
DISASSEMBLY — Disassembly Note (Camshaft pulley, Camshaft cap)
B2-63prose procedureLH and RH cylinder head bolt loosening sequences shown separately.
Disassembly Note
Camshaft pulley
- 1Hold the camshaft by using a wrench on the cast hexagon.
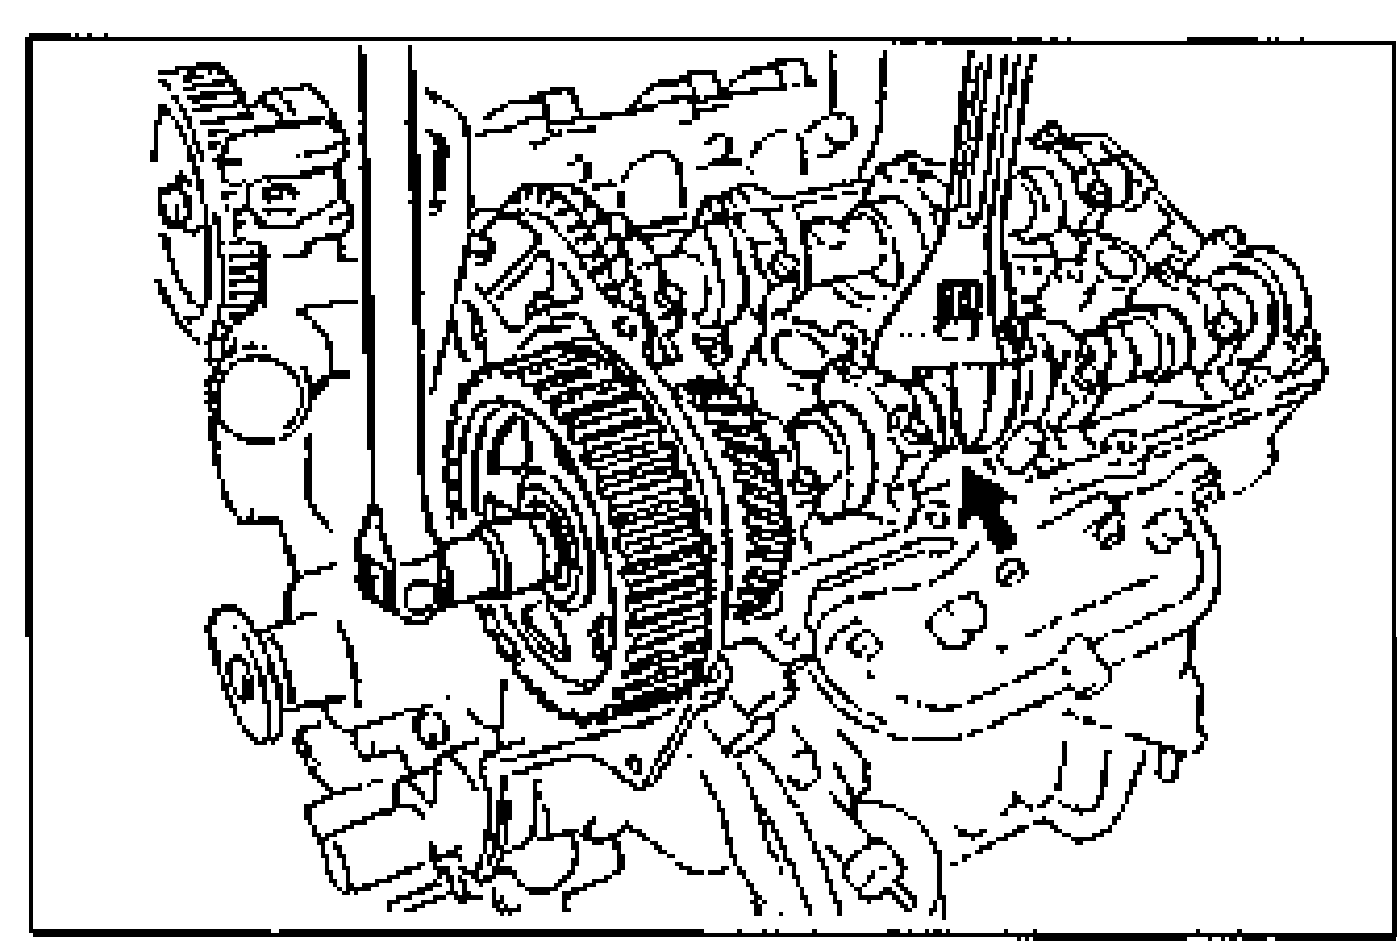
- 2Remove the camshaft pulley bolts.
- 3Remove the camshaft pulleys.
Camshaft cap
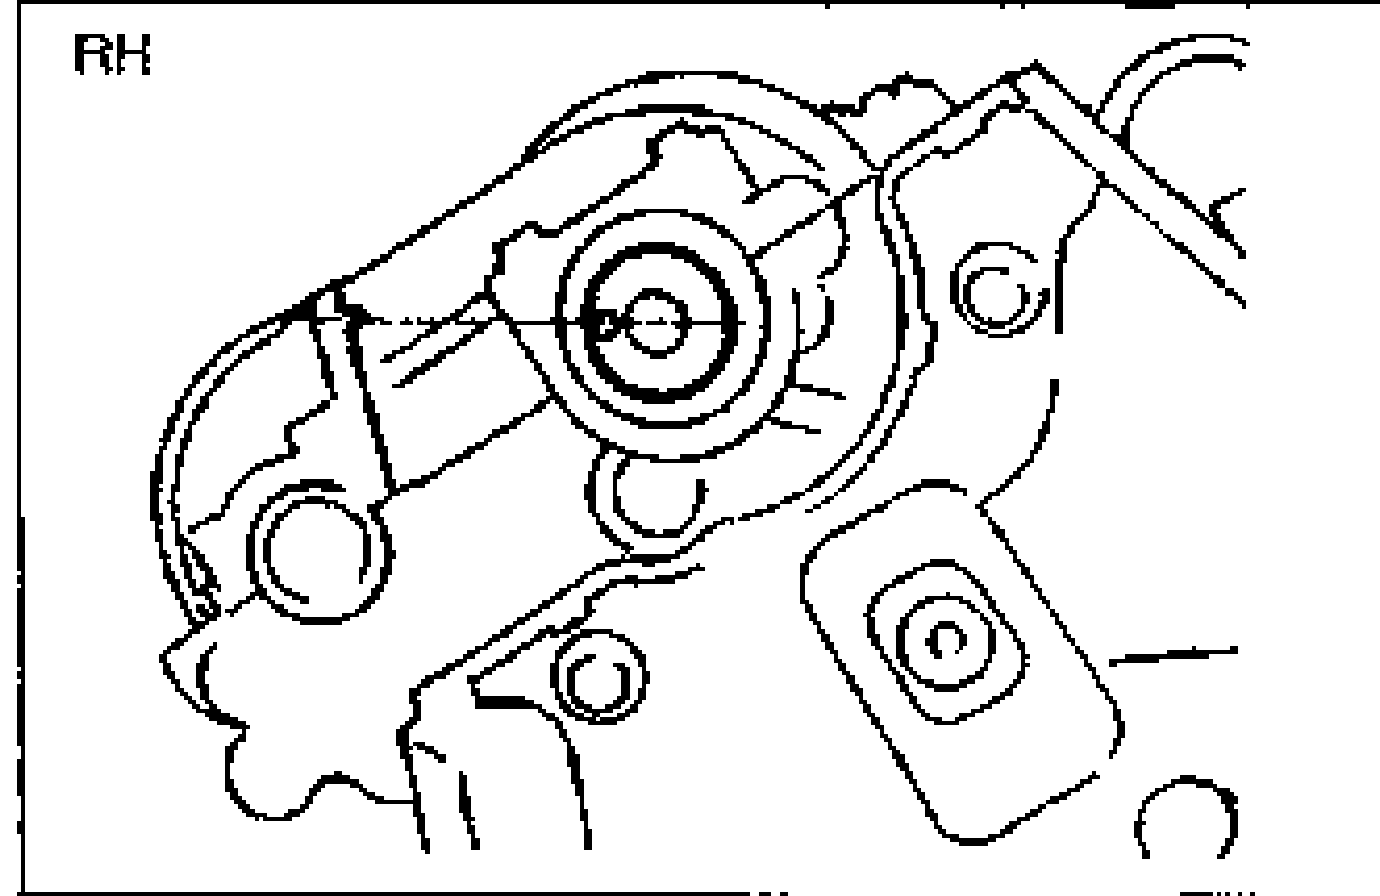
- 1Align the camshaft knock pin as shown to reduce the pressure of the HLA.When the front camshaft lobe is pressing on the HLA, removing the camshaft caps can damage the cylinder head thrust journal support.
- 2Loosen the front camshaft cap bolts in five or six steps in the order shown.
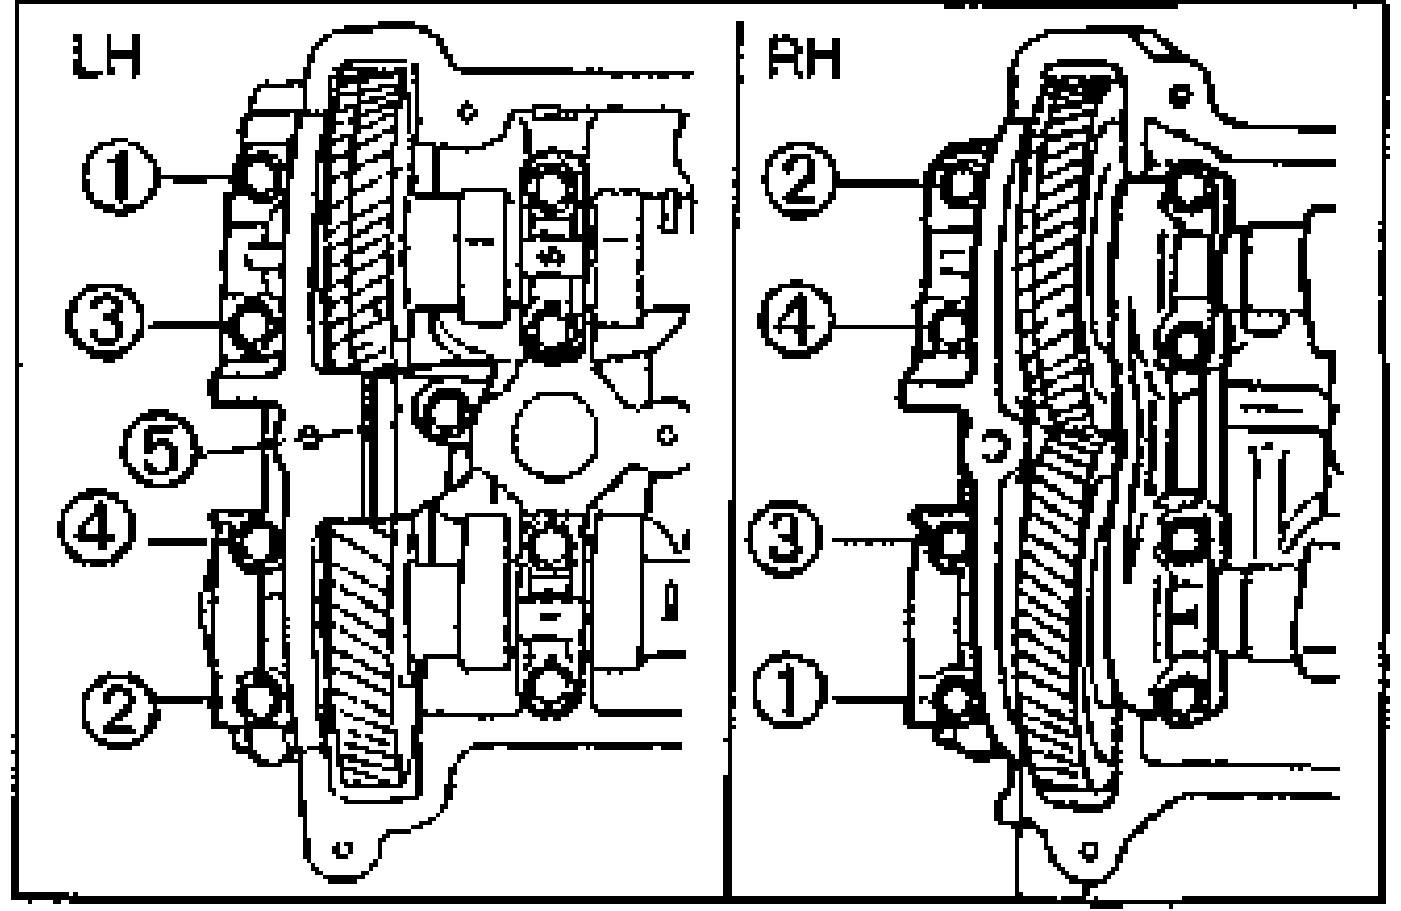
- 3Remove the front camshaft cap.
- 4Loosen the camshaft cap bolts in five or six steps in the order shown.Remove the thrust cap only after removing all camshaft caps. Otherwise, the thrust cap can be damaged.
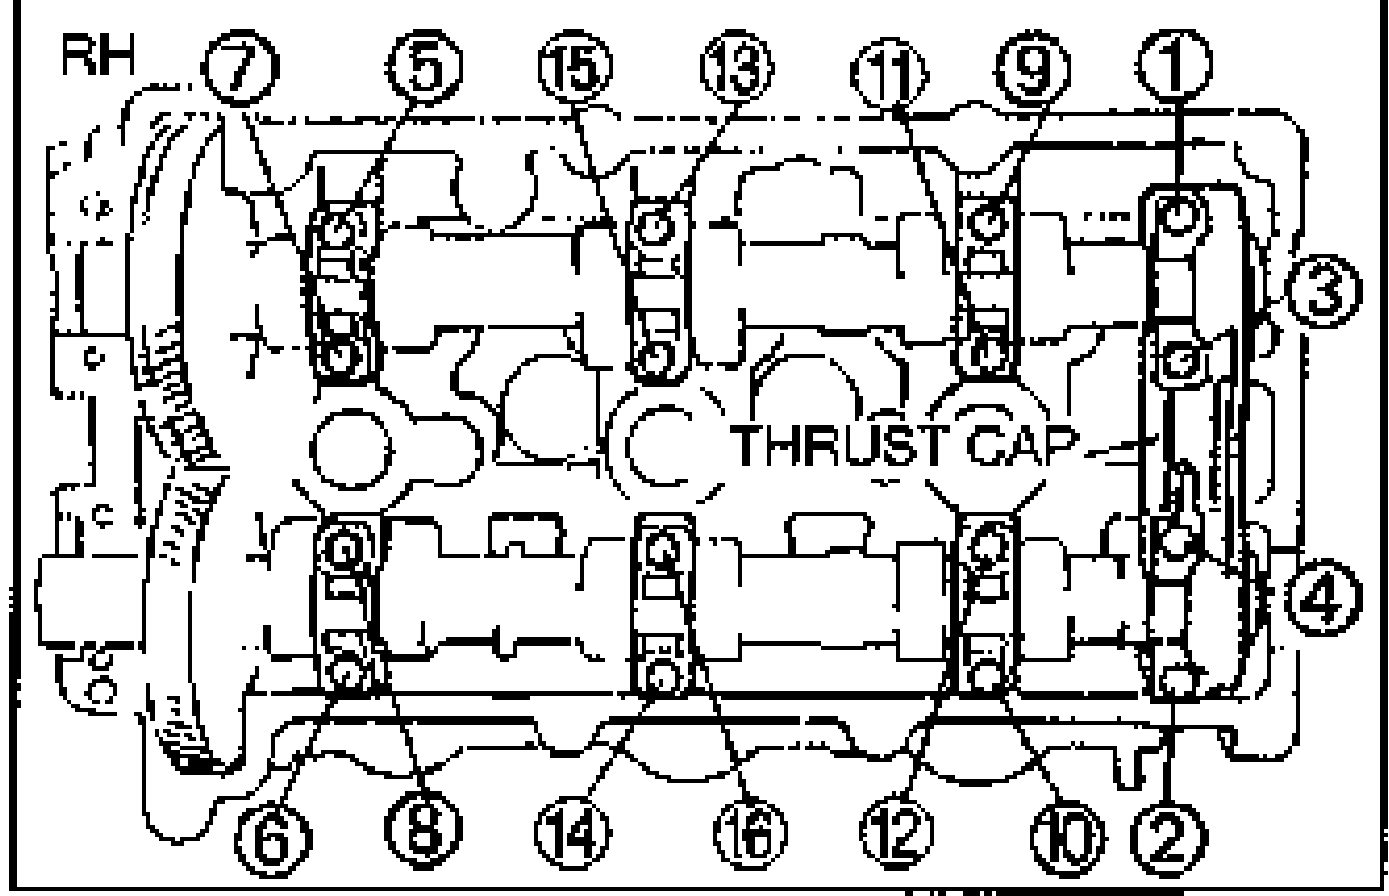
- 5Remove the camshaft caps.