
INSTALLATION
B2-120prose procedureEngine and transaxle assembly
- 1Suspend the engine and transaxle assembly.
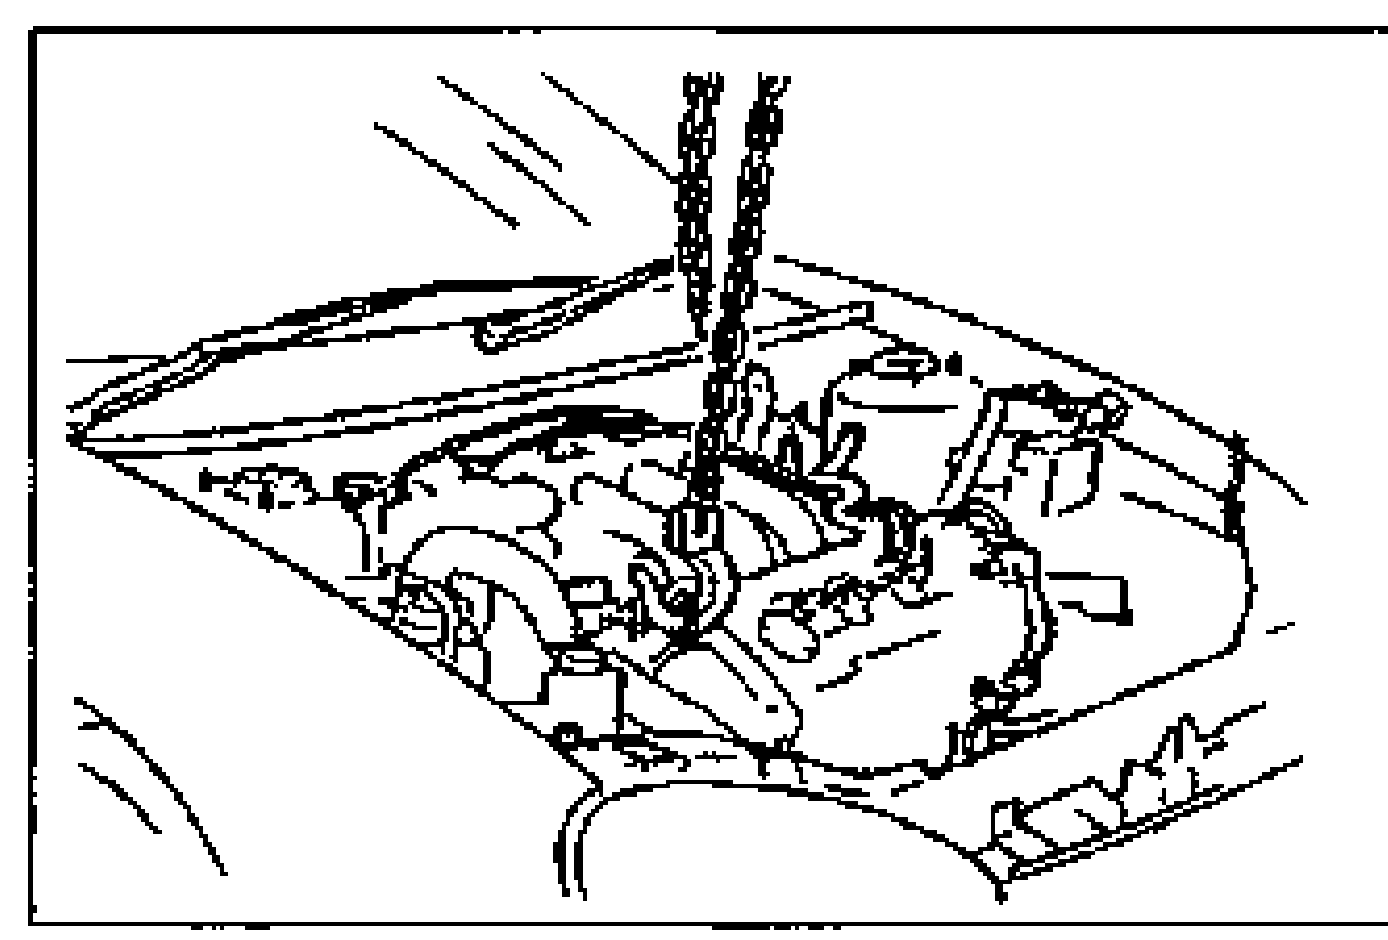
- 2Slowly lower the engine and transaxle assembly as a unit. Keep the engine from swinging or bumping into components in the engine compartment.
- 3Install the engine and transaxle assembly in the engine compartment.
- 4Align the engine mounts with the engine mount member mounting holes.
Engine mount
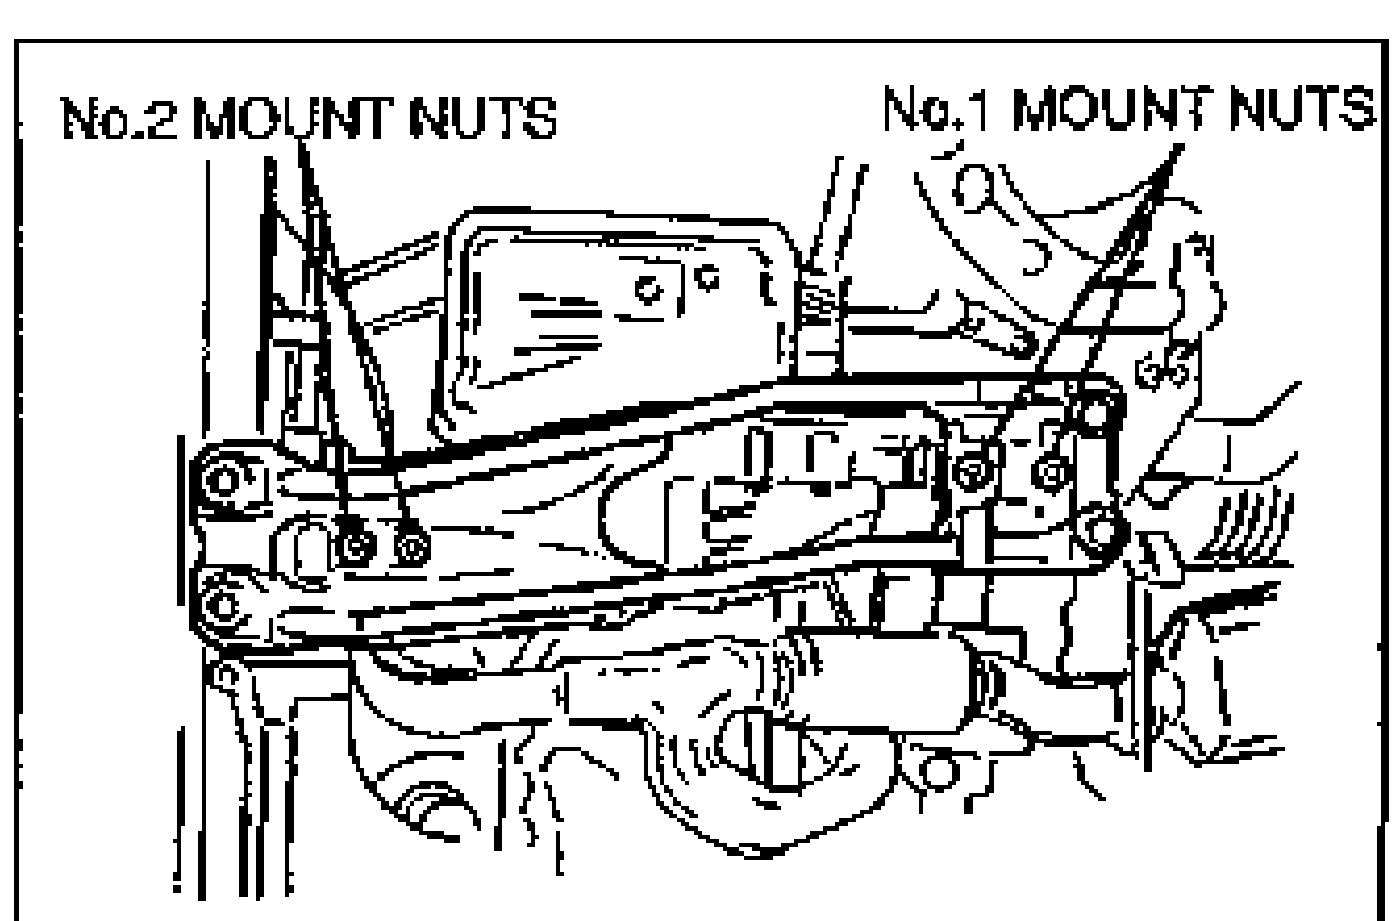
- 1Install and tighten the engine mount nuts of the No.1 and No.2 mounts.
- 2Install the No.3 engine mount rubber.
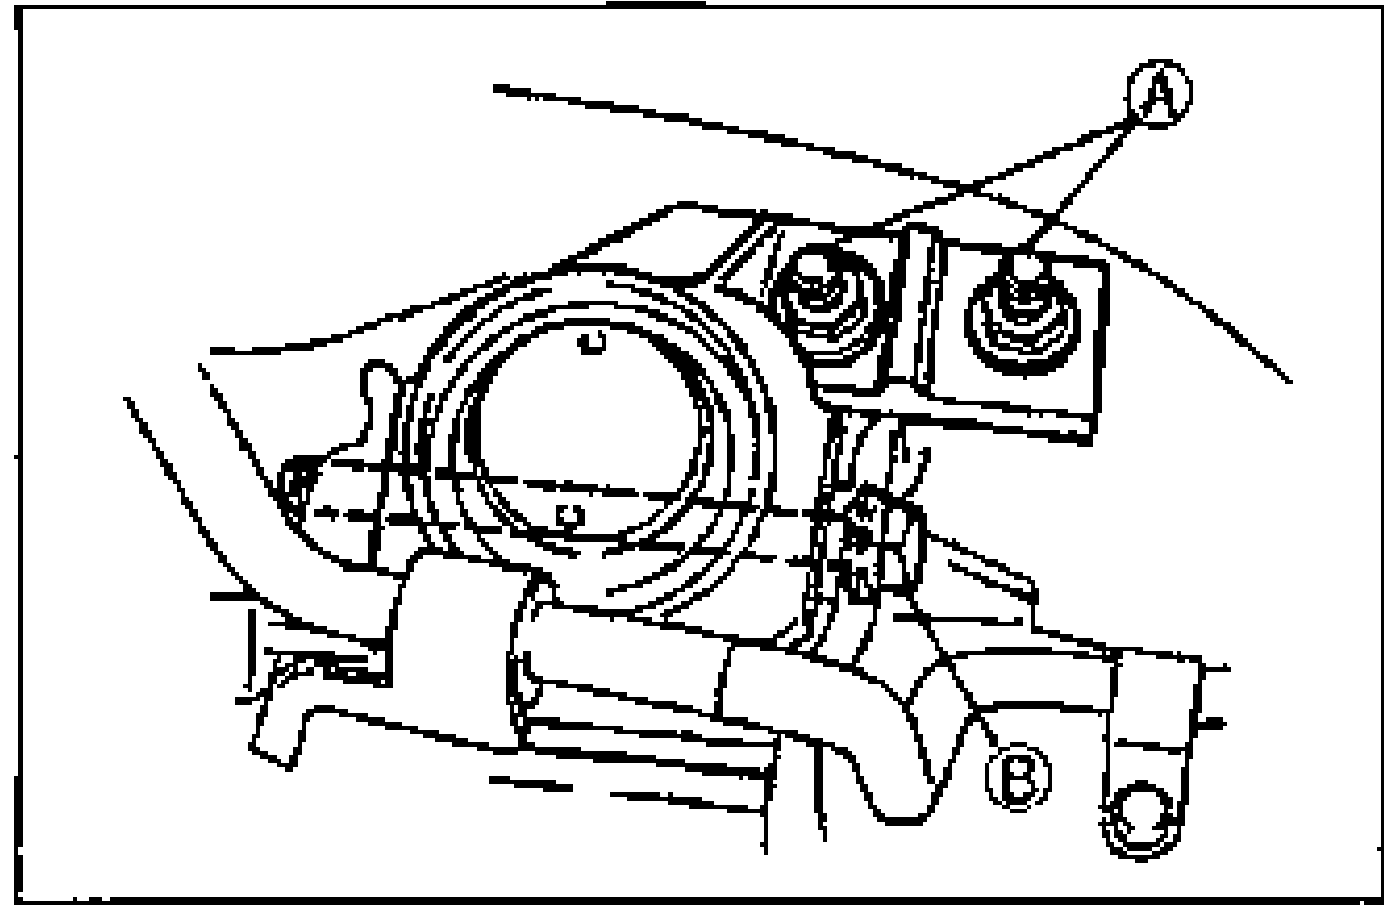
- 3Install the No.4 engine mount rubber and bracket, and hand tighten nuts A.
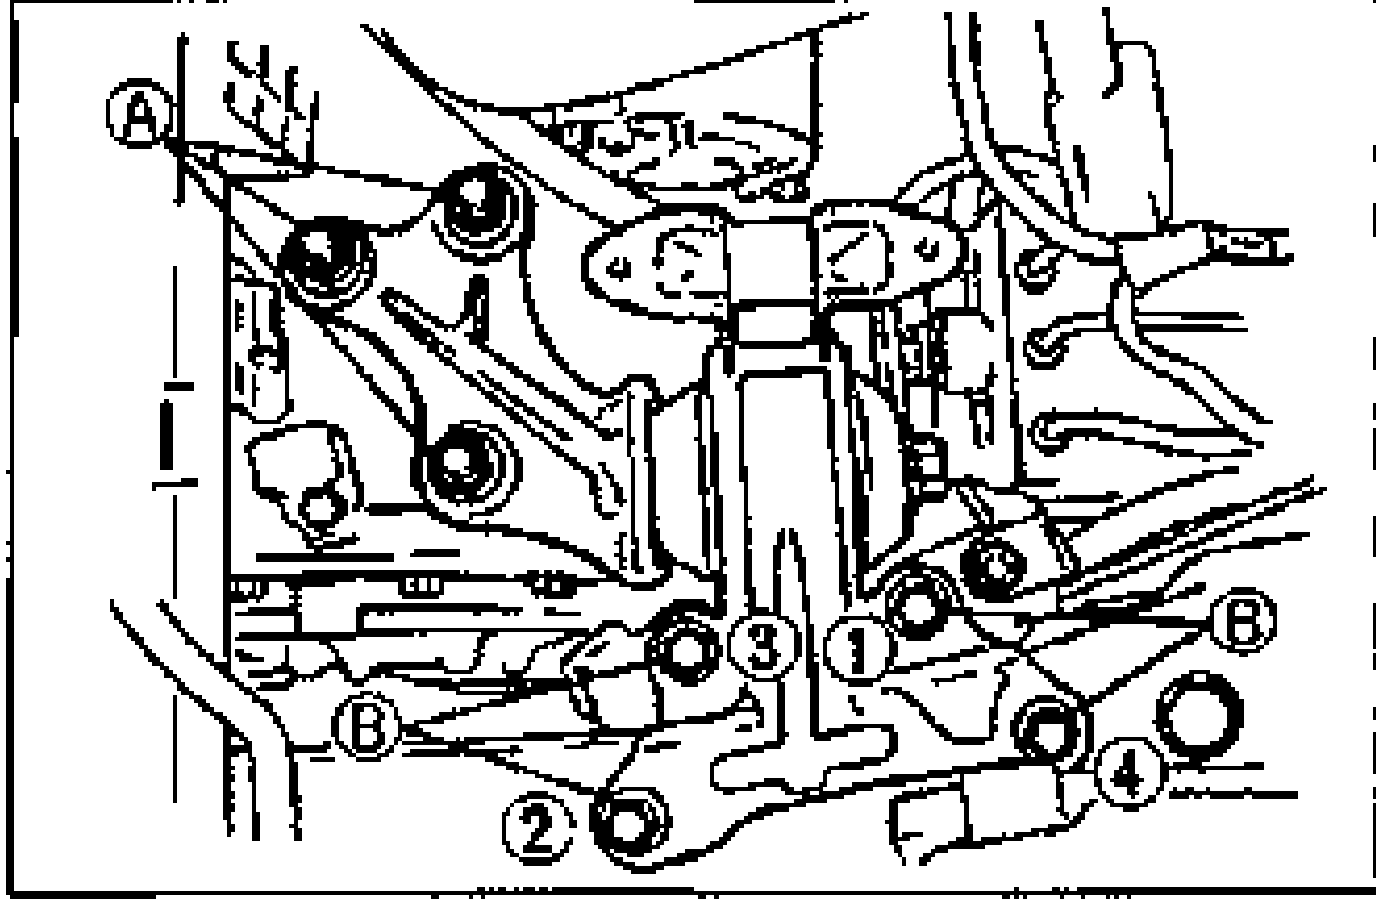
- 4Install bolts B and tighten them in two or three steps in the order shown.
- 5Tighten nuts A.
| Specification | Value |
|---|---|
| Tightening torque (No.1 and No.2 engine mount nuts)Engine mount step 1 | 38 - 52N·m |
| Tightening torque (No.3 engine mount rubber A)callout A | 74 - 103N·m |
| Tightening torque (No.3 engine mount rubber B)callout B | 67 - 93N·m |
| Tightening torque (No.4 mount bolts B)step 4 bolts B | 44 - 60N·m |
| Tightening torque (No.4 mount nuts A)step 5 nuts A | 67 - 93N·m |
Tightening torque (No.1 and No.2 engine mount nuts)Engine mount step 1
38 - 52N·m
Tightening torque (No.3 engine mount rubber A)callout A
74 - 103N·m
Tightening torque (No.3 engine mount rubber B)callout B
67 - 93N·m
Tightening torque (No.4 mount bolts B)step 4 bolts B
44 - 60N·m
Tightening torque (No.4 mount nuts A)step 5 nuts A
67 - 93N·m