
ASSEMBLY — Cylinder Head Installation
B2-102prose procedureK8-ZE V6 — separate RH and LH cylinder head gaskets; torque-to-angle head bolt method.
Cylinder Head Installation (continued)
- 3Thoroughly remove all dirt, oil, and other material from the decks of the cylinder block.
- 4Turn the crankshaft clockwise and apply engine oil to the cylinder walls.
- 5Place the new cylinder head gaskets on the cylinder block.
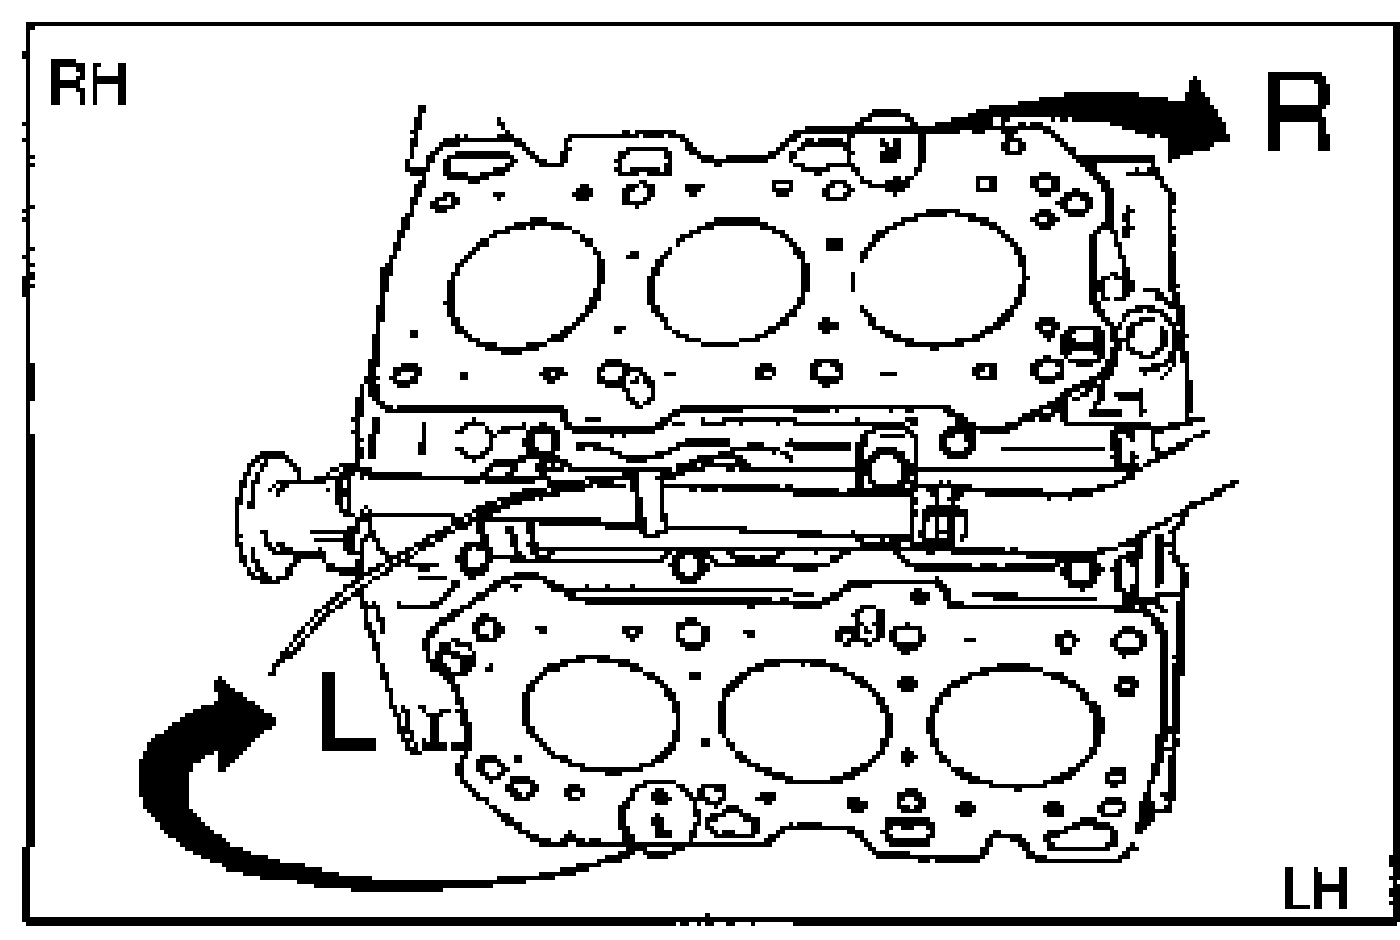
- 6Install the cylinder heads to the cylinder block.
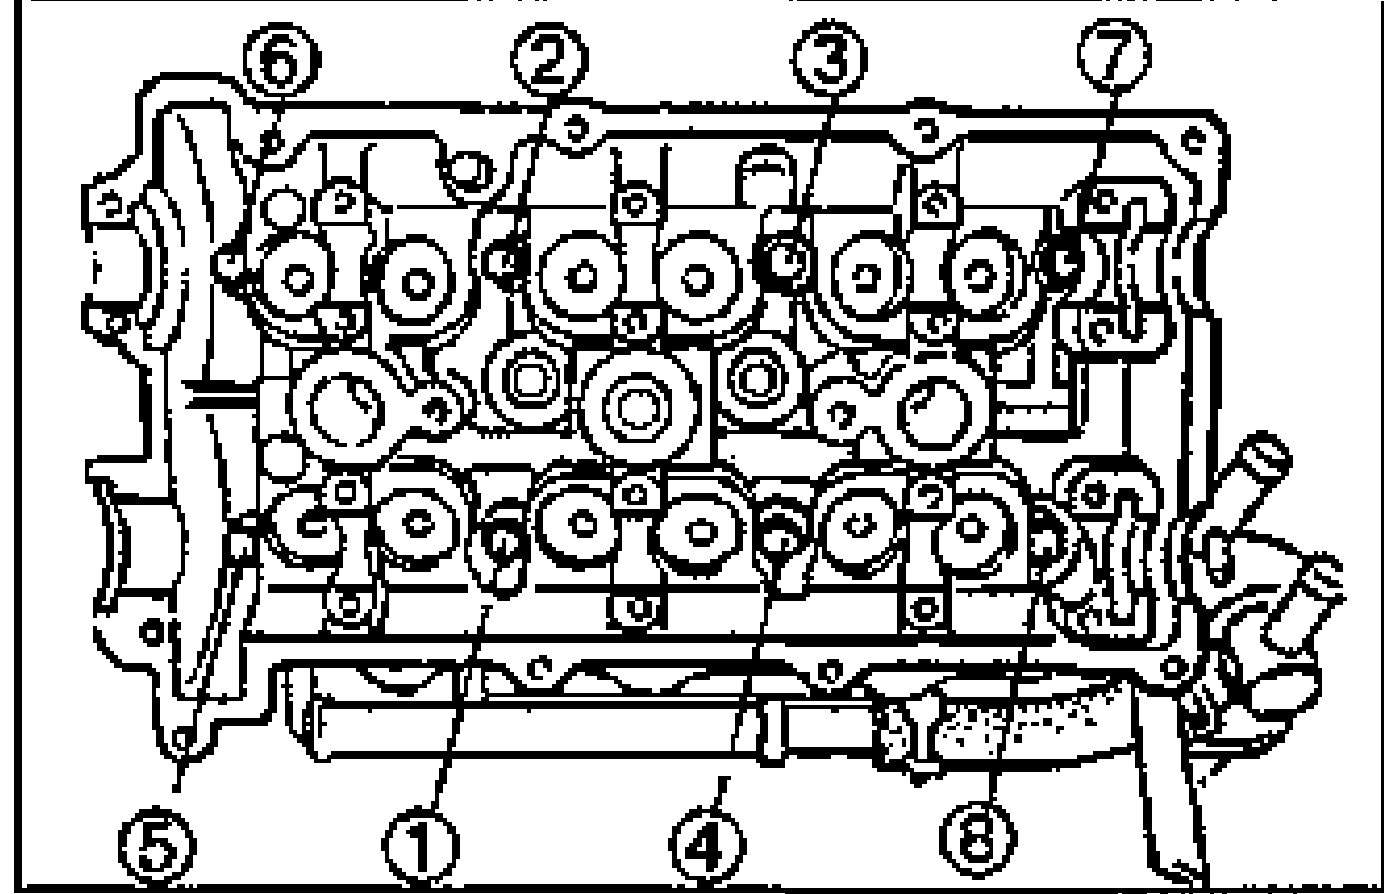
- 7Tighten the cylinder head bolts as described below: (1) Before installation, measure the length of each bolt. Replace a bolt if it exceeds the maximum length. (2) Apply clean engine oil to the threads and the seat face of each bolt and install them and new washers. (3) Tighten the bolts in two or three steps in the order shown. (4) Put a paint mark on each bolt head. (5) Using the marks as a reference, tighten the bolts by turning each 85°—95° in the sequence shown. (6) Further tighten each bolt by turning another 85°—95°.
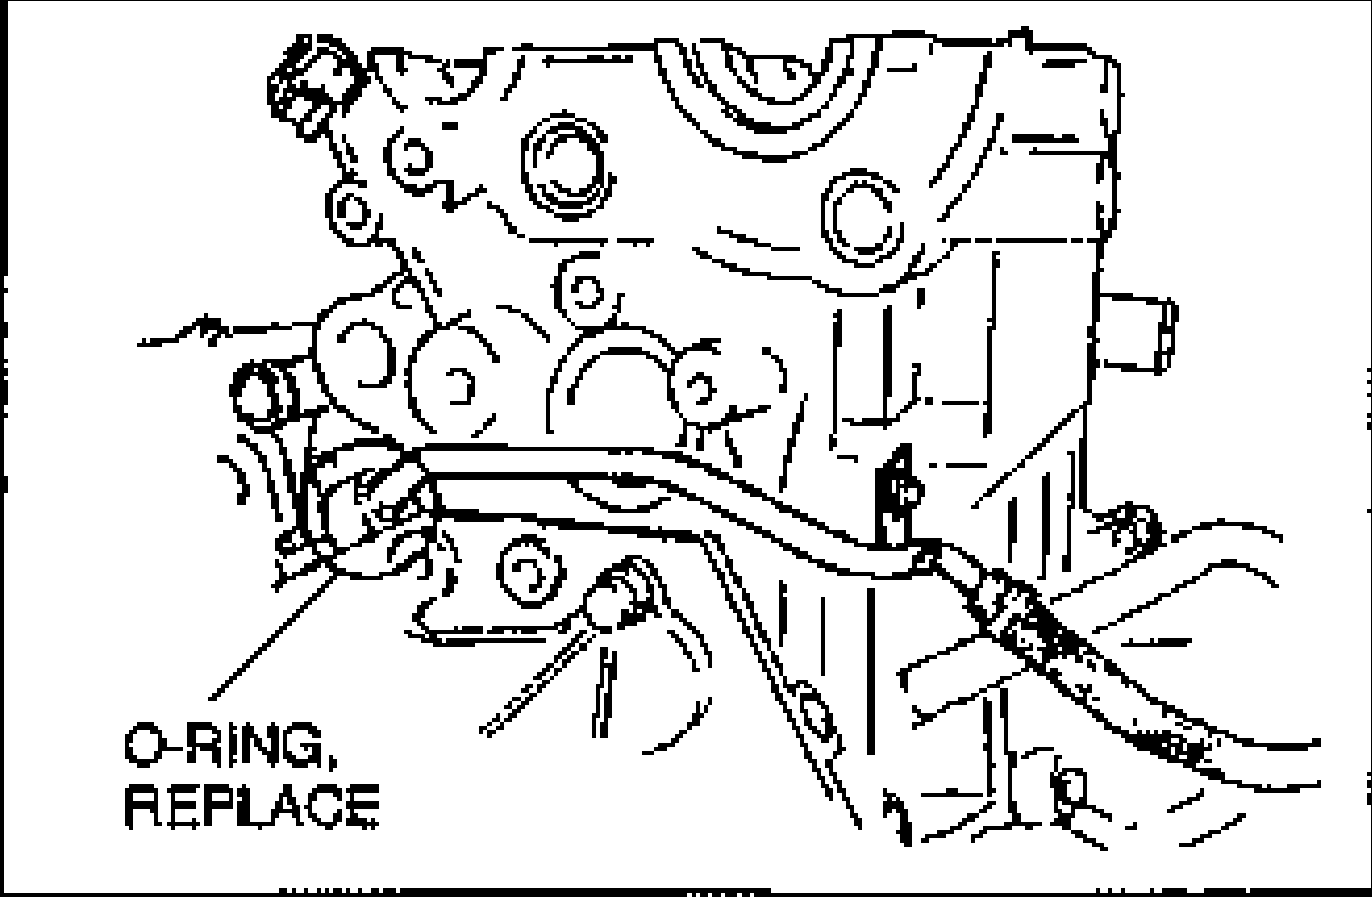
- 8Connect the water pipe to the water pipe elbow and secure to the cylinder head.
| Specification | Value |
|---|---|
| Bolt lengthCylinder head bolt | 133.7—134.3mm {5.264—5.287 in}mm |
| Maximum lengthCylinder head bolt — replace if exceeded | 135mm {5.31 in}mm |
| Tightening torque (step 3)Cylinder head bolts initial torque | 23.1 - 25.9N·m |
| Water pipeWater pipe to cylinder head | 7.9 - 10.7N·m |
Bolt lengthCylinder head bolt
133.7—134.3mm {5.264—5.287 in}mm
Maximum lengthCylinder head bolt — replace if exceeded
135mm {5.31 in}mm
Tightening torque (step 3)Cylinder head bolts initial torque
23.1 - 25.9N·m
Water pipeWater pipe to cylinder head
7.9 - 10.7N·m