
Air Conditioner — Refrigerant Lines: On-vehicle Inspection, Removal / Installation
G-71prose procedureREFRIGERANT LINES
On-vehicle Inspection
Check for leakage at all connections by using a gas leak tester. (Refer to page G-51.) Repair or replace as necessary.
Removal / Installation
Refrigerant Lines — Removal / Installation
- 1Discharge the refrigerant from the system.
- 2Remove as shown in the figure. Immediately plug all open fittings to keep moisture out of the system.
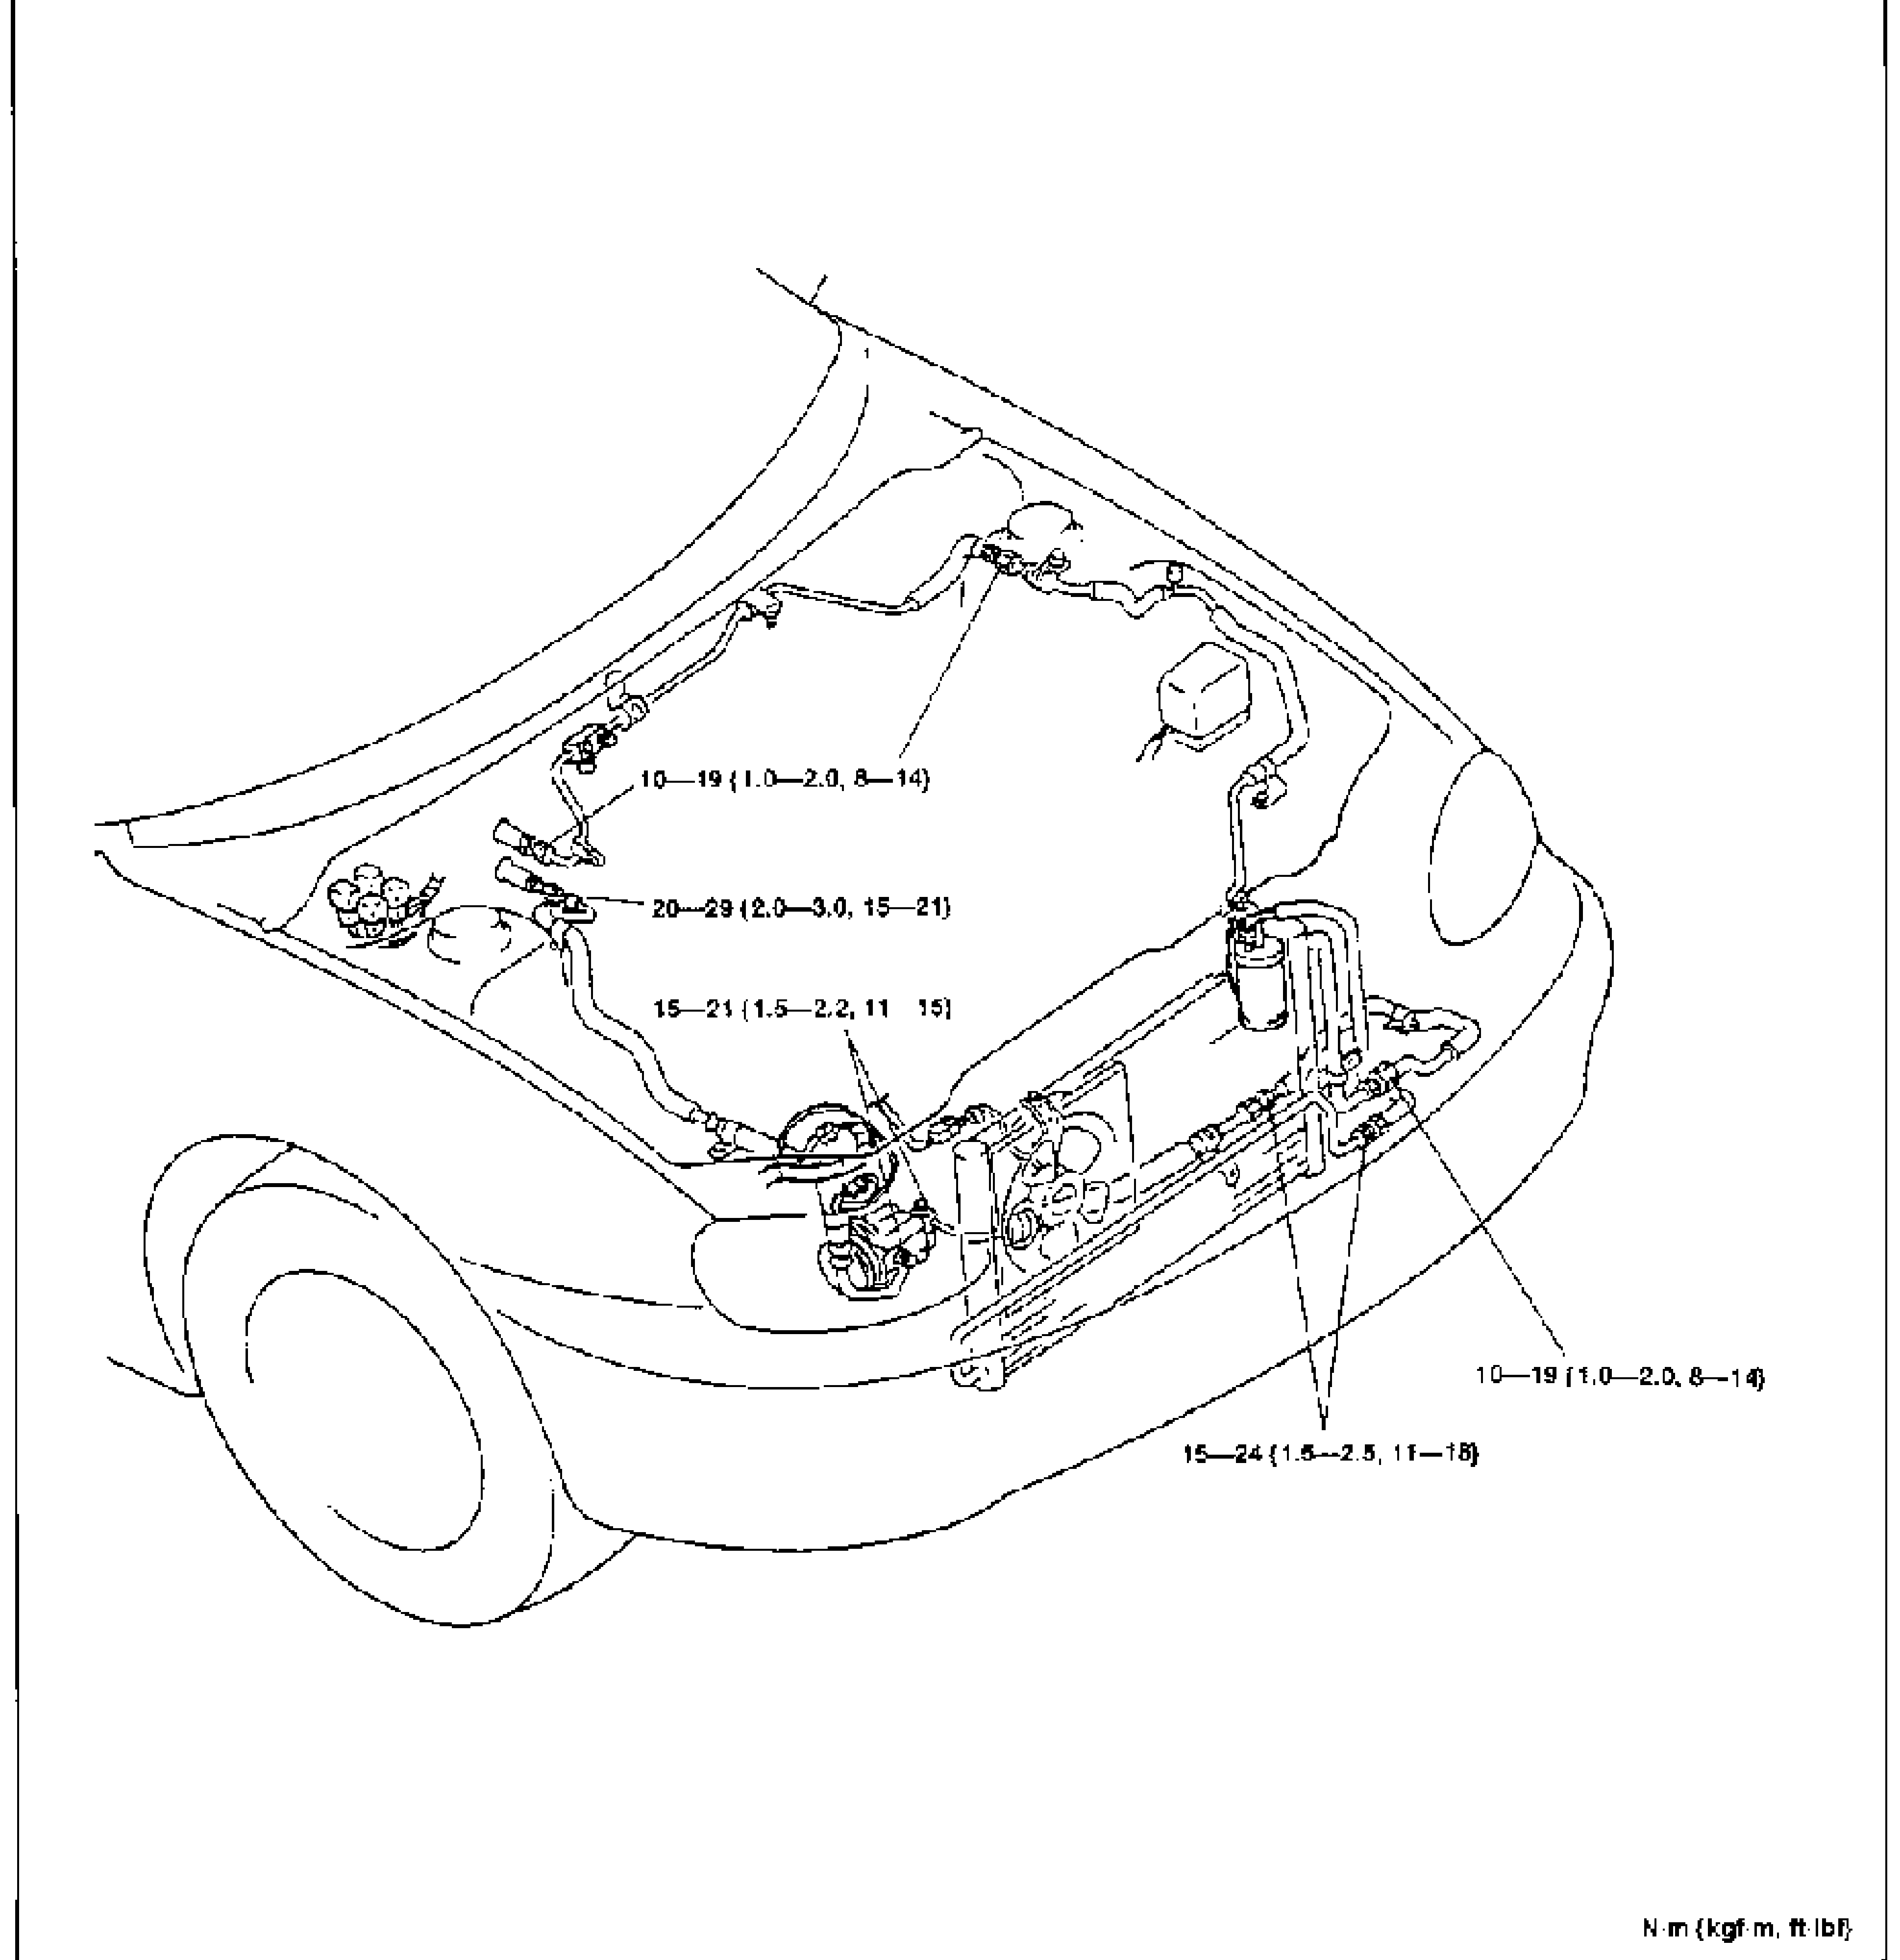
- 3Install in the reverse order of removal. Apply clean compressor oil to the O-rings before connecting the fittings; do not apply compressor oil to the fitting nuts. When installing a new pipe or hose, add 5 ml {5 cc, 0.2 fl oz} of compressor oil through the high pressure side of the A/C compressor.
- 4Evacuate, charge, and test the refrigeration system.
| Specification | Value |
|---|---|
| Refrigerant line fitting torque (upper hoses) | ≈98 - 186N·m |
| Refrigerant line fitting | ≈147 - 206N·m |
| Refrigerant line fitting torque (lower) | ≈147 - 235N·m |
| Compressor oil added with new pipe/hosethrough high pressure side of A/C compressor | 5ml {5 cc, 0.2 fl oz} |
Refrigerant line fitting torque (upper hoses)
98 - 186N·m
Refrigerant line fitting
147 - 206N·m
Refrigerant line fitting torque (lower)
147 - 235N·m
Compressor oil added with new pipe/hosethrough high pressure side of A/C compressor
5ml {5 cc, 0.2 fl oz}