
HEATER UNIT - Removal / Installation
G-37parts diagramRemoval / Installation
- 1Drain the engine coolant. (Refer to the 1995 MX-3 Workshop Manual, section E.)
- 2Remove the dashboard. (Refer to the 1995 MX-3 Workshop Manual, section S.)
- 3Remove in the order shown in the figure.
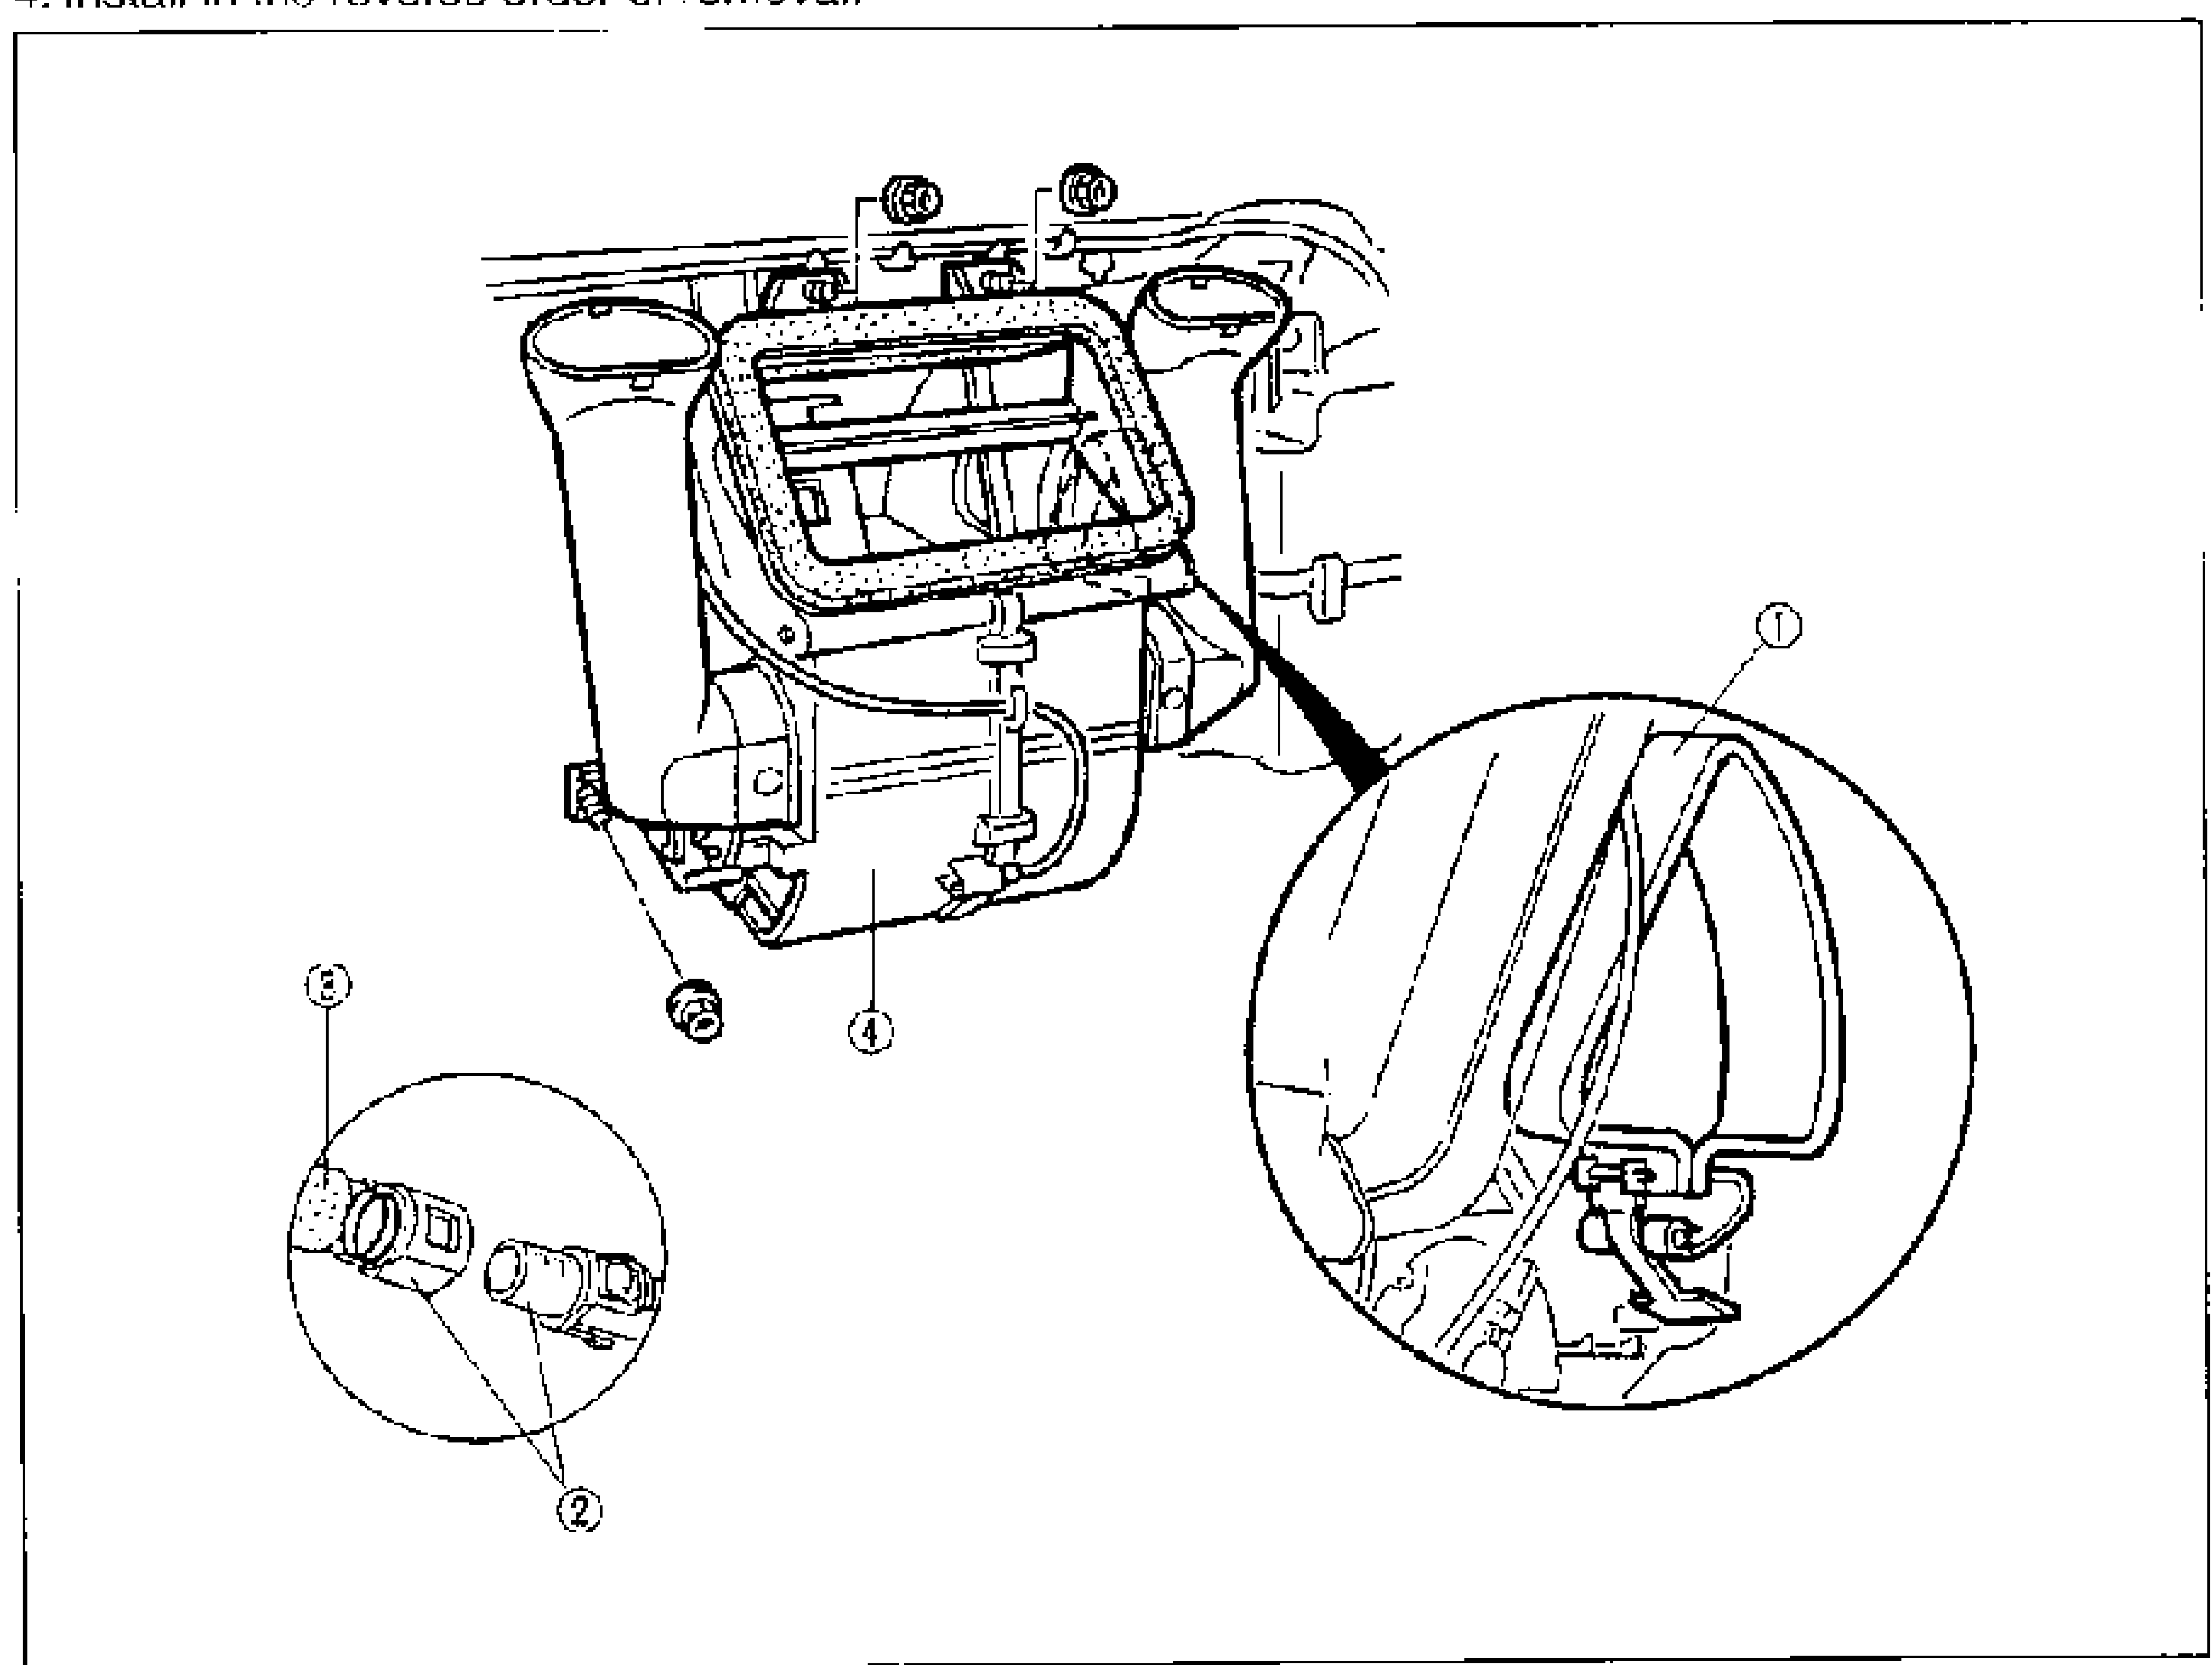
- 4Install in the reverse order of removal.
Parts DiagramFig. fig1
Removal note
Seal plate
Release the clamp and remove the seal plate together with the heater unit.
Heater hose
When disconnecting the heater hose from the heater core, unlock the hose connector from the heater core side.
Installation note
Heater hose
After installing the heater hose to the heater core, verify that the hose connector is securely locked.