Mazda MX-3 silhouetteMX-3

BLOWER UNIT

G-40parts diagram

Removal / Installation

  1. 1
    Remove the glove compartment. (Refer to the 1995 MX-3 Workshop Manual, section S.)
  2. 2
    Remove in the order shown in the figure.
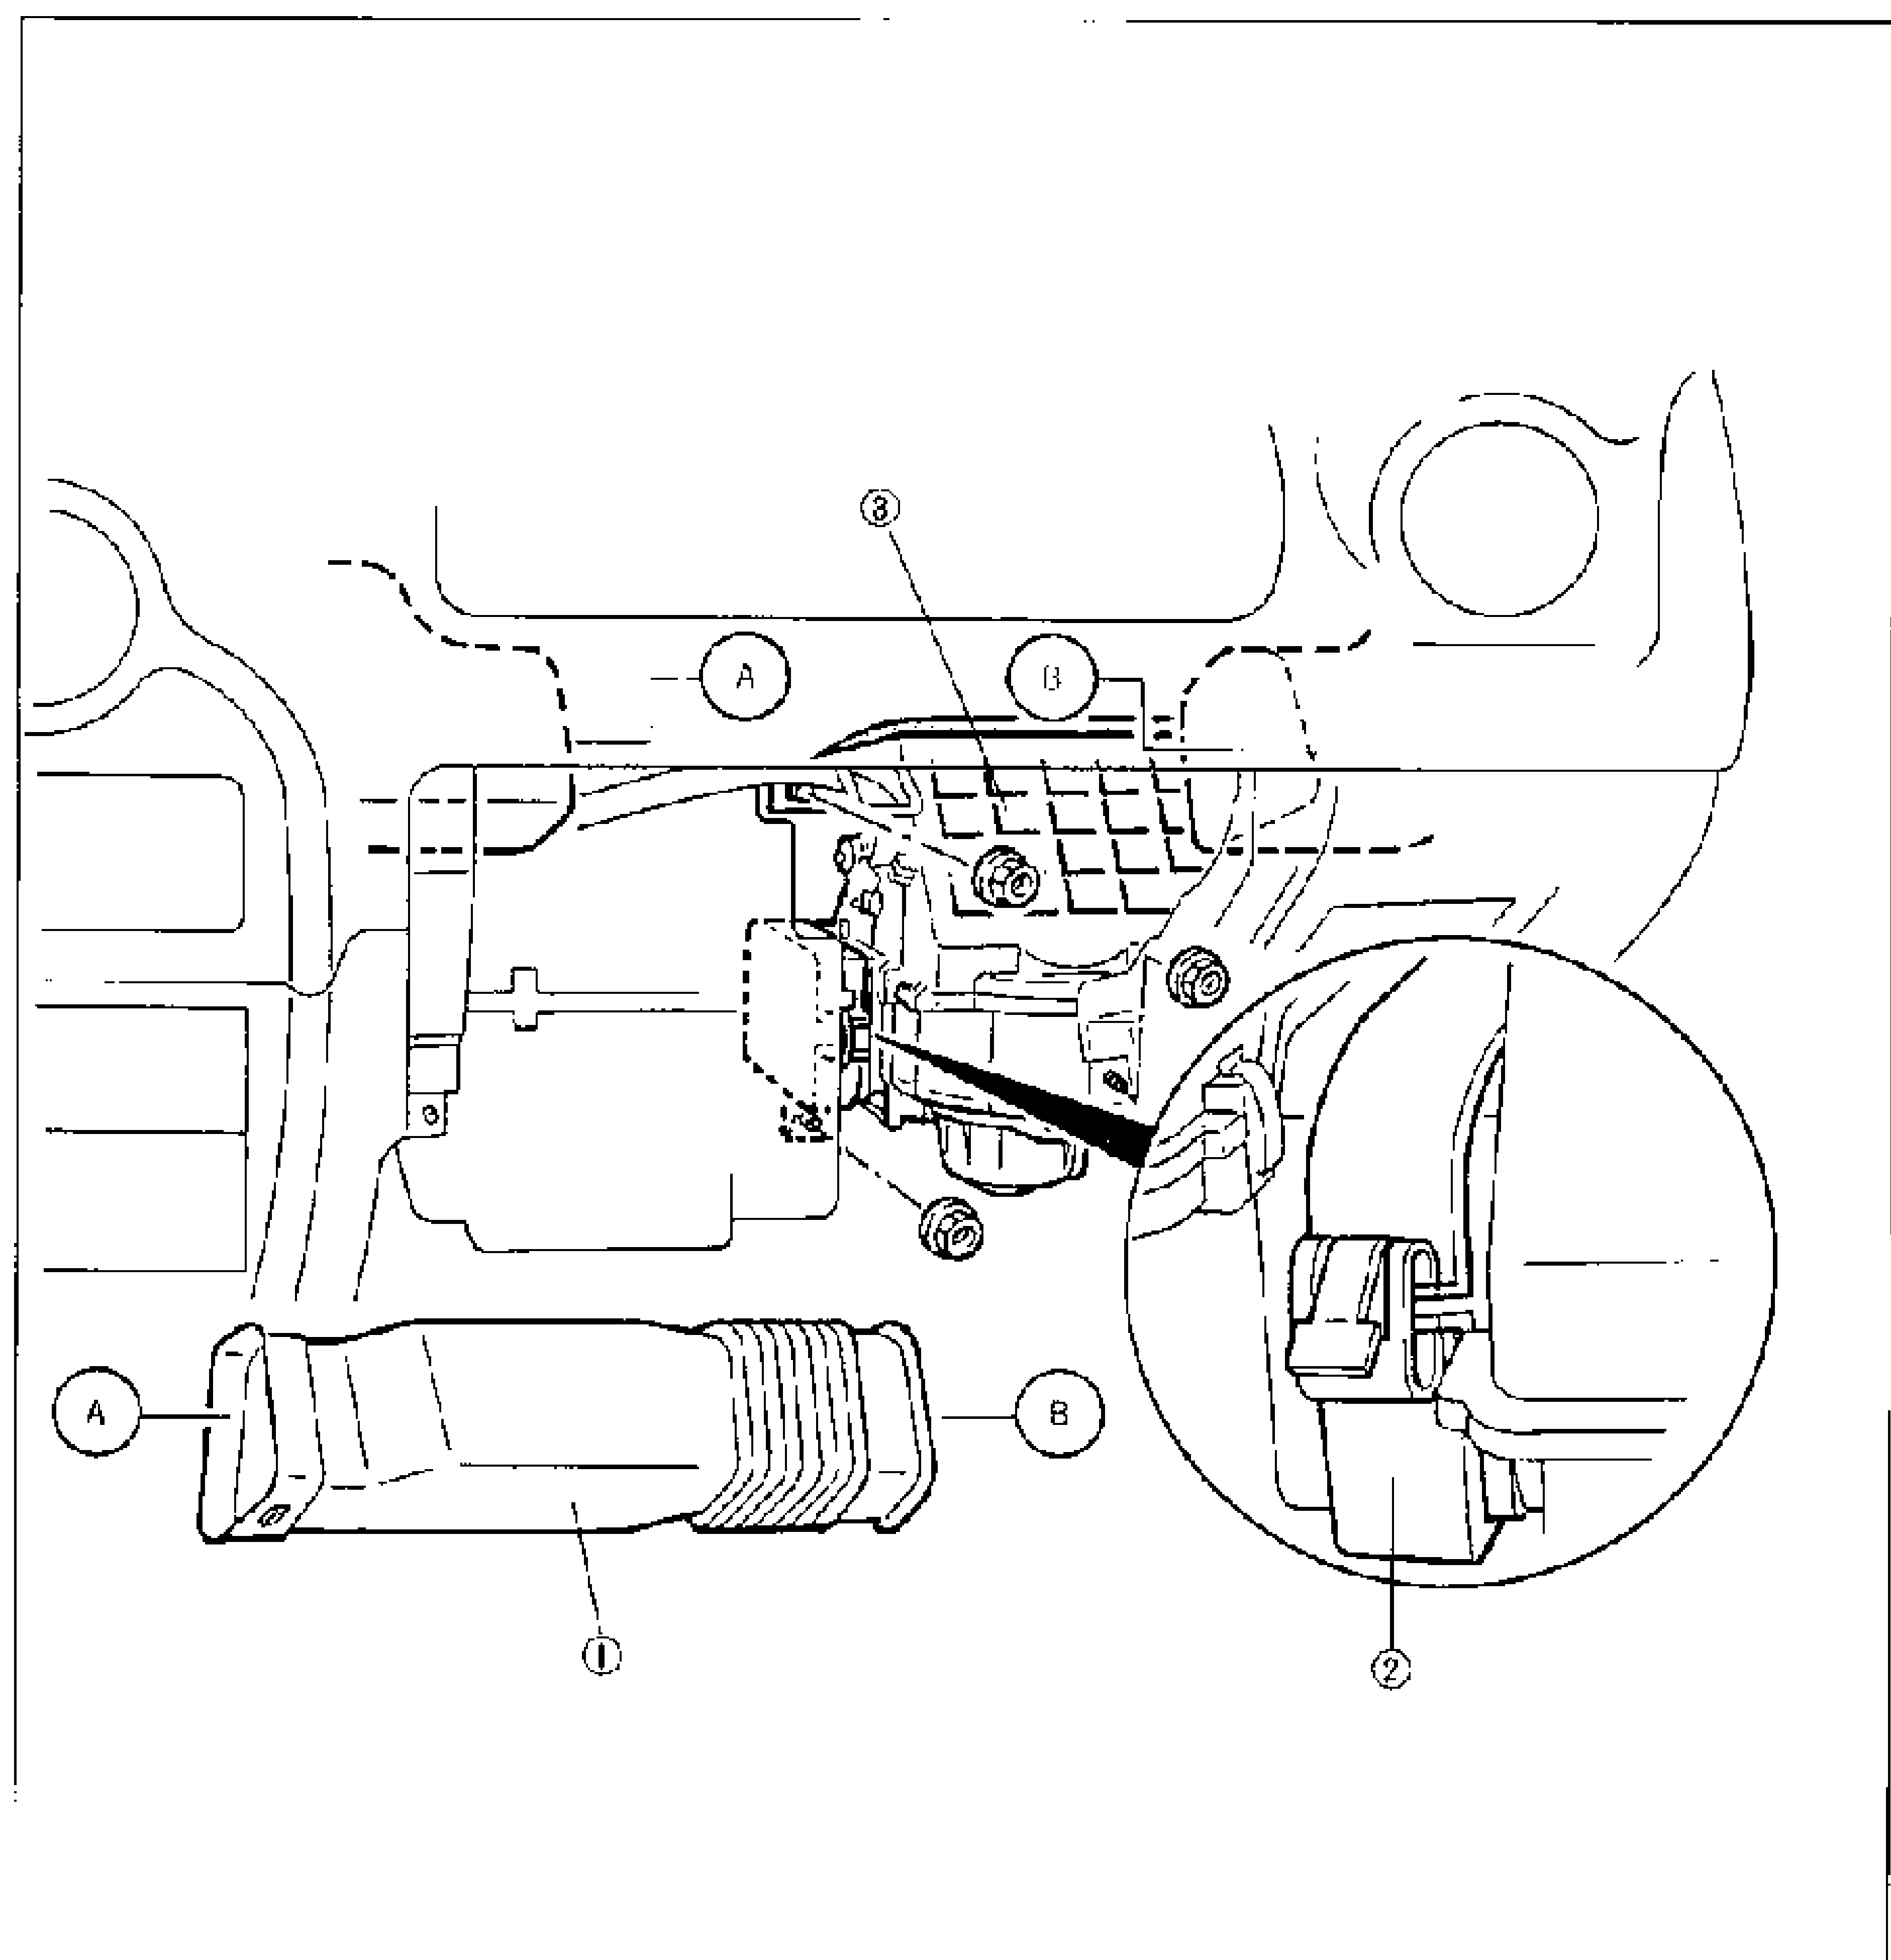
    Exploded/installation view of the heater blower unit behind the dashboard. Balloon callouts identify components: 1 = duct (lower-left, marked A and B at duct ends), 2 = seal plate (shown in a magnified circular detail at lower right of the clamp/connector), 3 = blower unit (centre, with mounting nuts). Letters A and B mark connection points between the duct and the blower assembly.
  3. 3
    Install in the reverse order of removal.
Parts DiagramFig. fig1
#Part NameNotes
1Duct
2Seal plateRemoval note ... below
3Blower unitDisassembly / Assembly ... page G-41

Removal note

Seal plate

Release the clamp and remove the seal plate together with the blower unit.

Search Manual

Search pages, specs, and procedures