Mazda MX-3 silhouetteMX-3

PARKING BRAKE SYSTEM

P-47parts diagram

PARKING BRAKE LEVER

Removal / Inspection / Installation

Parking brake lever removal / inspection / installation

  1. 1
    Block the wheels firmly.
  2. 2
    Release the parking brake.
  3. 3
    Remove in the order shown in the figure.
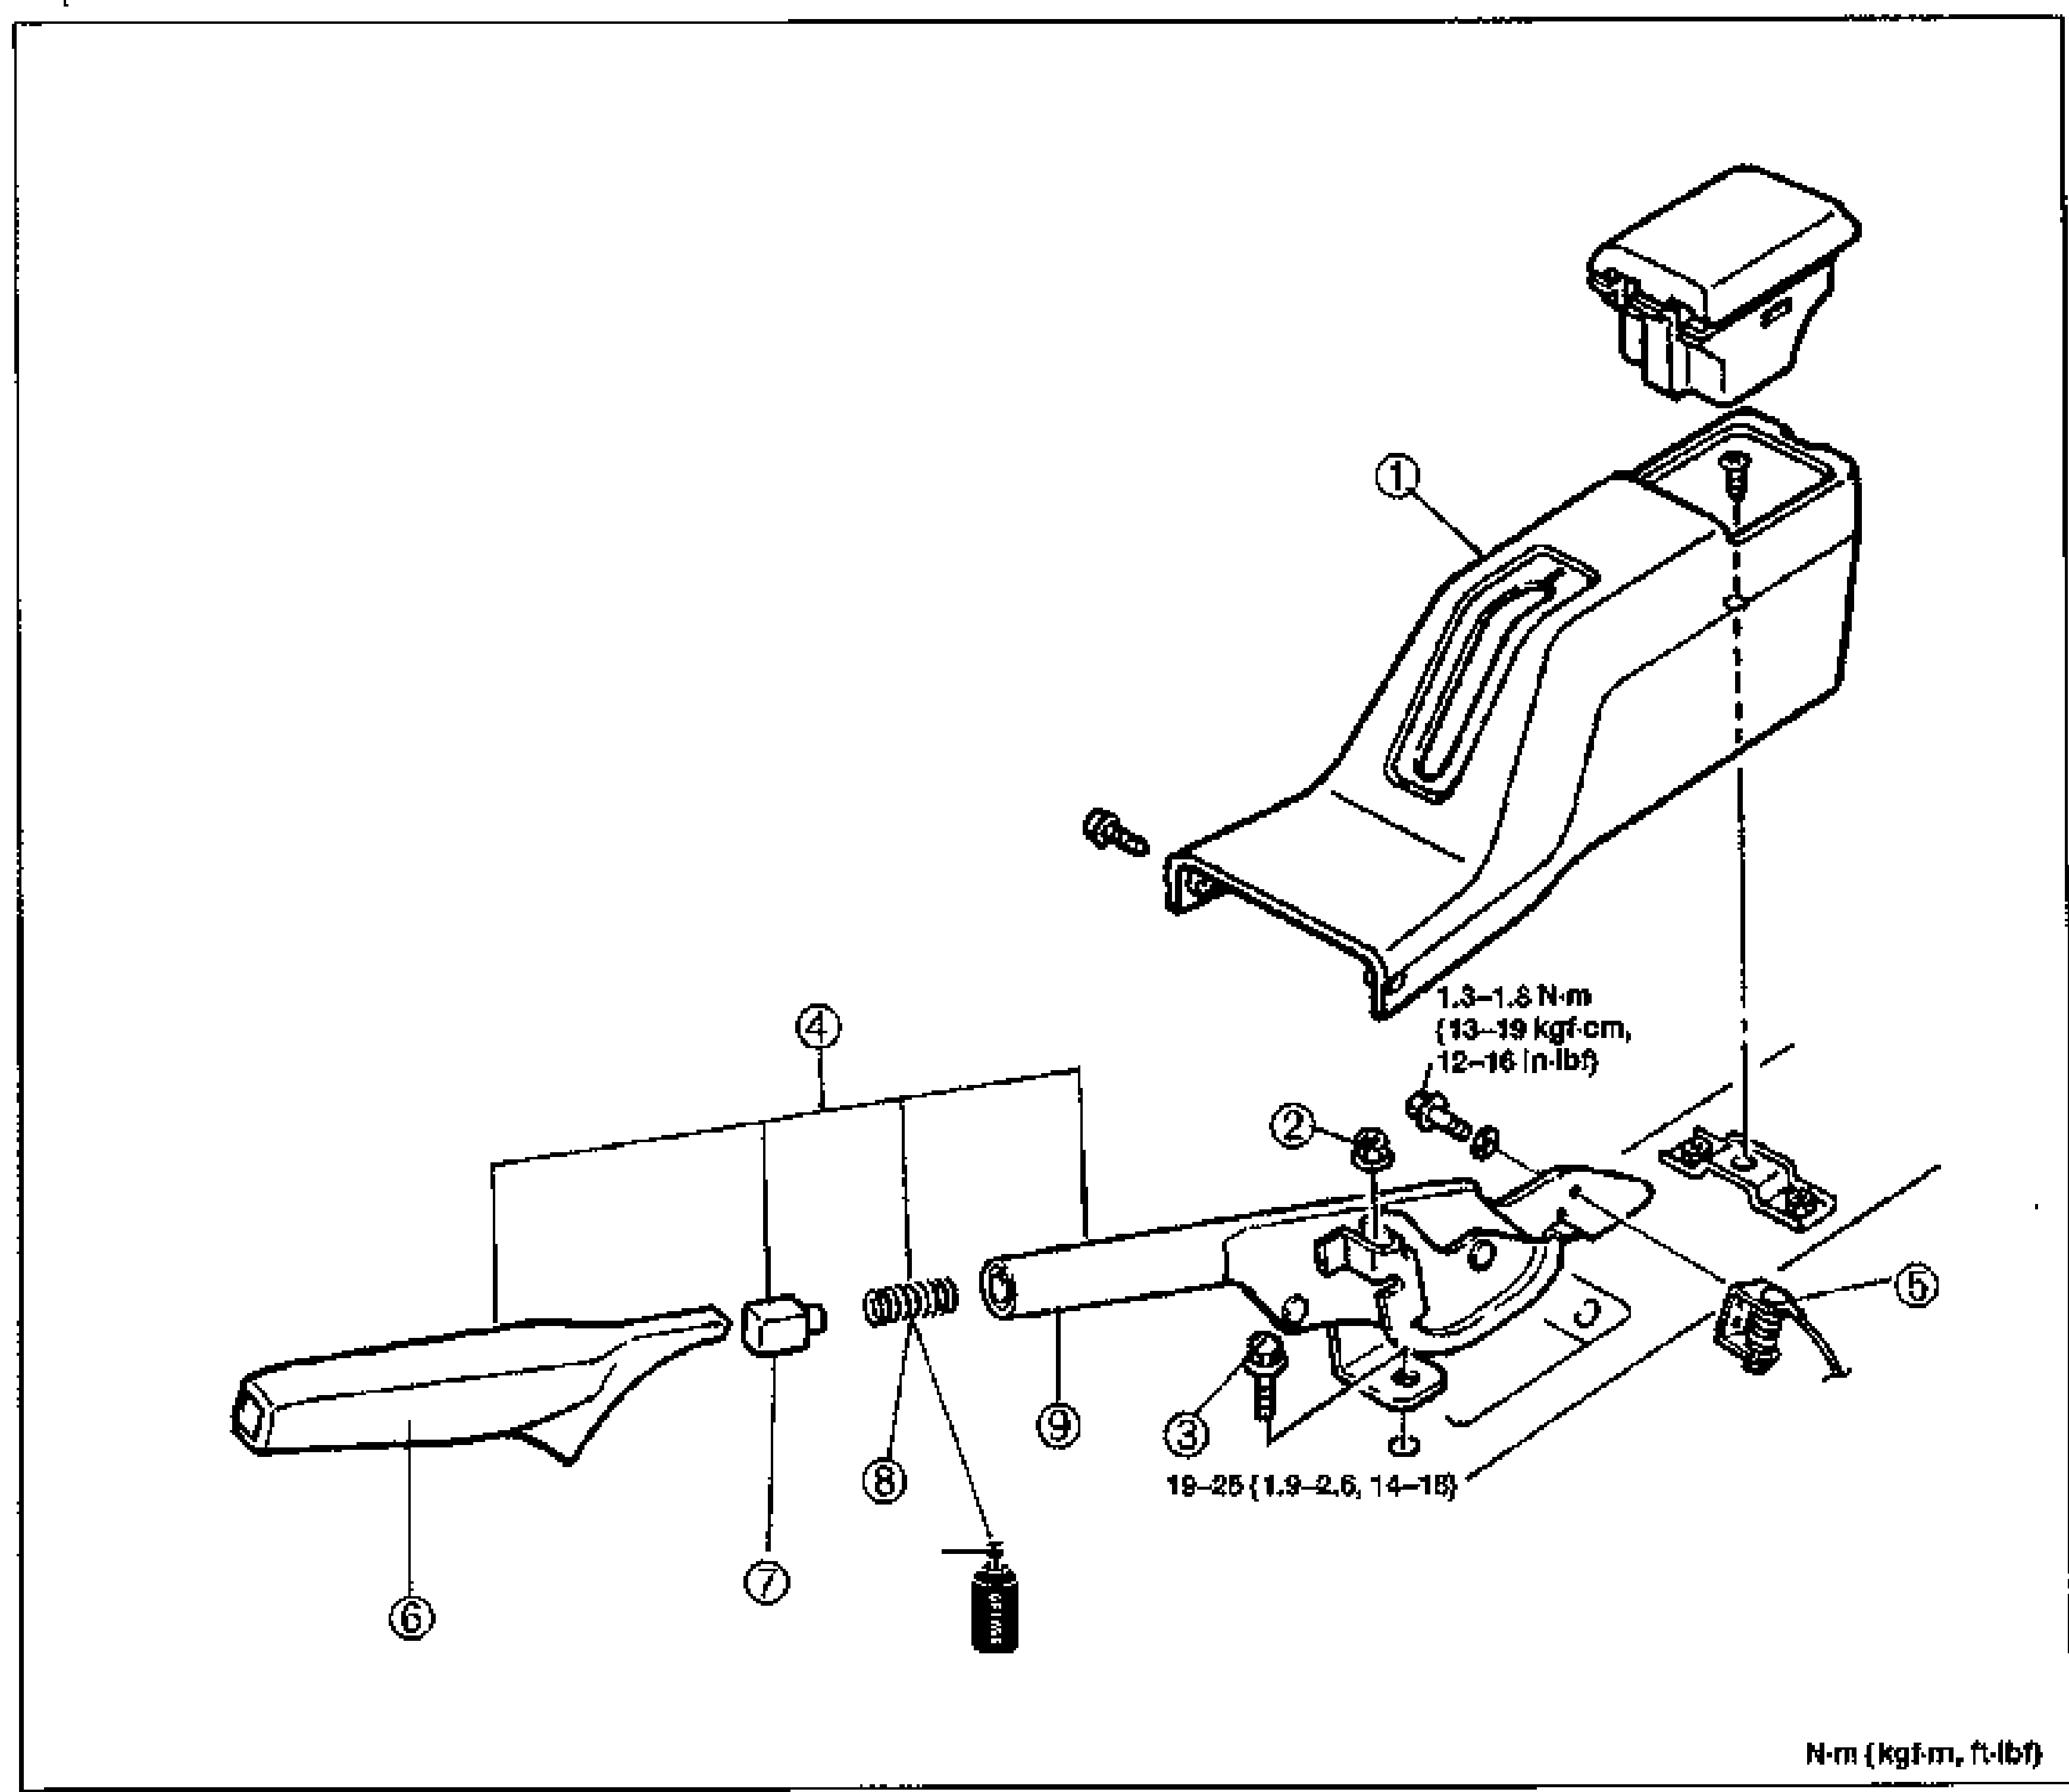
    Exploded view of the parking brake lever assembly with the rear console, adjusting nut, bolt, parking brake lever assembly, parking brake switch, parking lever cap, release button, parking lever spring and parking brake lever. Balloon callouts 1-9. Tightening torques labeled: 1.3—1.8 N·m {13—19 kgf·cm, 12—16 in·lbf} and 19—25 N·m {1.9—2.6, 14—18}. Grease application point indicated.
  4. 4
    Inspect all components and parts. Replace parts if necessary.
  5. 5
    Install in the reverse order of removal. Install the parking brake switch so that it contacts the parking brake lever when the lever is fully released.
  6. 6
    After installation: Adjust the parking lever stroke. (Refer to page P-45.)
  7. 7
    Turn the ignition switch ON, and check that the parking brake warning light illuminates with the lever pulled one notch.
Parts DiagramFig. fig1
#Part NameNotes
1Rear consoleRemoval / Installation … Section S
2Adjusting nut
3Bolt19—25 N·m {1.9—2.6 kgf·m, 14—18 ft·lbf}
4Parking brake lever assemblyInspect for damage and wear
5Parking brake switch1.3—1.8 N·m {13—19 kgf·cm, 12—16 in·lbf}
6Parking lever cap
7Release button
8Parking lever spring
9Parking brake lever

Search Manual

Search pages, specs, and procedures