
EXHAUST SYSTEM
F2-121parts diagramCOMPONENT PARTS
Inspection (On-vehicle)
Start the engine and verify that there is no exhaust gas leakage from the exhaust system components.
Removal / Inspection / Installation
- 1Remove in the order shown in the figure.
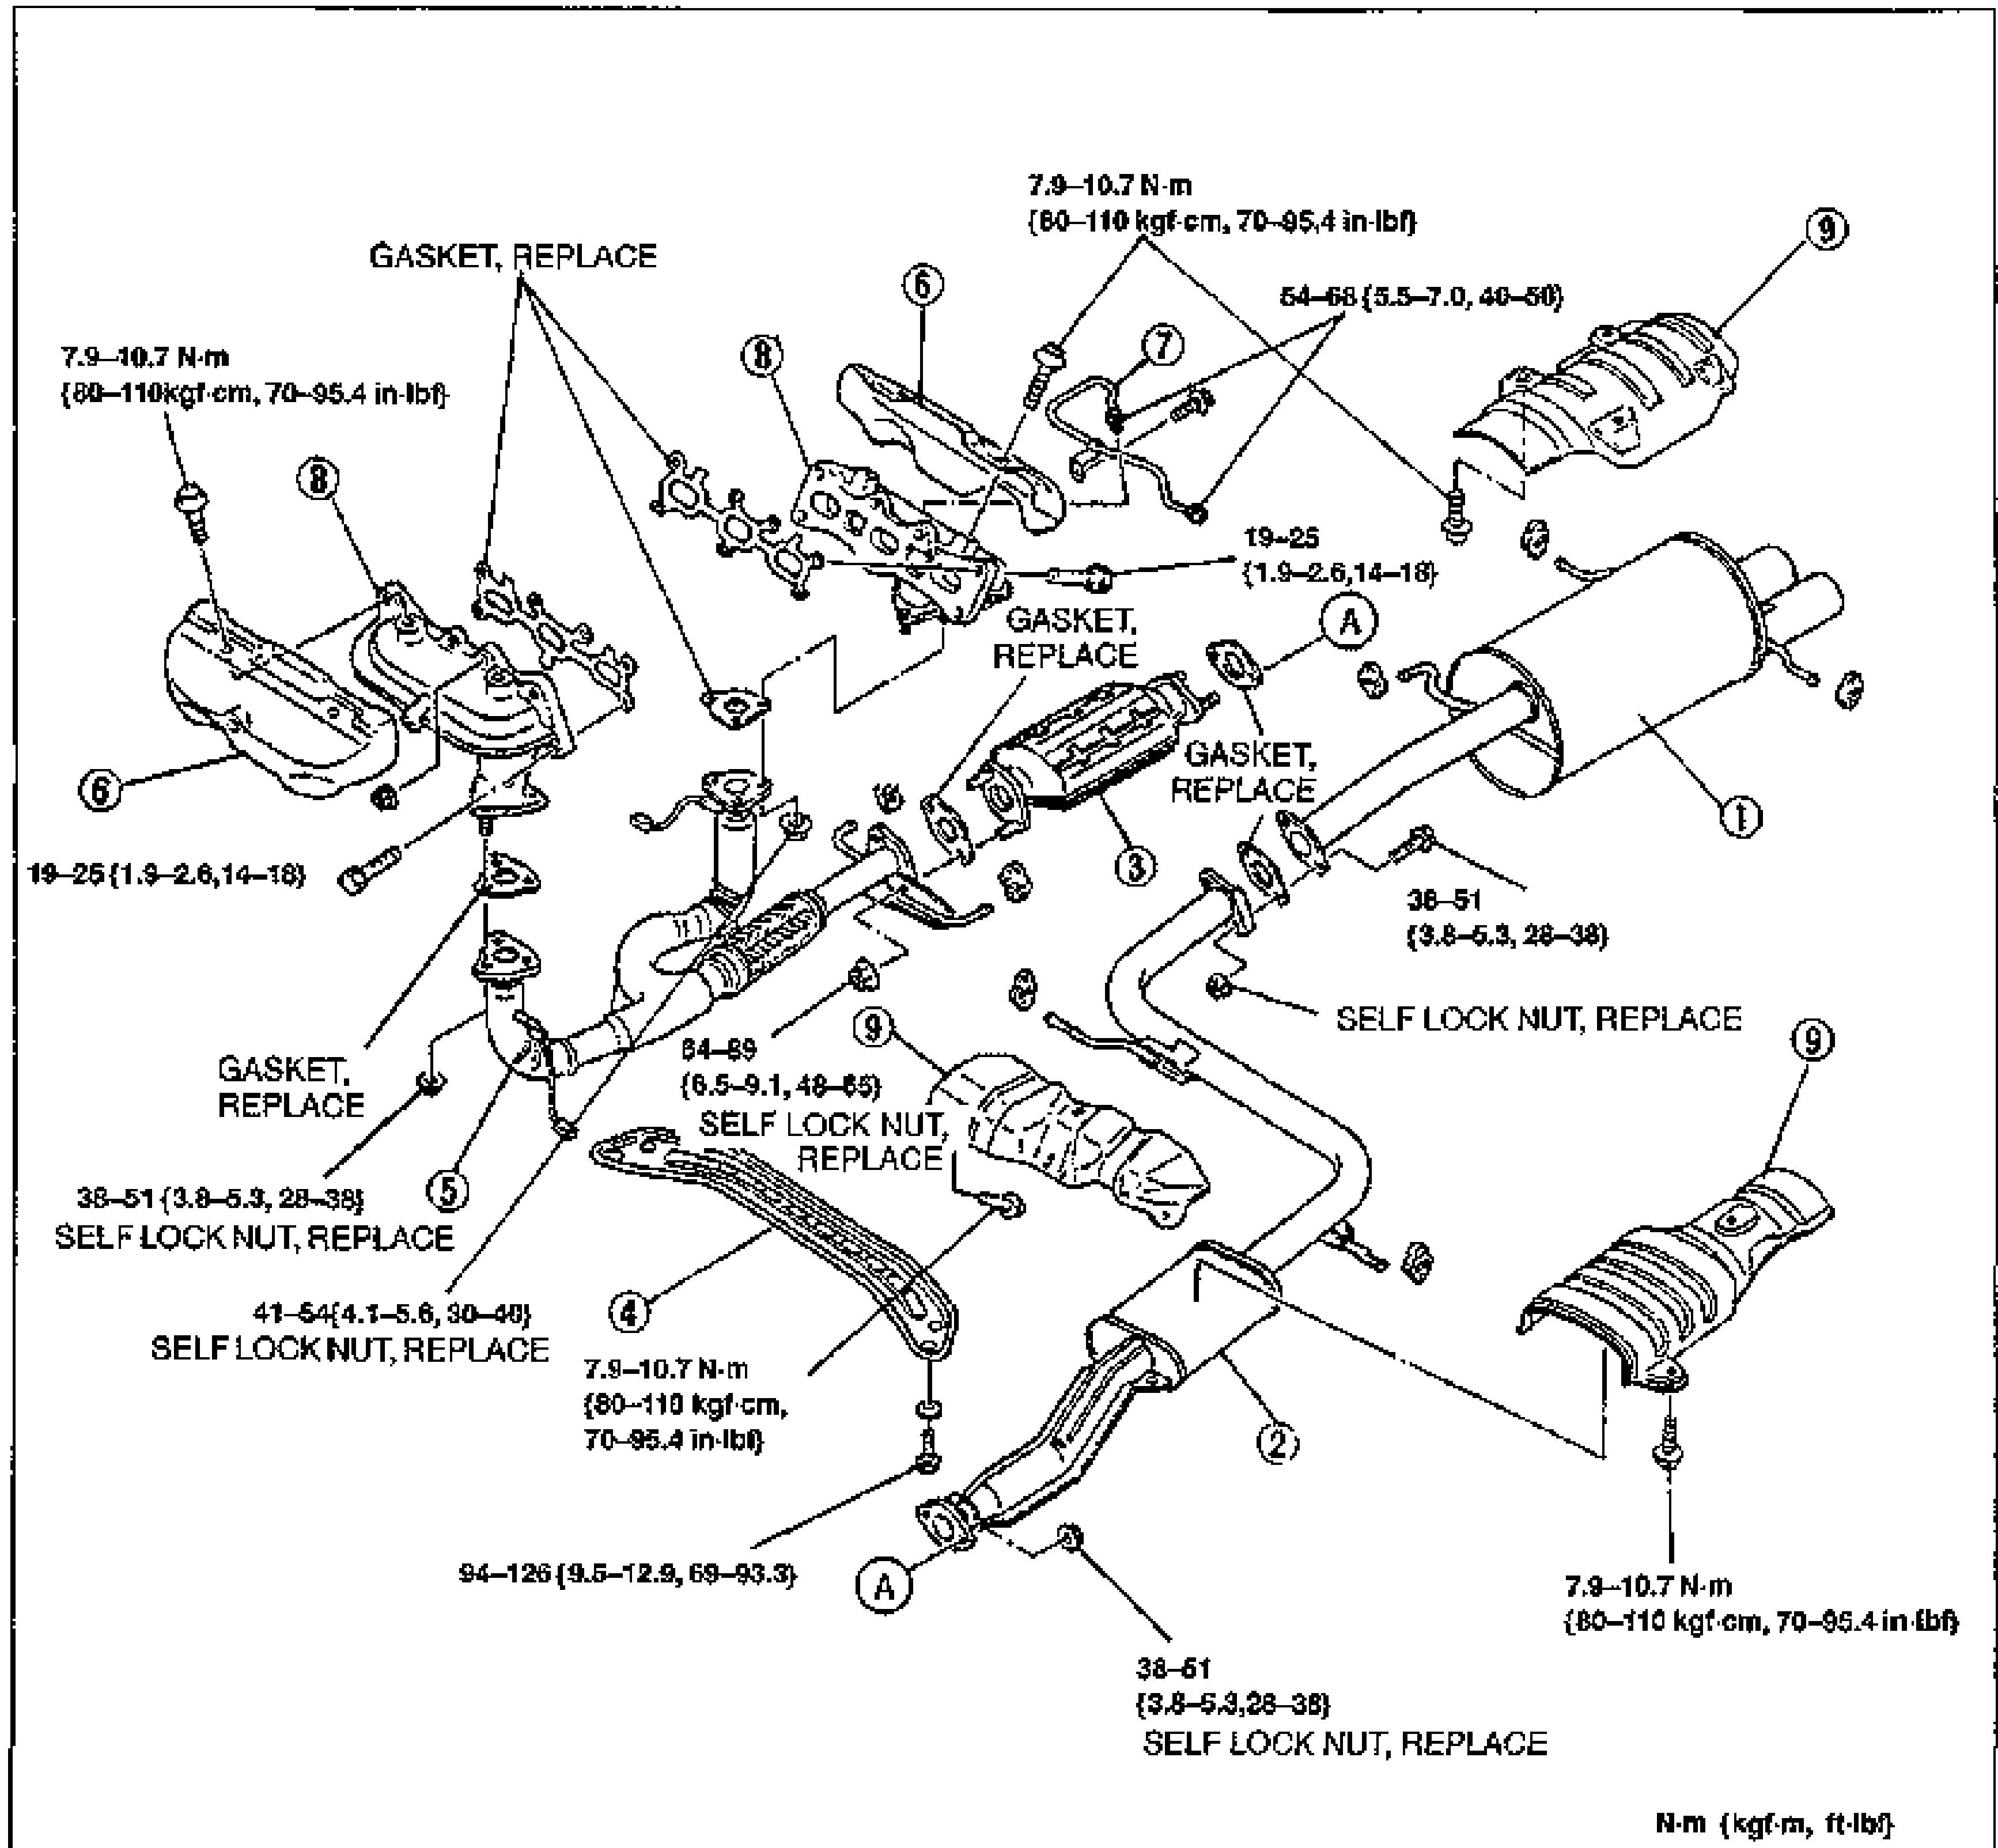
- 2Check the exhaust component parts and repair or replace as necessary.
- 3Install in the reverse order of removal.
Parts DiagramFig. fig1
| Specification | Value |
|---|---|
| Tightening torque (insulators) | 7.9 - 10.7N·m |
| 19 - 25N·m | |
| Tightening torque (self lock nut, replace) | 38 - 51N·m |
| Tightening torque (self lock nut, replace) | 41 - 54N·m |
| 54 - 69N·m | |
| Tightening torque (self lock nut, replace) | 84 - 89N·m |
| 94 - 126N·m |
Tightening torque (insulators)
7.9 - 10.7N·m
19 - 25N·m
Tightening torque (self lock nut, replace)
38 - 51N·m
Tightening torque (self lock nut, replace)
41 - 54N·m
54 - 69N·m
Tightening torque (self lock nut, replace)
84 - 89N·m
94 - 126N·m