Mazda MX-3 silhouetteMX-3

FUEL SYSTEM

F2-109parts diagram

Installation Note

  1. 1
    Push the ends of the main fuel hose, fuel return hose, and evaporative hoses onto the fuel tank fittings at least 25 mm {1.0 in}.
  2. 2
    Push the fuel filler hose onto the fuel tank pipe and filler pipe at least 35 mm {1.4 in}.
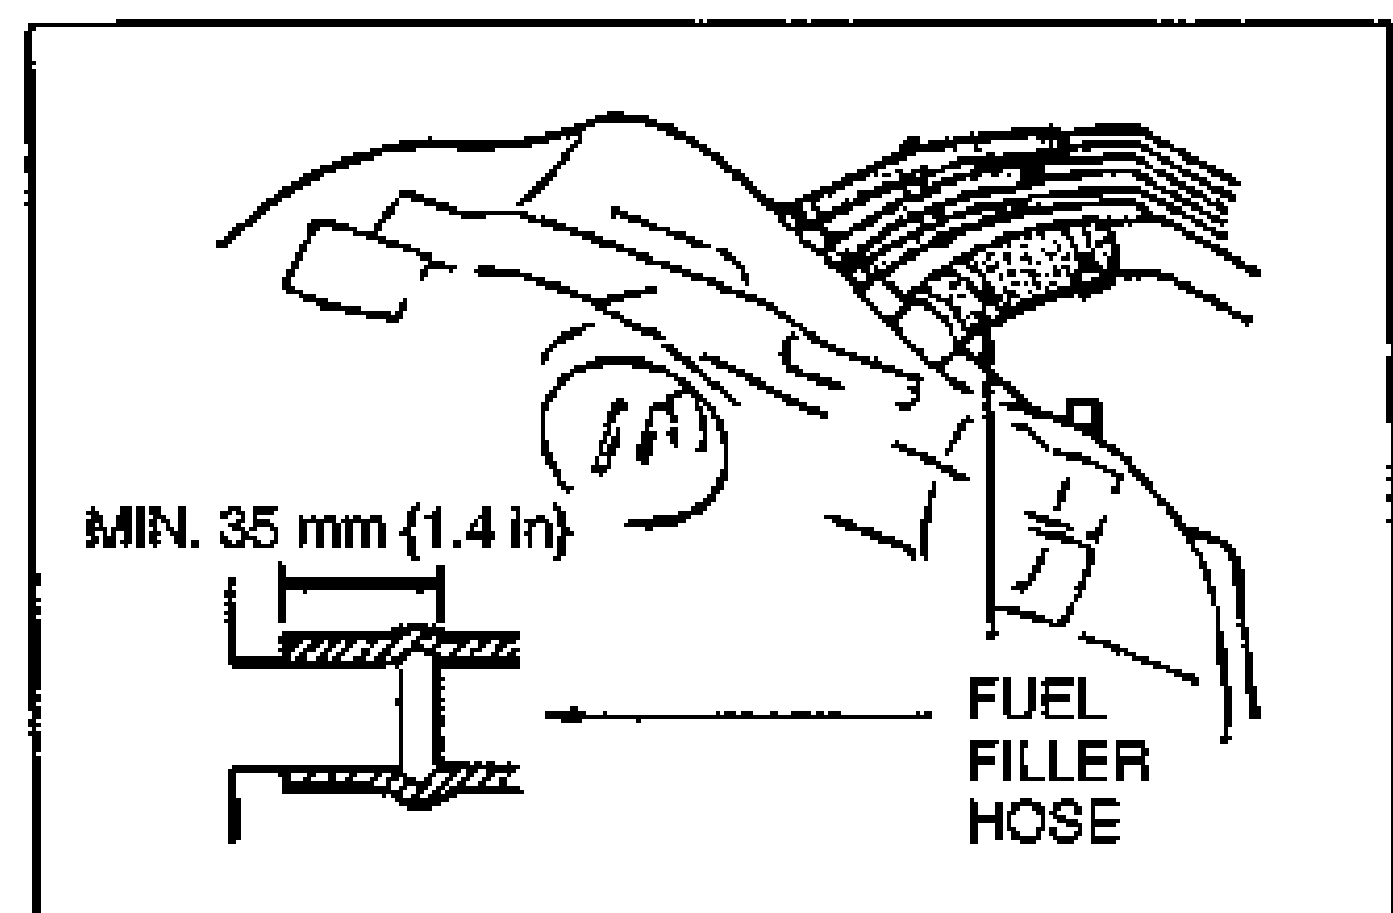
    Installation Note cross-section diagram showing the fuel filler hose pushed onto the fuel tank pipe and filler pipe, with the engagement dimension labeled MIN. 35 mm {1.4 in} and an arrow indicating push direction. Labeled FUEL FILLER HOSE.

FUEL FILTER

Replacement

High pressure side

The fuel filter must be replaced at the intervals outlined in the maintenance schedule.

Fuel Filter Replacement (High pressure side)

  1. 1
    Before removing the fuel filter, release the fuel pressure from the fuel system.
  2. 2
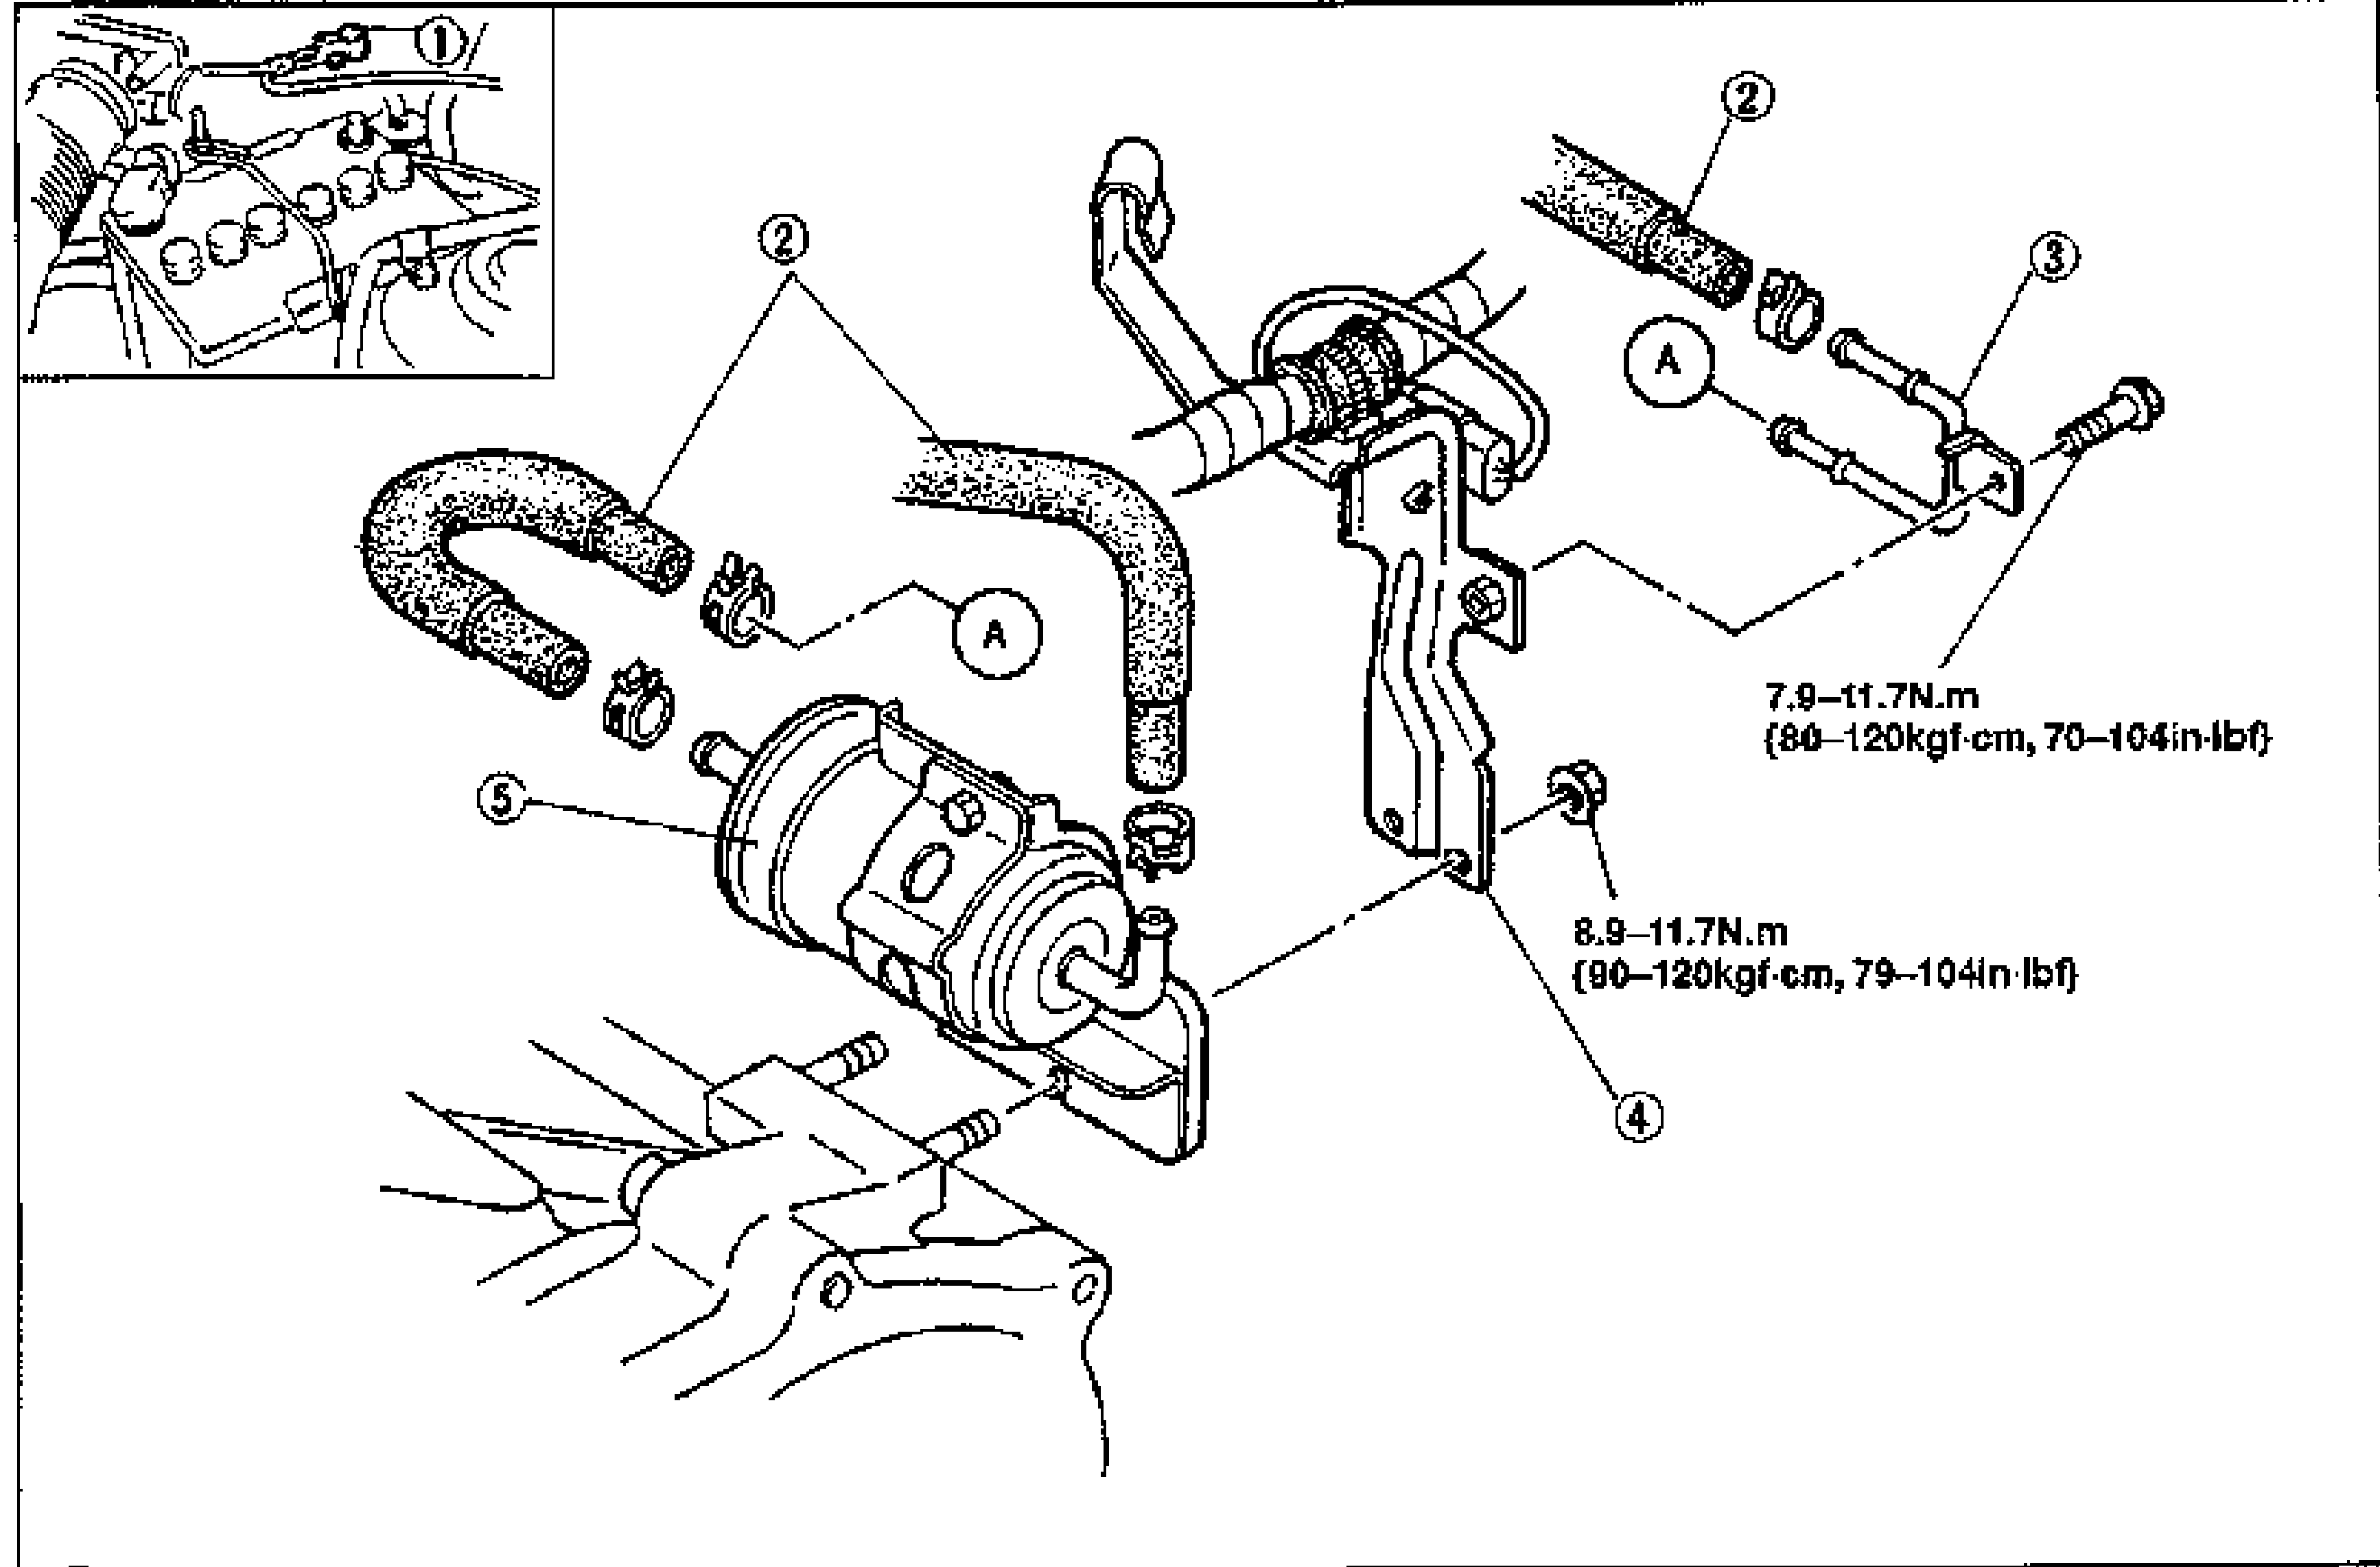
    Remove in the order shown in figure.
    Fuel filter (high pressure side) exploded view. Top-left inset shows the in-bay location with balloon (1) at the negative battery cable. Main diagram shows fuel hoses (2) with clamps, fuel pipe (3), bracket (4), and the fuel filter high-pressure side (5), plus two circled 'A' reference markers. Tightening torques annotated: 7.9-11.7 N·m {80-120 kgf·cm, 70-104 in-lbf} and 8.9-11.7 N·m {90-120 kgf·cm, 79-104 in-lbf}.
  3. 3
    Install in the reverse order of removal.
  4. 4
    Verify that the fuel hoses are pushed fully onto the fuel filter nozzles.
Parts DiagramFig. fig2
#Part NameNotes
1Negative battery cable
2Fuel hose
3Fuel pipe
4Bracket
5Fuel filter (High pressure side)

Search Manual

Search pages, specs, and procedures