Mazda MX-3 silhouetteMX-3

TRIM — Removal notes (continued)

S-67prose procedure

Door trim removal differs between driver side and passenger side.

Door trim — Driver side (continued)

  1. 4
    Pull the door trim to remove the clips from the body.
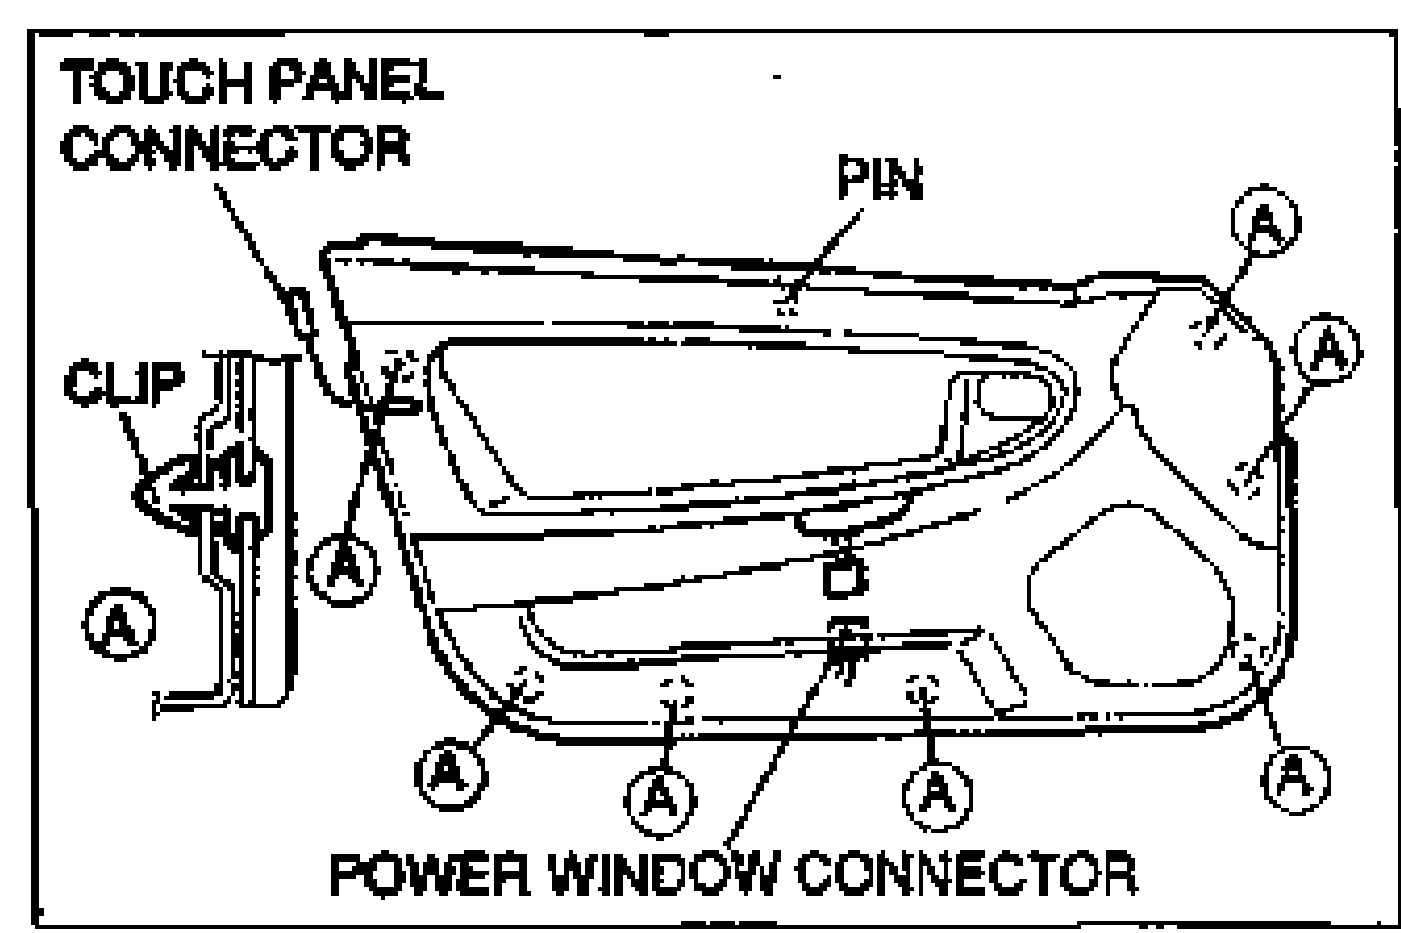
    Driver-side door trim panel (inner view) with TOUCH PANEL CONNECTOR and POWER WINDOW CONNECTOR callouts, lettered clip-location markers A around the perimeter, PIN callouts and a CLIP detail at left.
  2. 5
    Lift the door trim to remove it.
  3. 6
    Disconnect the harness connectors, if equipped.

Passenger side

Door trim — Passenger side

  1. 1
    Remove the regulator handle. (Refer to page S-11.)
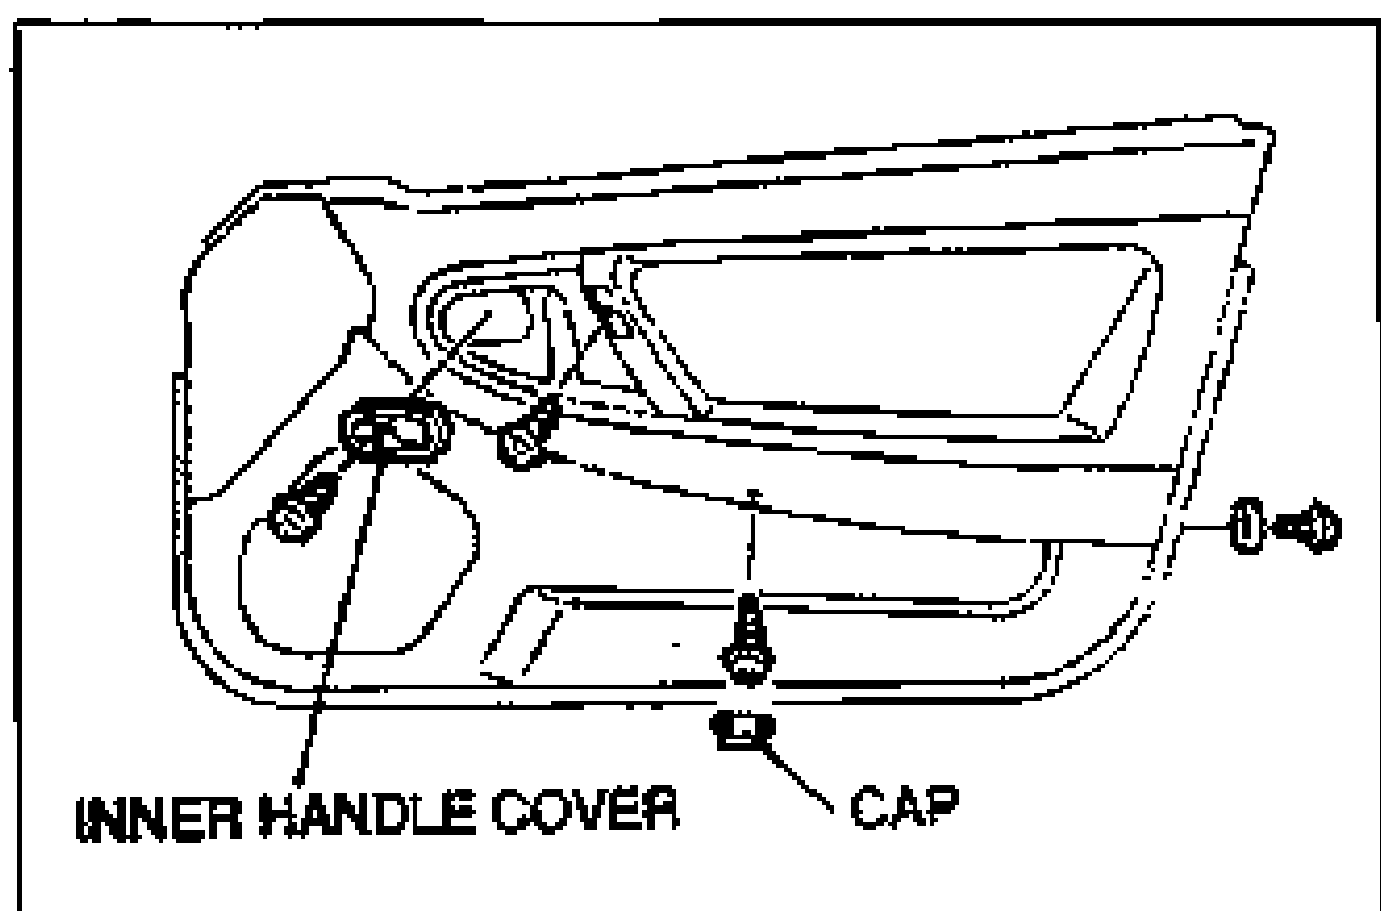
    Passenger-side door trim panel (inner view) with INNER HANDLE COVER and CAP callouts at the bottom, showing the cap and door trim mounting screw locations.
  2. 2
    Remove the inner handle.
  3. 3
    Remove the cap and door trim mounting screws.
  4. 4
    Pull the door trim to remove the clips from the body.
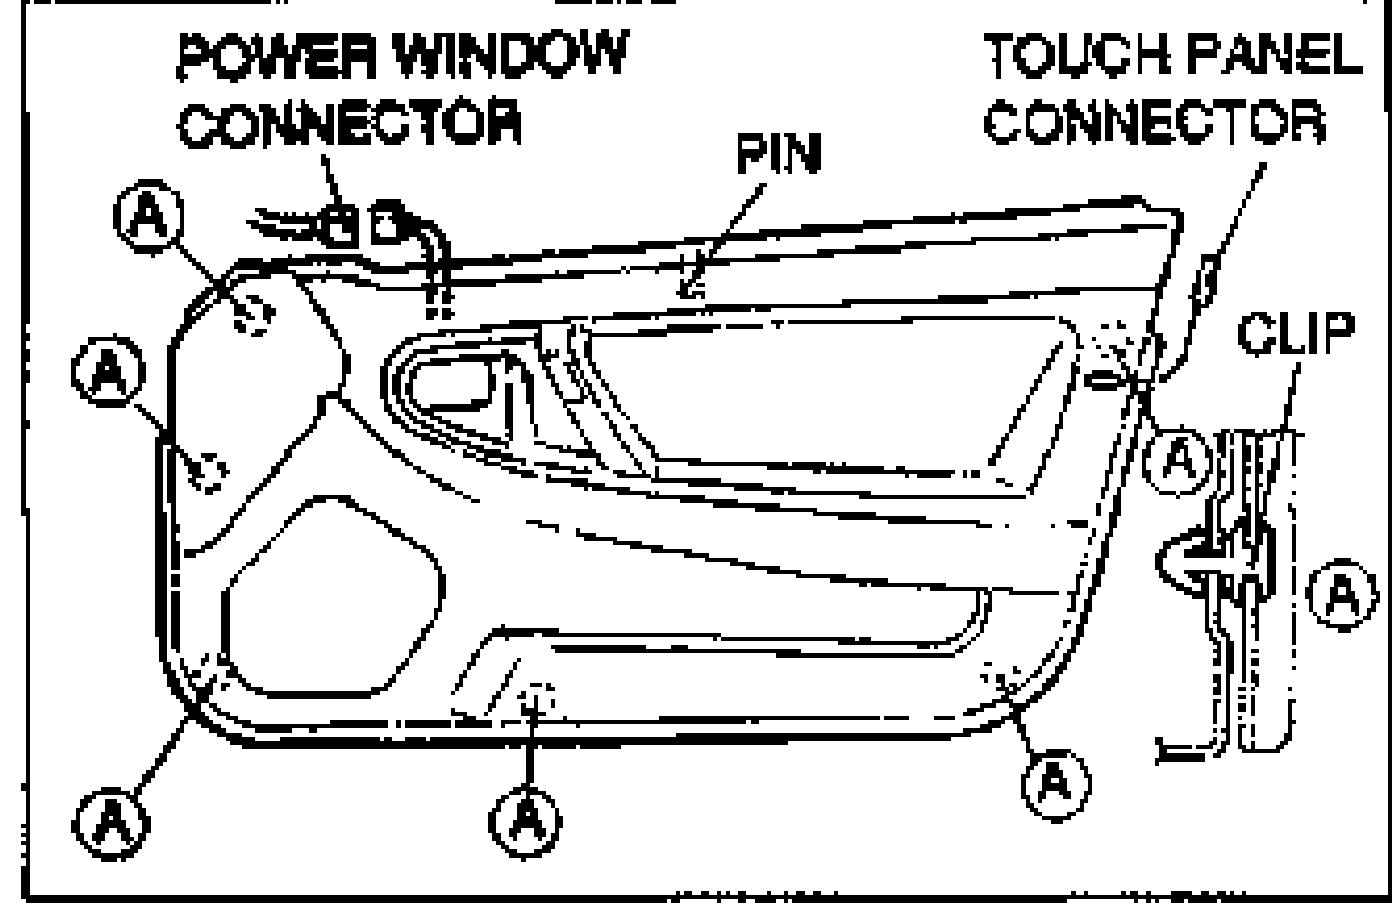
    Passenger-side door trim panel (inner view) with POWER WINDOW CONNECTOR and TOUCH PANEL CONNECTOR callouts, lettered clip-location markers A around the perimeter, PIN callouts and a CLIP detail at right.
  5. 5
    Lift up the door trim to remove it.
  6. 6
    Disconnect the harness connectors, if equipped.

Trunk end trim

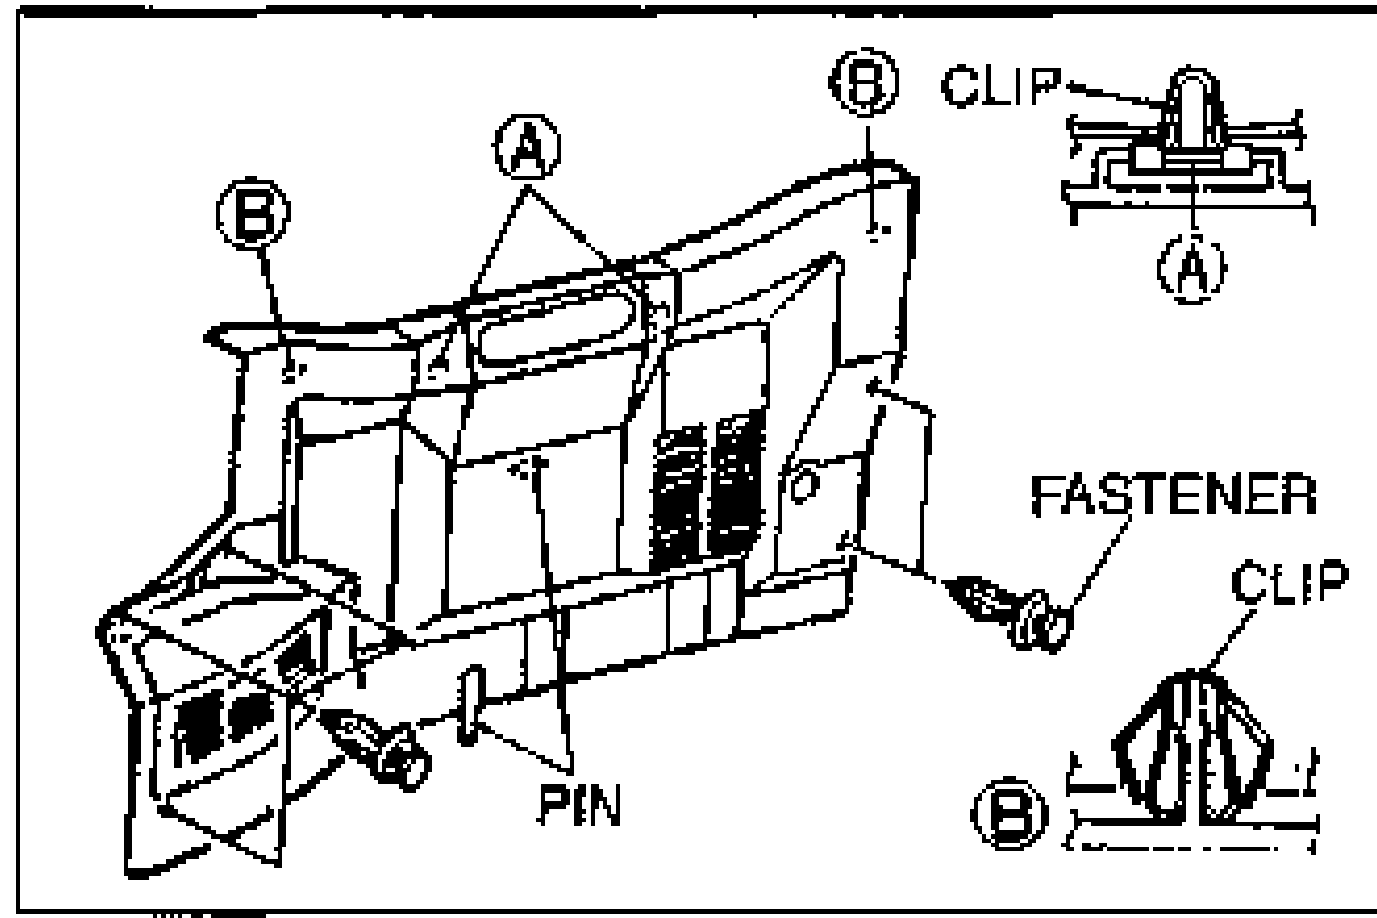
  1. 1
    Remove the installation fastener.
    Trunk end trim with lettered clip-location markers A and B, two CLIP details (views A and B), a FASTENER callout, and PIN callouts.
  2. 2
    Pull the trunk end trim to remove the clips from the body.
  3. 3
    Lift the trunk end trim to remove it.

Liftgate side trim

Pull the liftgate side trim to remove the clips from the body.

See also

Search Manual

Search pages, specs, and procedures