Mazda MX-3 silhouetteMX-3

WINDOW REGULATOR AND GLASS

S-10parts diagram

Two variants shown: POWER WINDOW and MANUAL WINDOW. Power window regulator (11) vs manual window regulator (12); power window subswitch (5) only on power-window doors.

COMPONENTS

Removal / Installation

  1. 1
    Lower the door glass 280 mm {11.0 in} from the fully closed position.
  2. 2
    Disconnect the negative battery cable, if equipped with power windows.
    Remove the door screen carefully so that it may be reused.
  3. 3
    Remove in the order shown in the figure, referring to Removal note.
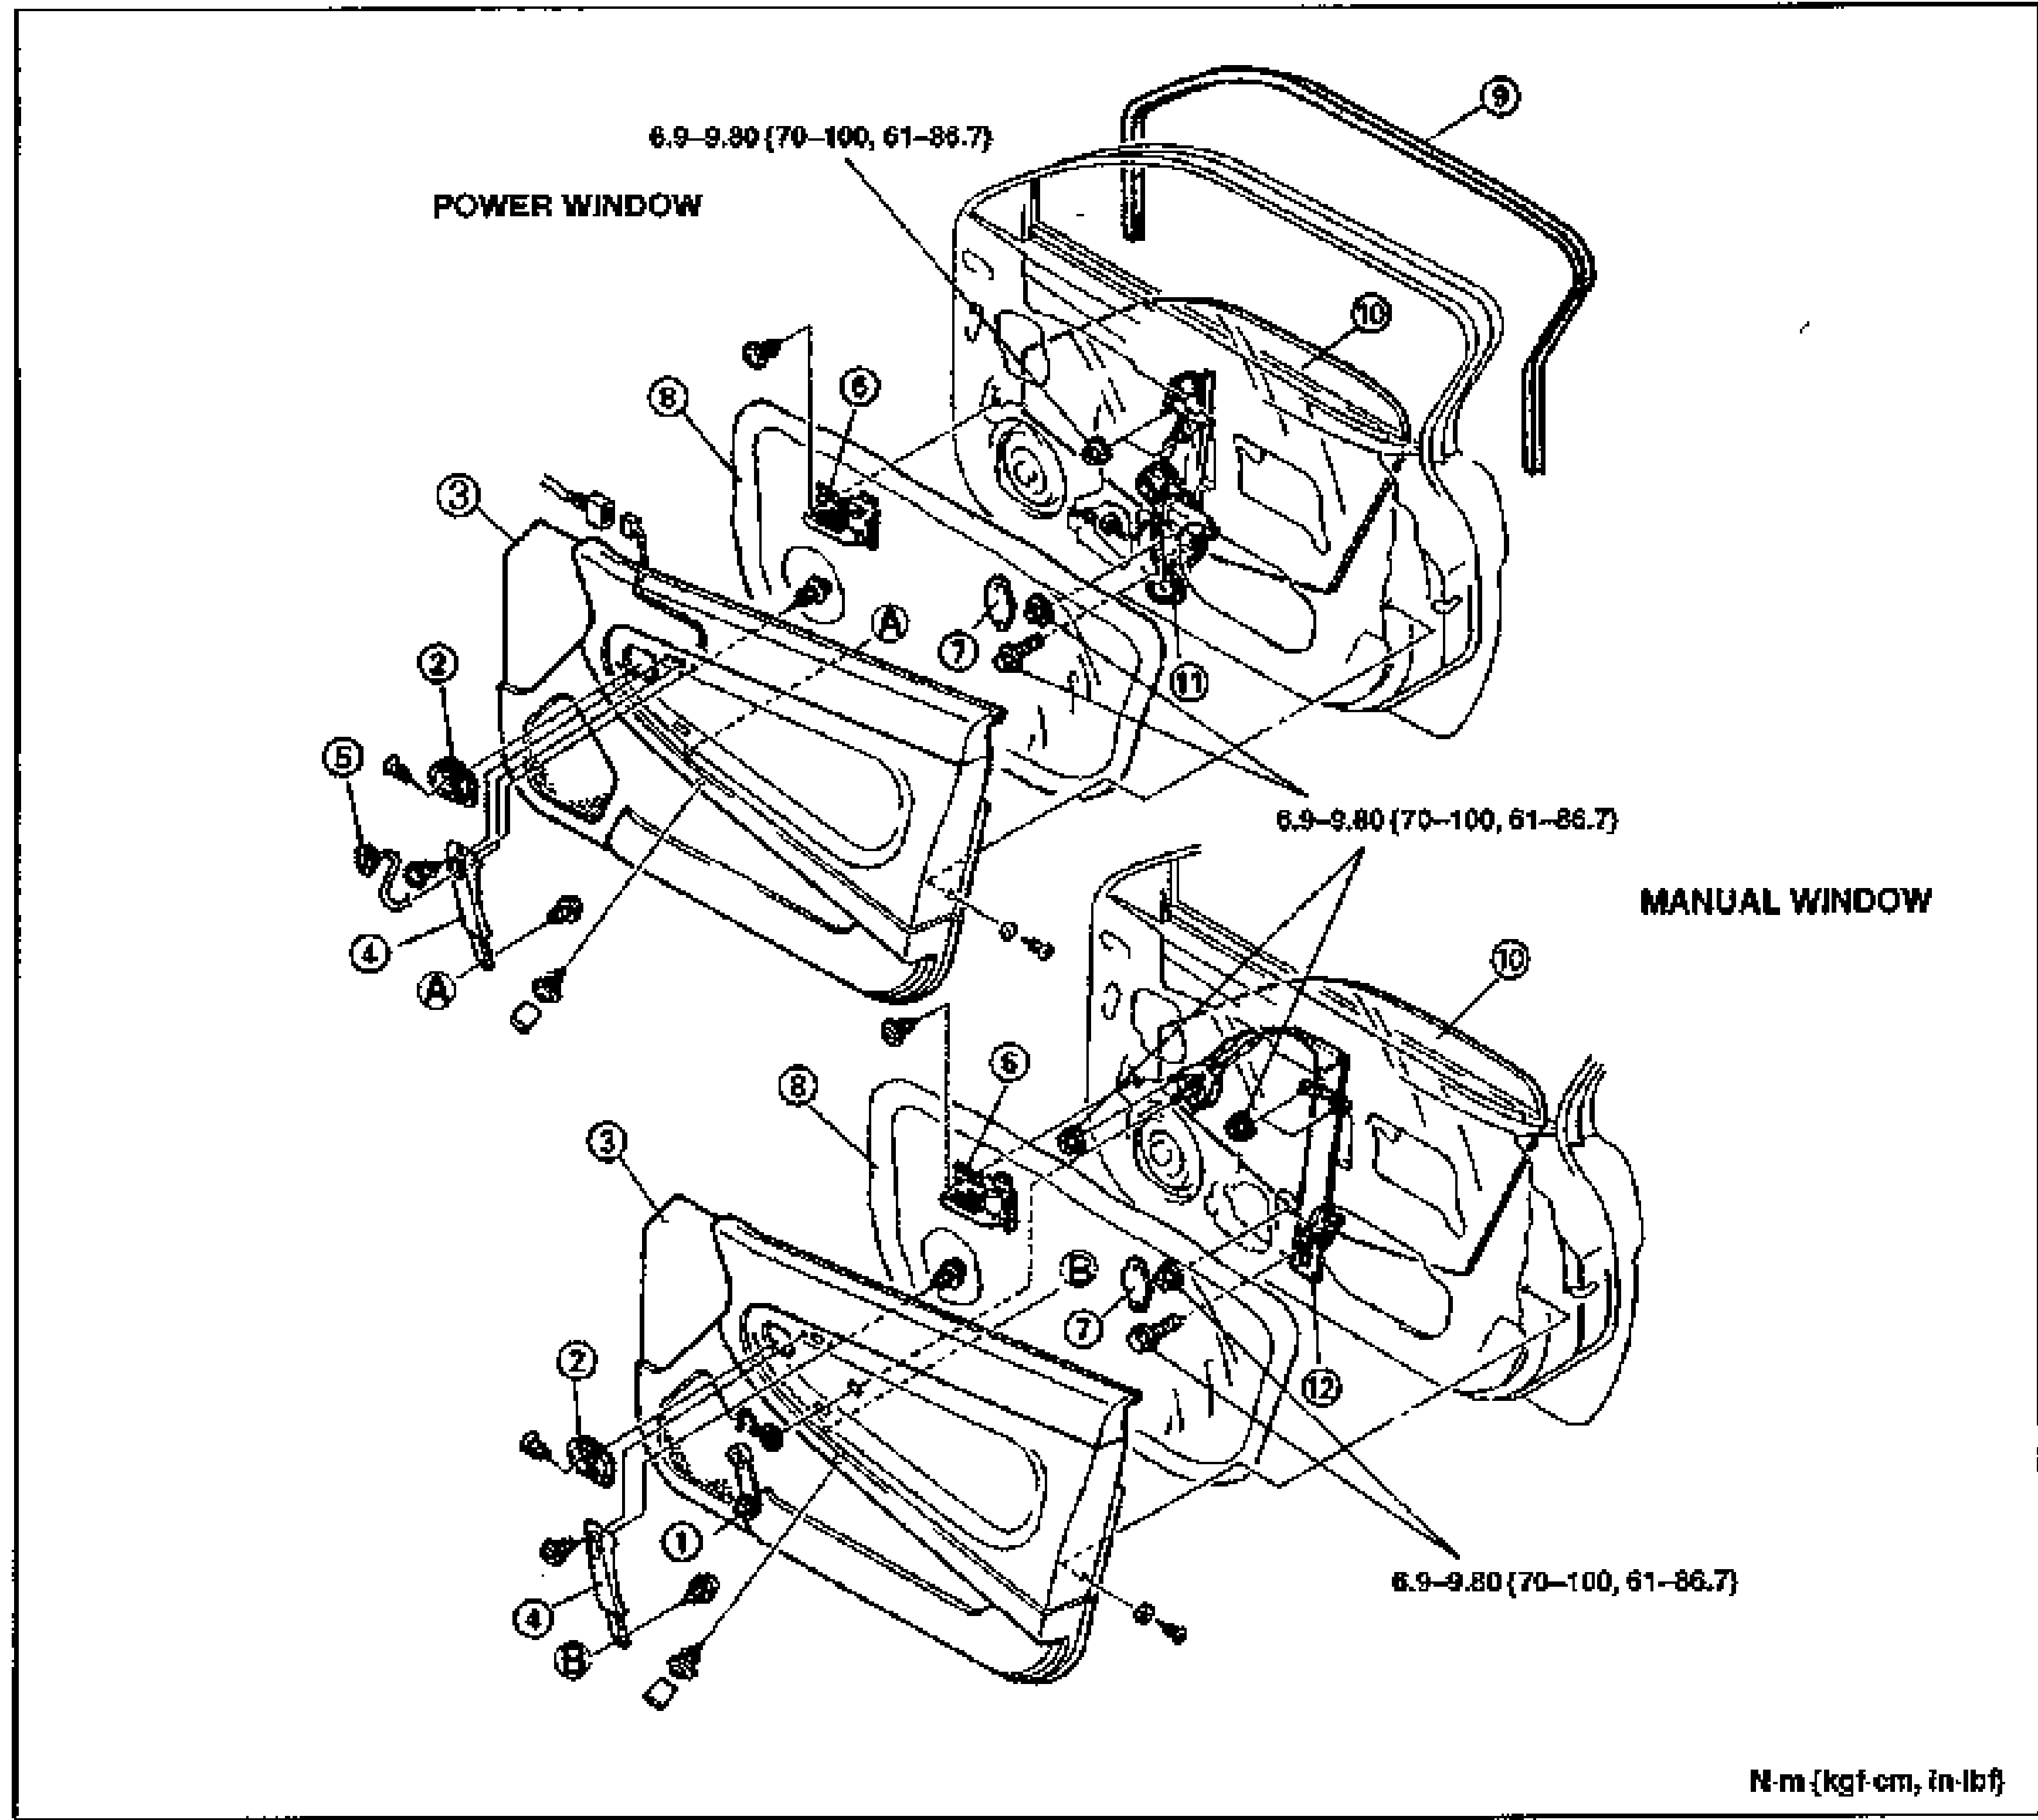
    Exploded view of the door window regulator and glass assembly, shown in two variants: POWER WINDOW (upper) and MANUAL WINDOW (lower). Each shows the door panel, door trim, inner handle cover, pull handle, glass run channel, door glass and window regulator with numbered balloon callouts 1-12. Torque values 6.9-9.80 N·m {70-100 kgf-cm, 61-86.7 in-lbf} are called out at bolt locations. Units note at bottom right: N·m {kgf-cm, in-lbf}.
  4. 4
    Install in the reverse order of removal, referring to Installation note.
Parts DiagramFig. fig1
#Part NameNotes
1Regulator handleRemoval note ... page S-11; Installation note ... page S-11
2Inner handle cover
3Door trimRemoval / Installation ... page S-65
4Pull handle
5Power window subswitch
6Inner handle
7Sealing pad
8Door screen
9Glass run channel
10Door glass
11Power window regulator
12Manual window regulator

Search Manual

Search pages, specs, and procedures