Mazda MX-3 silhouetteMX-3

Molding

S-27prose procedure

Installation note — Liftgate molding (continued)

  1. 5
    Insert the blade of the SST into the sealant, and pull on the bar to cut the sealant near the glass as shown.
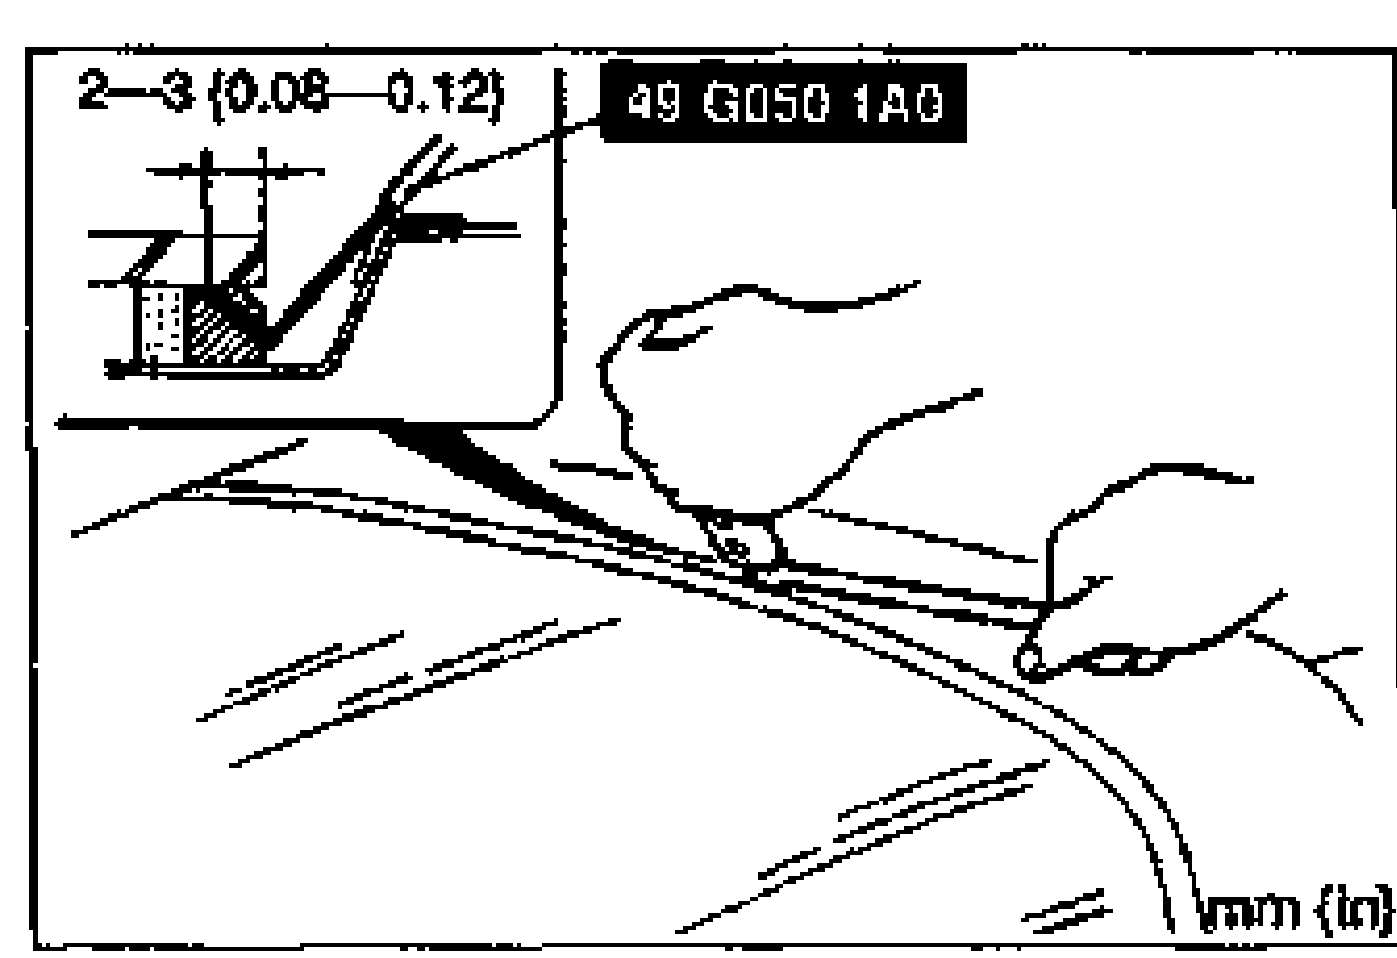
    Cross-section showing SST 49 G050 1A0 blade inserted into the sealant, cutting near the glass; dimension callout '2-3 (0.08-0.12)' mm (in). A hand pulls the tool's bar.
  2. 6
    Apply primer onto the bonding area of the glass, liftgate, and new liftgate molding by using a brush. Use only glass primer on the glass and body primer on the liftgate and molding. Keep the area free of dirt and grease, and do not touch the surface. Allow the primer to dry for approximately 30 minutes.
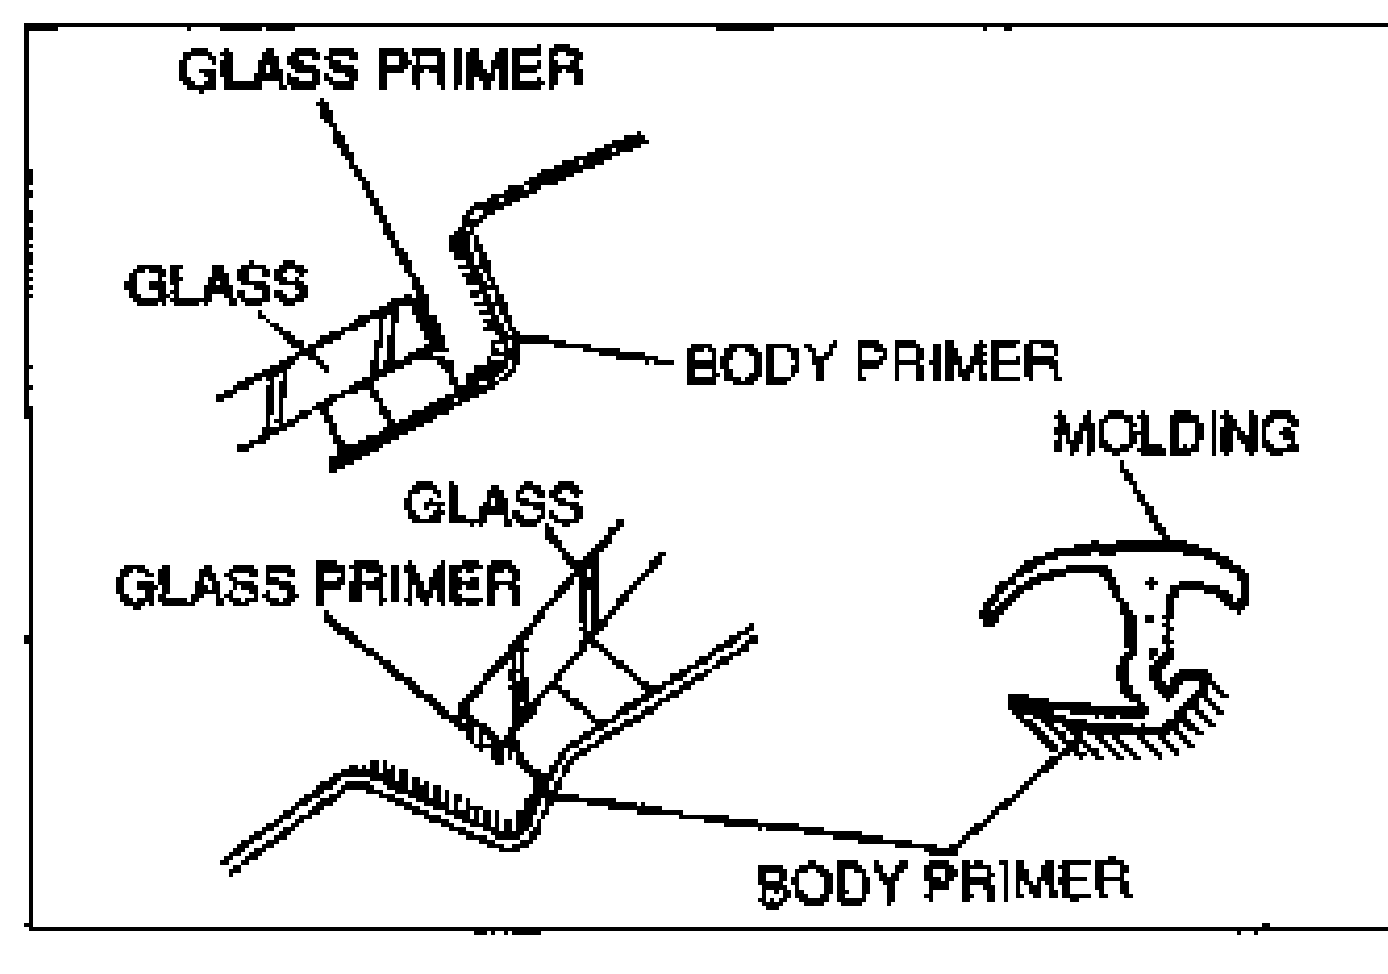
    Diagram showing where to apply primer on the liftgate molding/glass joint. Callouts label GLASS PRIMER, GLASS, BODY PRIMER, MOLDING (with the molding cross-section profile shown at right).
  3. 7
    Apply a 3 mm (0.12 in) bead of repair sealant between the glass and the liftgate.
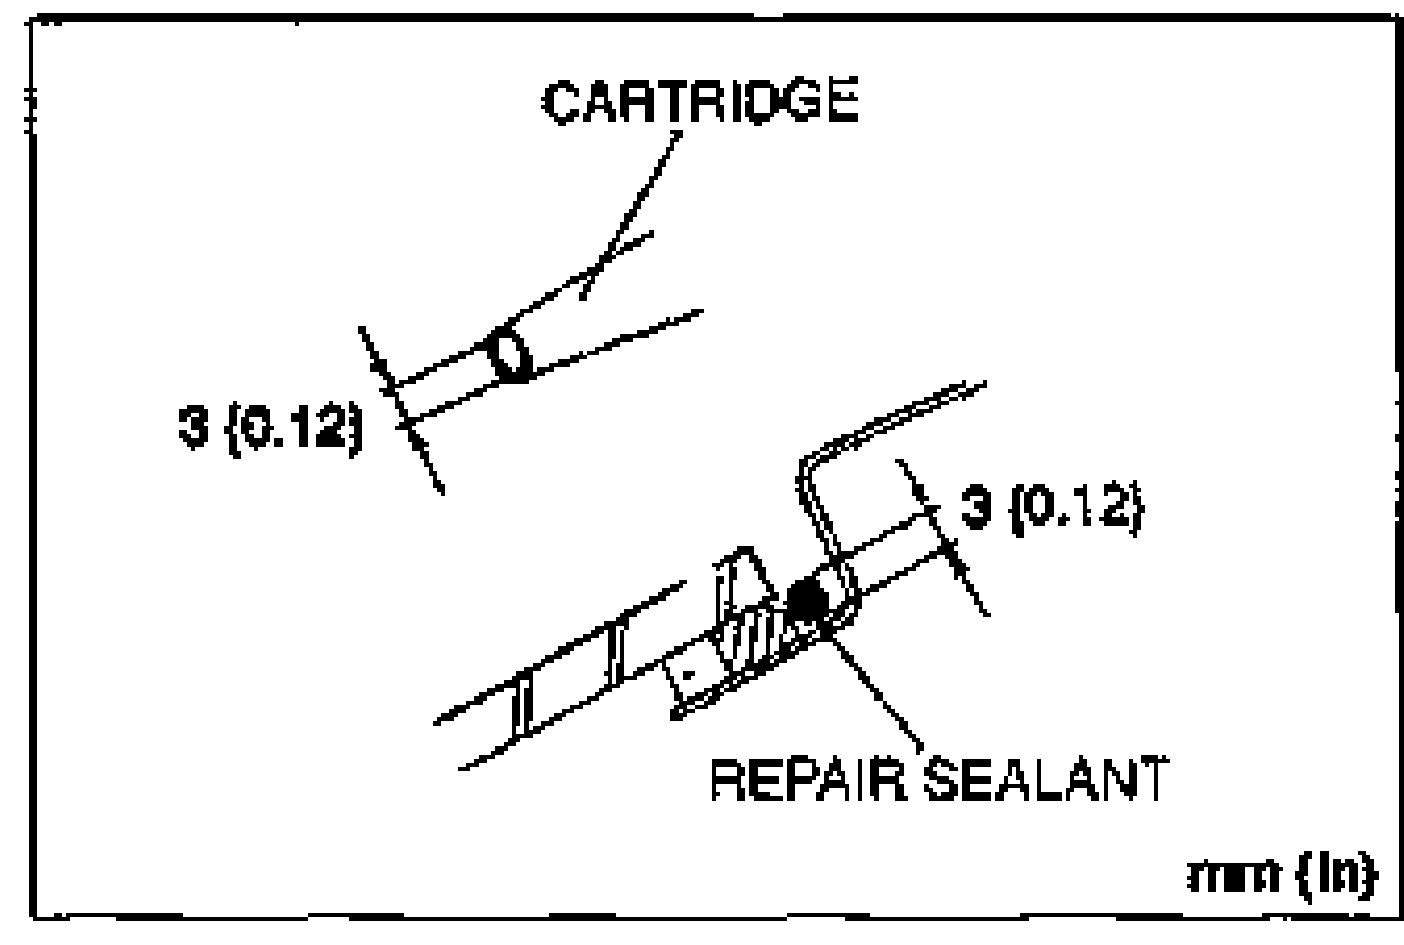
    Diagram of applying a 3 mm (0.12 in) bead of repair sealant from a cartridge between the glass and liftgate. Callouts label CARTRIDGE and REPAIR SEALANT, with dimension '3 (0.12)' mm (in) marked at two points.
  4. 8
    Reshape the repair sealant as shown if necessary.
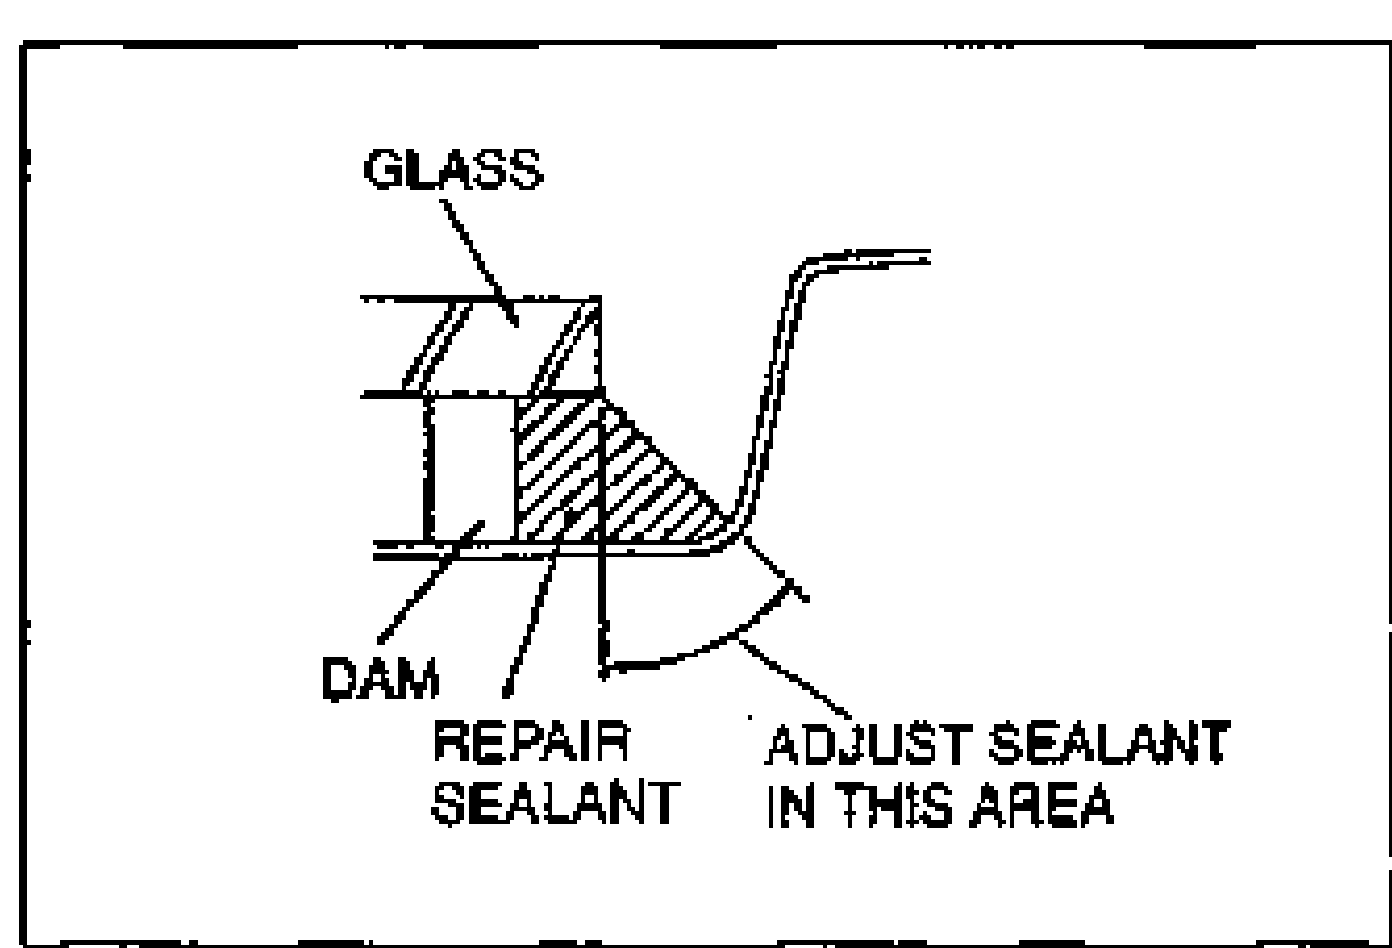
    Cross-section showing the reshaped repair sealant. Callouts label GLASS, DAM, REPAIR SEALANT, and 'ADJUST SEALANT IN THIS AREA' with hatching on the sealant fillet between glass and body.

Search Manual

Search pages, specs, and procedures