Mazda MX-3 silhouetteMX-3

WINDSHIELD

S-41parts diagram

PREPARATION

SST

SST

49 0305 870A
NameTool set, window
UsageFor removal / installation of glass

COMPONENTS

Removal / Installation

Windshield Removal / Installation

  1. 1
    Disconnect the negative battery cable.
  2. 2
    Remove in the order shown in the figure, referring to Removal note.
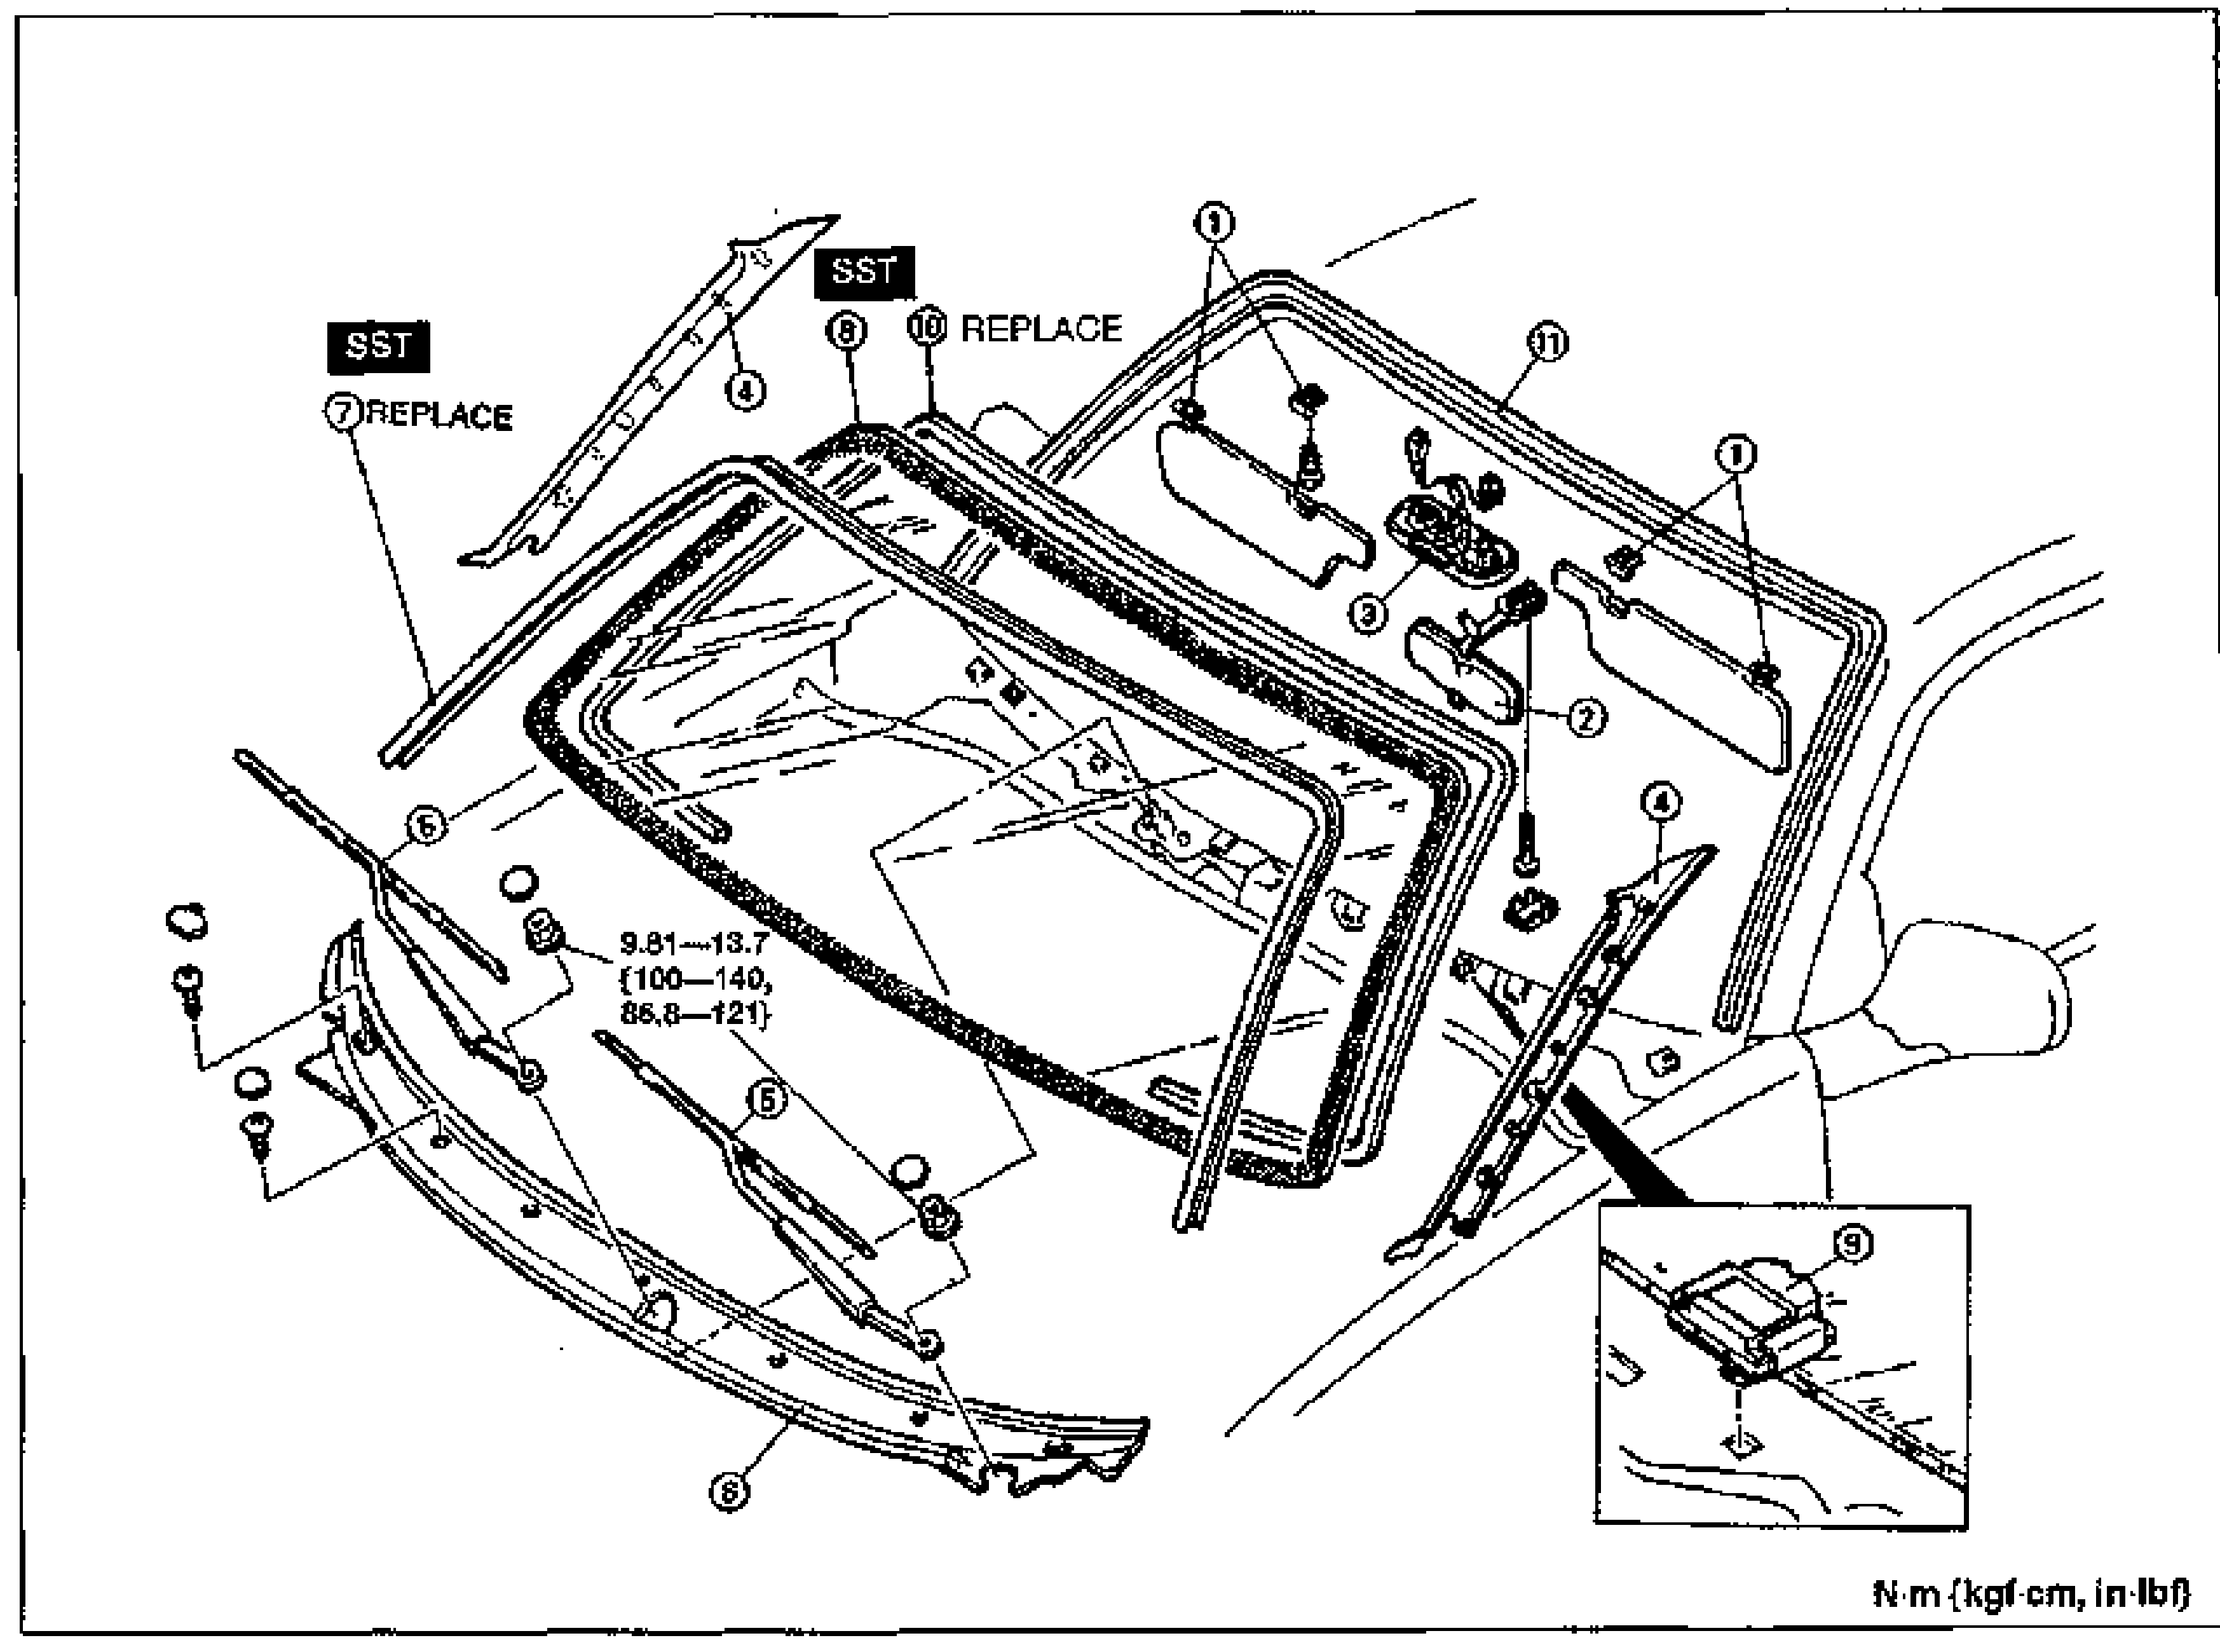
    Exploded view of the windshield assembly and surrounding trim. Numbered balloon callouts identify sunvisor and adapter (1), rearview mirror (2), overhead console (3), A-pillar trim (4), windshield wiper arm and blade (5), cowl grille (6), windshield molding (7, marked SST/REPLACE), windshield glass (8, marked SST), spacer (9, in lower-right inset), dam (10, REPLACE), and protector (11). A tightening torque callout reads 9.81—13.7 N·m {100—140, 86.8—121}; unit note 'N·m (kgf·cm, in·lbf)' at bottom right.
  3. 3
    Install in the reverse order of removal, referring to Installation note.
Parts DiagramFig. fig2
#Part NameNotes
1Sunvisor and adapter
2Rearview mirror
3Overhead console
4A-pillar trimRemoval / Installation ... page S-65
5Windshield wiper arm and bladeRemoval / Installation ... page S-36
6Cowl grilleRemoval / Installation ... page S-33
7Windshield moldingRemoval / Installation ... page S-22
8WindshieldRemoval note ... page S-42; Installation note ... page S-42
9Spacer
10Dam
11Protector

Search Manual

Search pages, specs, and procedures