
SLIDING SUNROOF
S-53parts diagramCOMPONENTS
Removal / Installation
- 1Open the slide panel 100 mm {3.9 in} from the fully closed position.
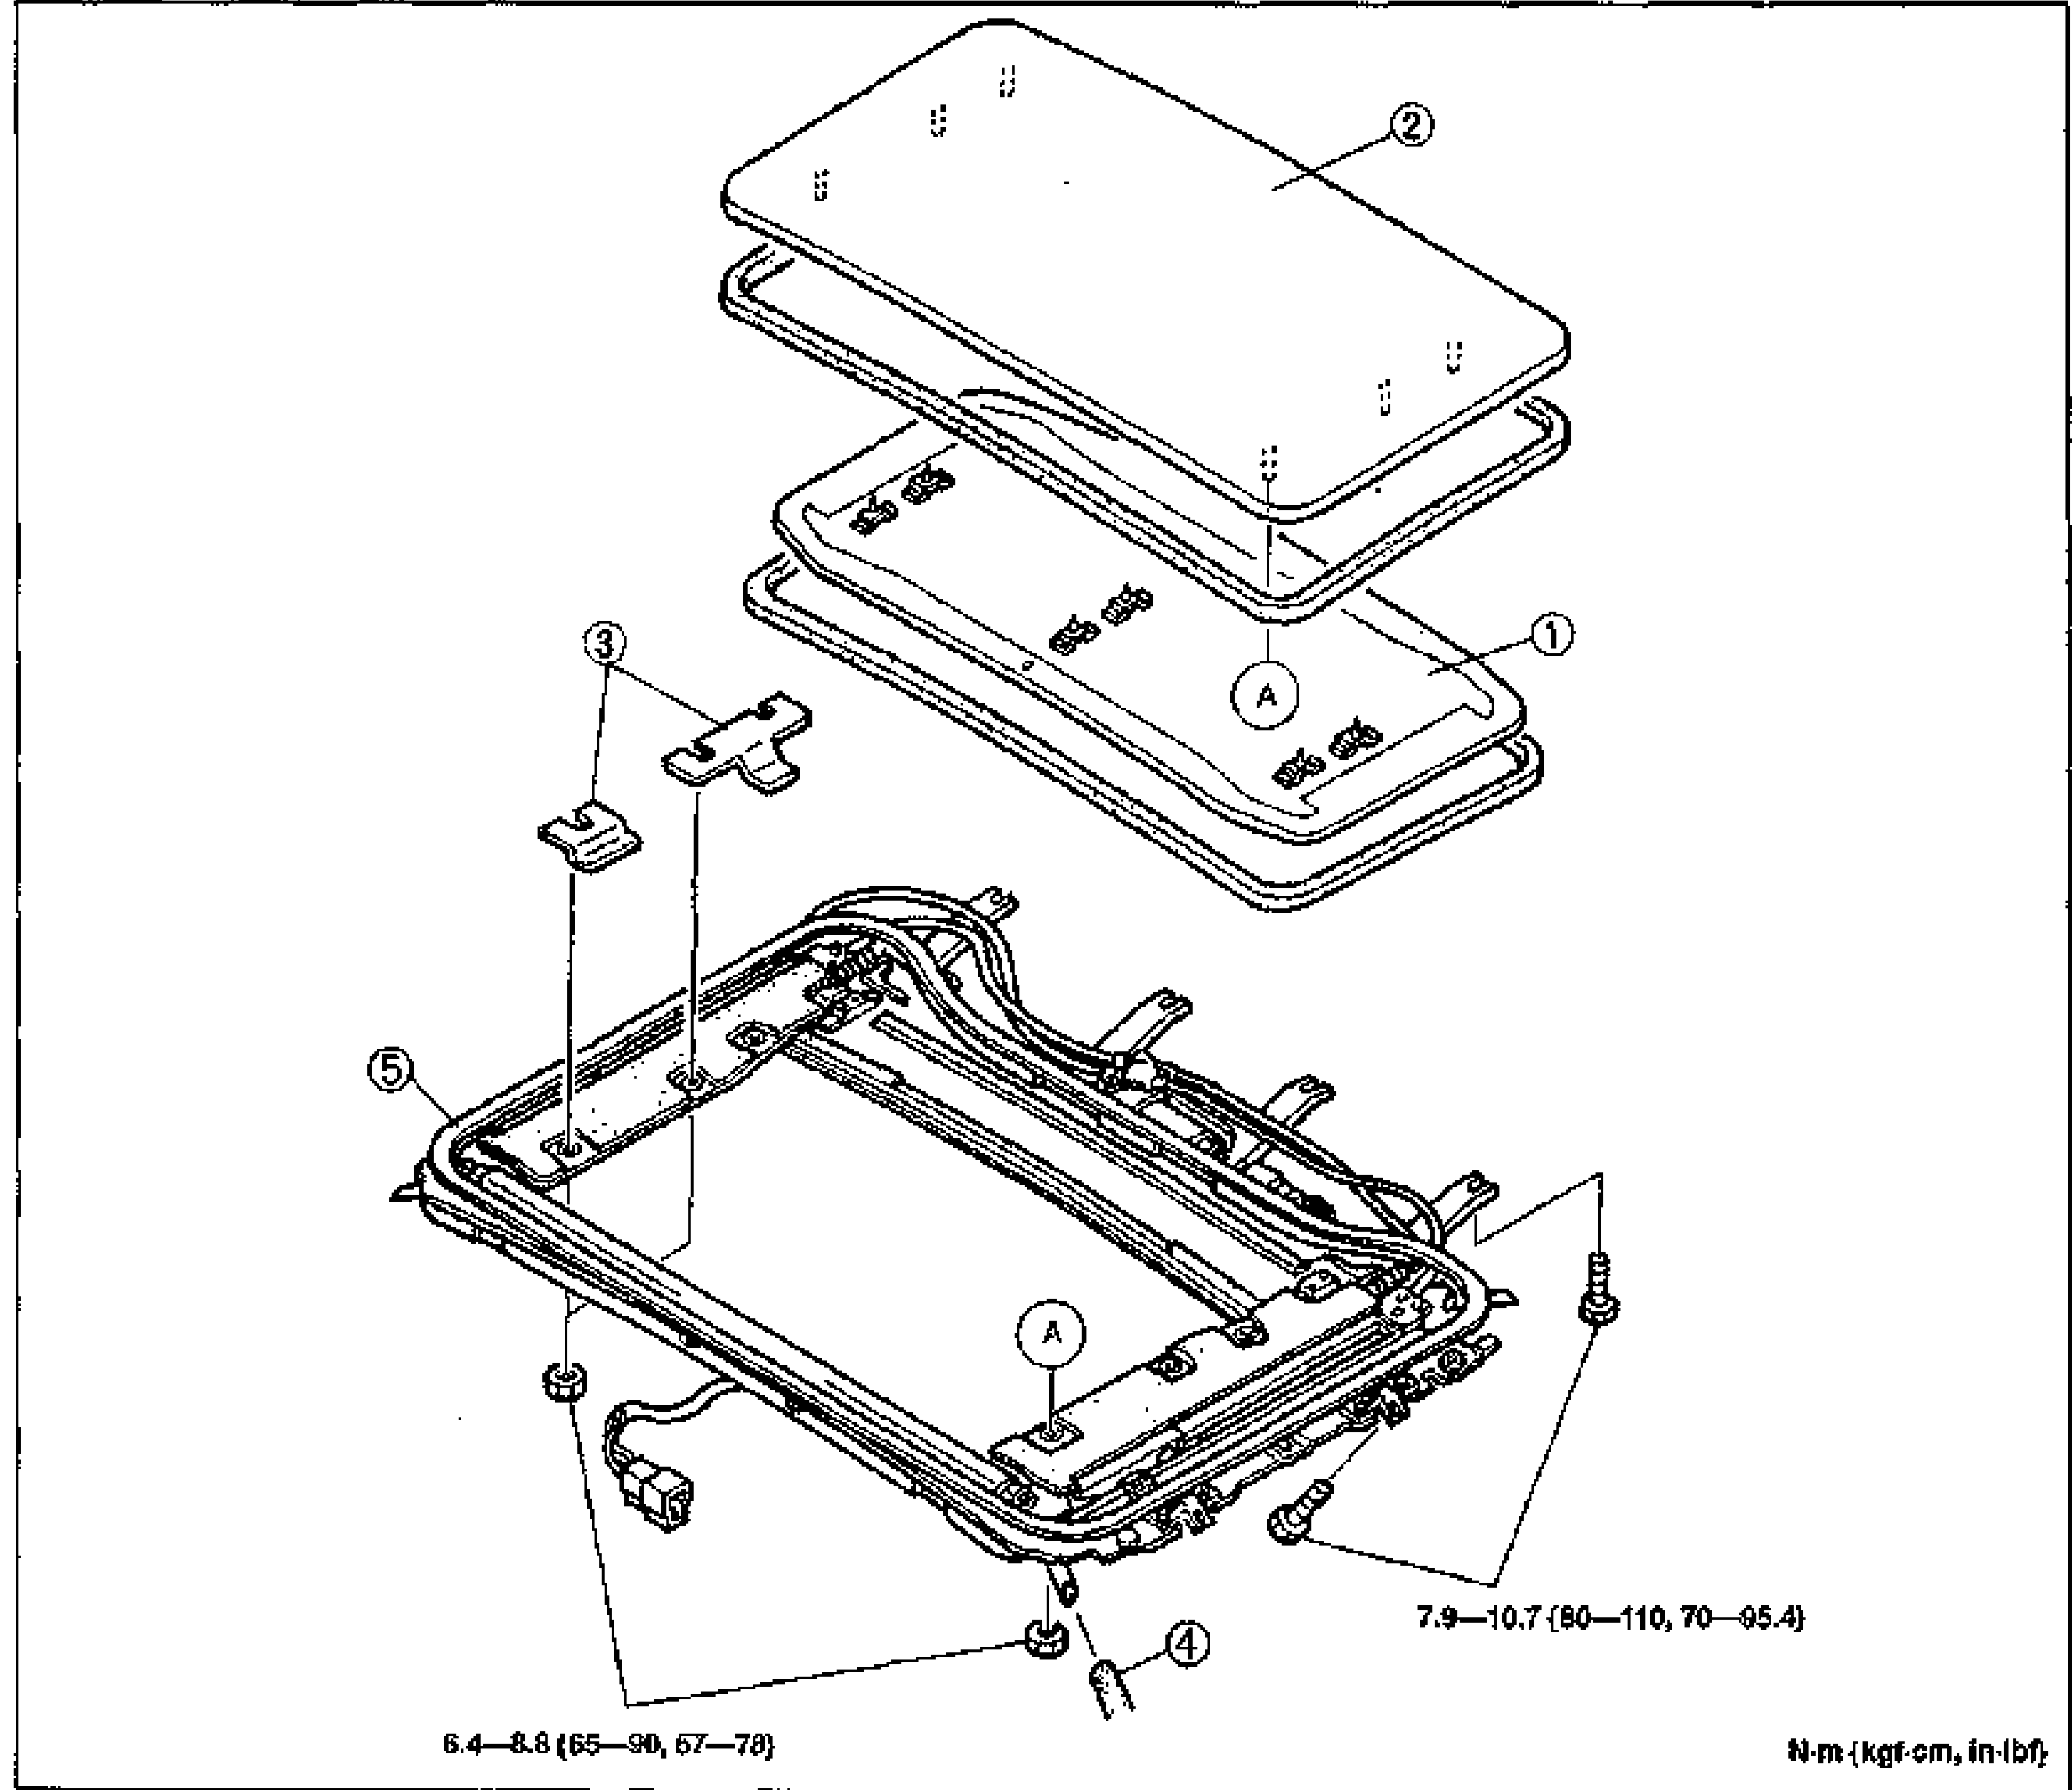
- 2Disconnect the negative battery cable.
- 3Remove in the order shown in the figure, referring to Removal note. To remove the sunroof drive unit, remove the headliner. (Refer to page S-70.)
- 4Install in the reverse order of removal, referring to Installation note.
| Specification | Value |
|---|---|
| Sunroof trim / shim screws | 6.4—8.8N·m {65—90 kgf·cm, 57—78 in·lbf} |
| Sunroof frame / drive unit screws | 7.9—10.7N·m {80—110 kgf·cm, 70—95.4 in·lbf} |
Sunroof trim / shim screws
6.4—8.8N·m {65—90 kgf·cm, 57—78 in·lbf}
Sunroof frame / drive unit screws
7.9—10.7N·m {80—110 kgf·cm, 70—95.4 in·lbf}
Parts DiagramFig. fig1