Mazda MX-3 silhouetteMX-3

Molding

S-23prose procedure

Removal note

Windshield molding

Installation note

Windshield molding

Installation note — Windshield molding

  1. 1
    Apply protective tape along the edge of the body to protect it from damage.
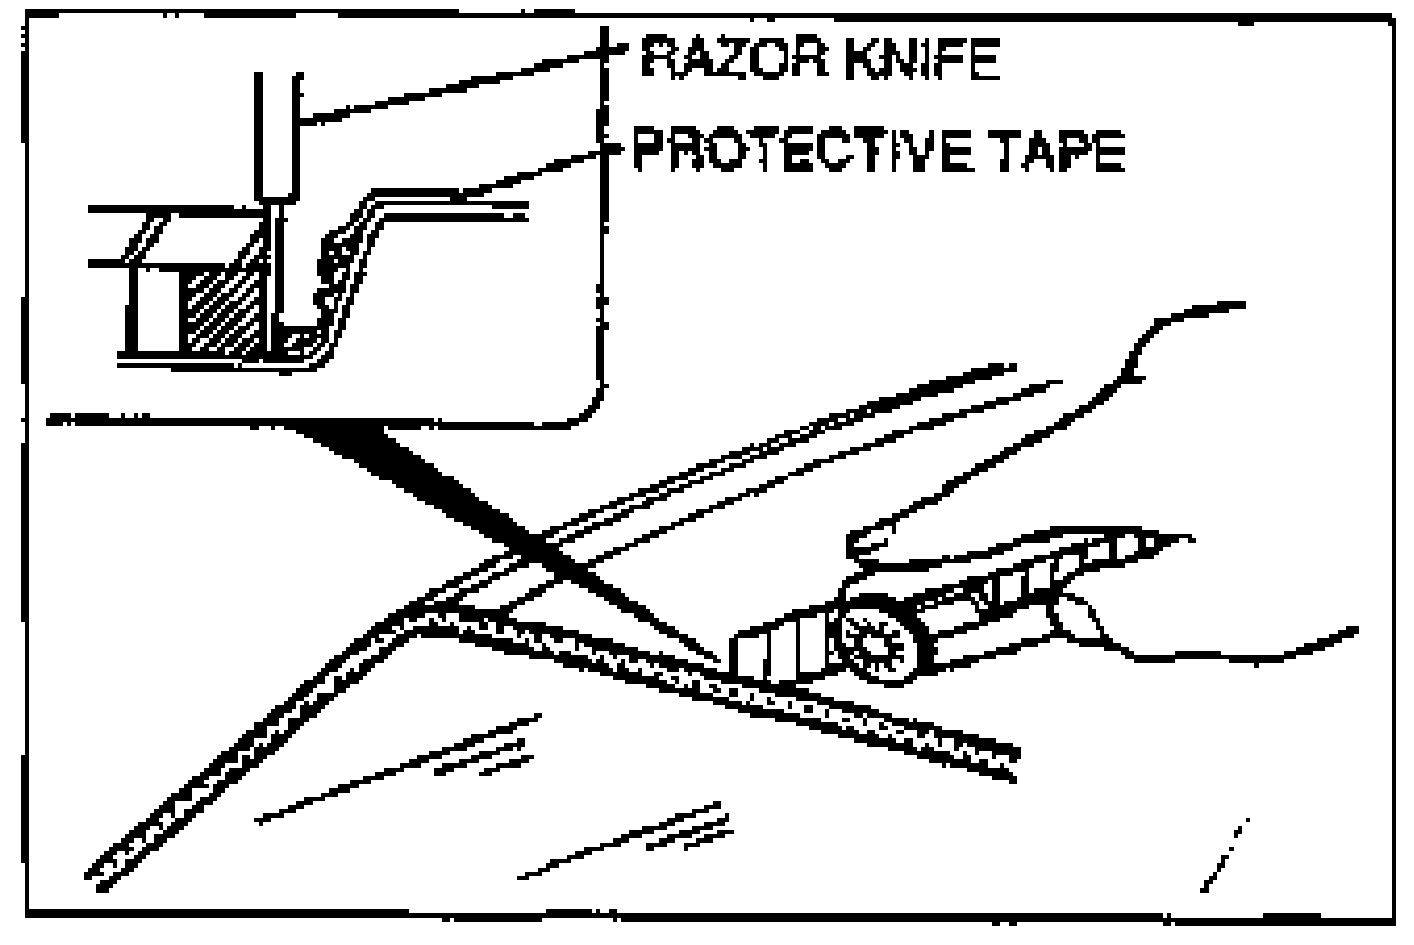
    Installation note step: cross-section of the molding joint with a razor knife cutting the sealant; callouts label 'RAZOR KNIFE' and 'PROTECTIVE TAPE'. A hand holds the razor knife along the body edge.
  2. 2
    Cut the sealant by using a razor knife as shown.
  3. 3
    Insert the blade of the SST into the sealant, and pull on the bar to cut the sealant near the body as shown.
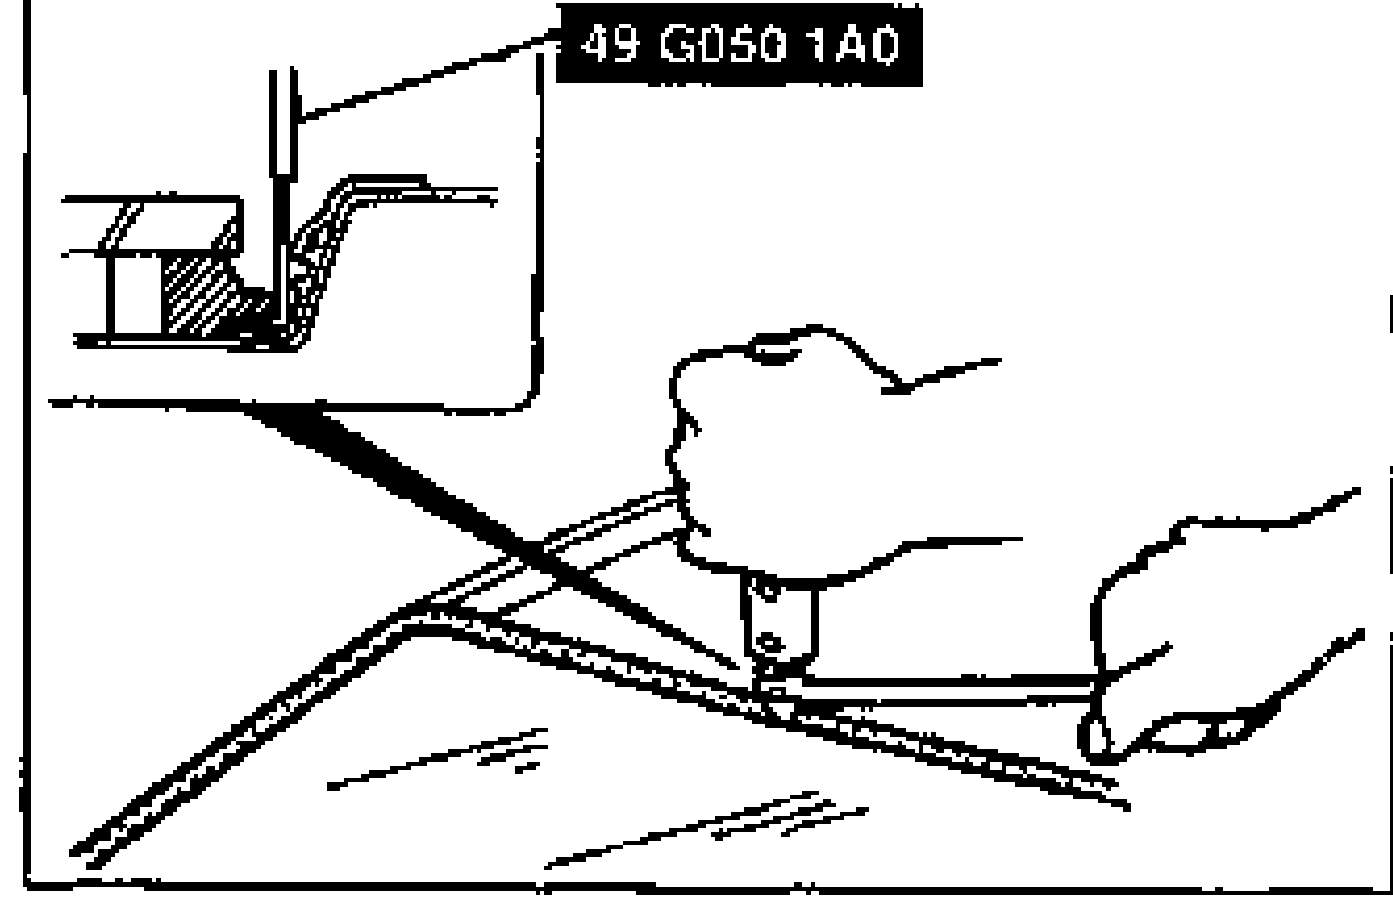
    Cross-section showing SST 49 G050 1A0 blade inserted into the sealant, cutting near the body. A hand pulls the tool's bar.
  4. 4
    Insert the blade of the SST into the sealant, and pull on the bar to cut the sealant near the glass as shown.
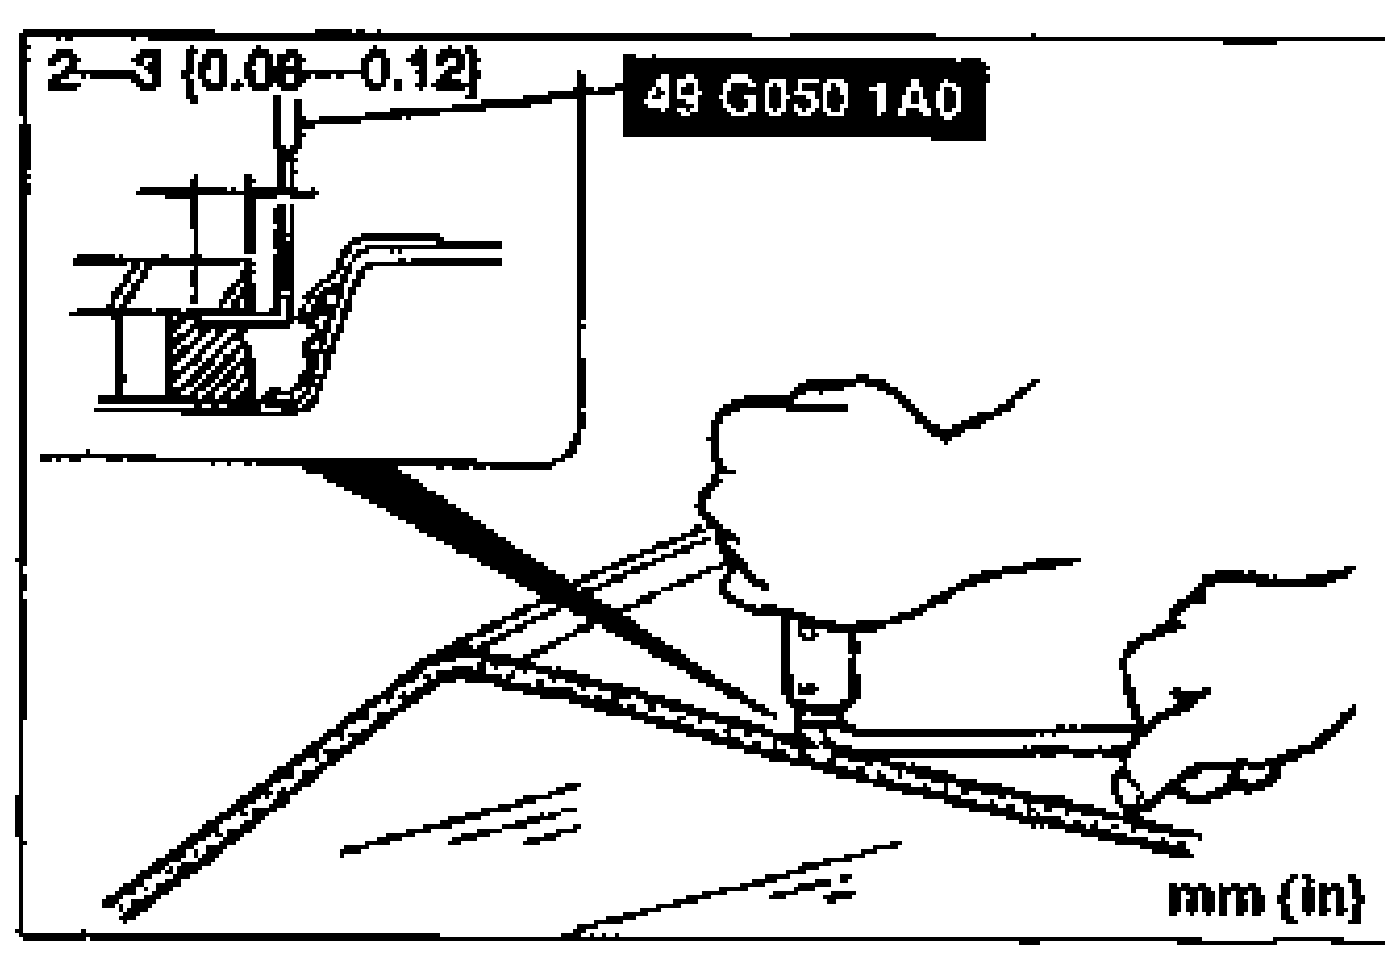
    Cross-section showing SST 49 G050 1A0 blade inserted into the sealant, cutting near the glass; dimension callout '2-3 (0.08-0.12)' mm (in) marks the cut depth from the glass. A hand pulls the tool's bar.
  5. 5
    Remove as much sealant as possible from between the body and the glass.
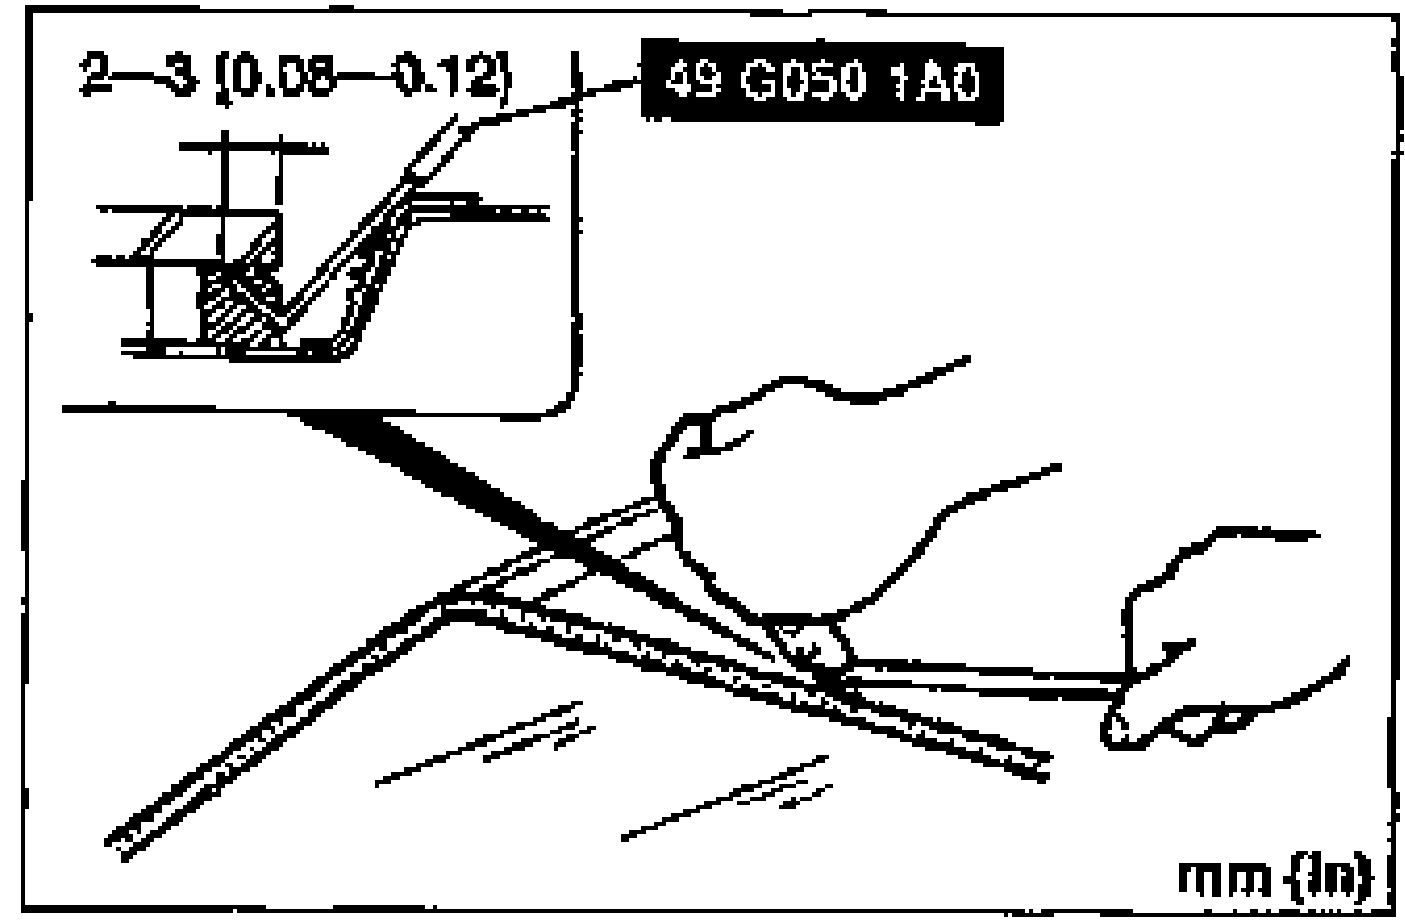
    Cross-section showing SST 49 G050 1A0 blade cutting the remaining sealant; dimension callout '2-3 (0.08-0.12)' mm (in). A hand pulls the tool's bar.
  6. 6
    Carefully clean around the edge of the glass and the adhesion surface at the body.

Search Manual

Search pages, specs, and procedures