Mazda MX-3 silhouetteMX-3

WINDSHIELD

S-43prose procedure

Windshield Installation note (continued)

  1. 3
    Securely bond a new dam 7 mm {0.28 in} from the edge of the glass as shown. Allow it to dry completely.
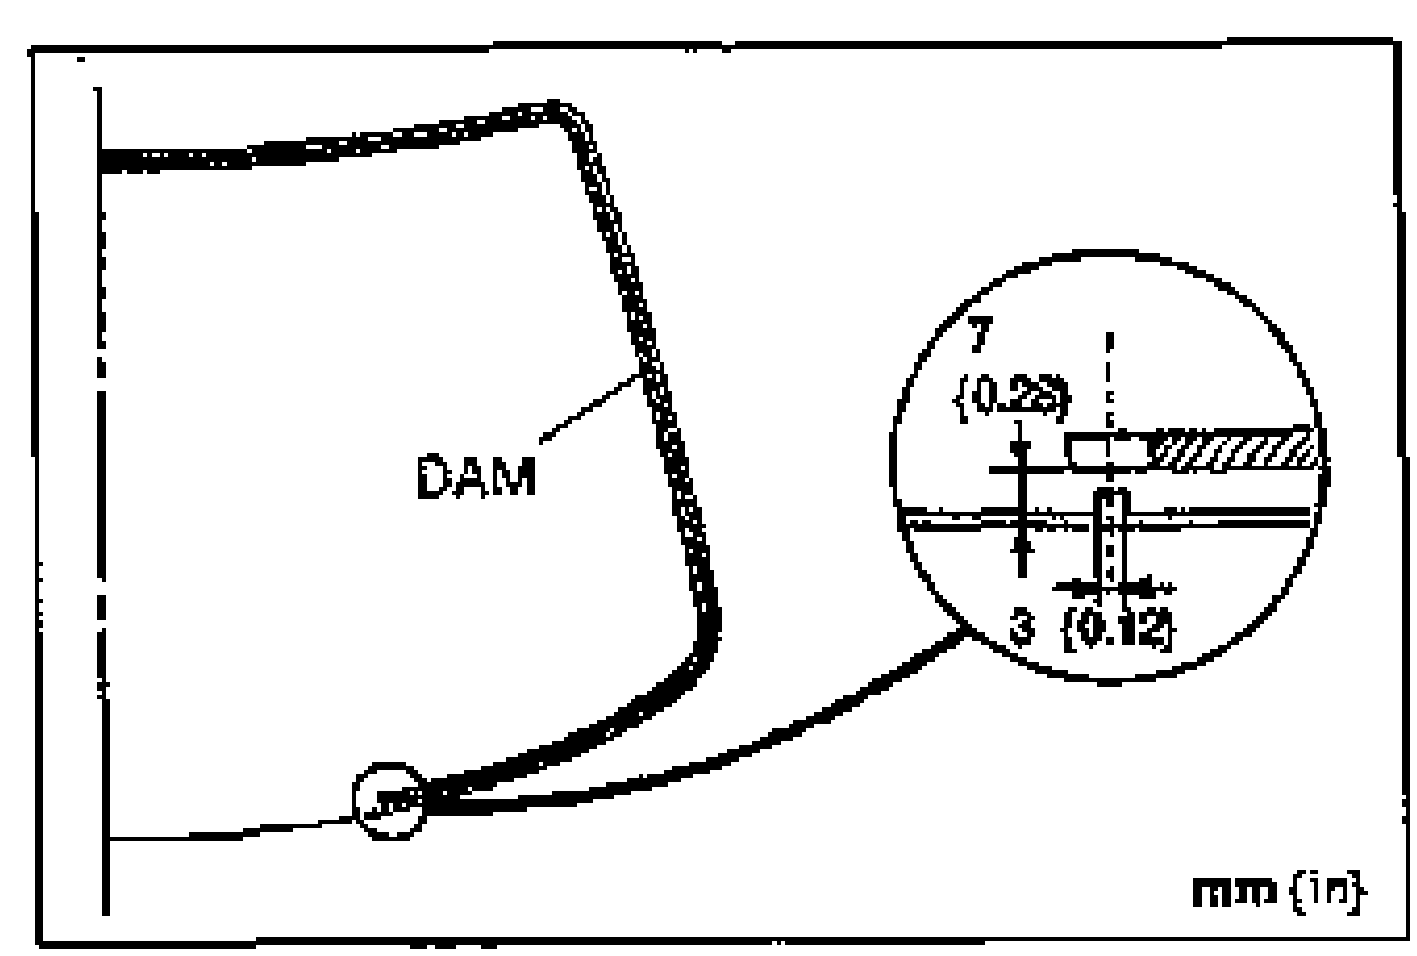
    Windshield glass with a new dam bonded along the edge, with a magnified inset cross-section showing dimensions 7 (0.28) for dam offset from glass edge and 3 (0.12). Labeled DAM; unit note 'mm (in)'.
  2. 4
    Install the spacers onto the body. If a spacer is damaged, replace it.
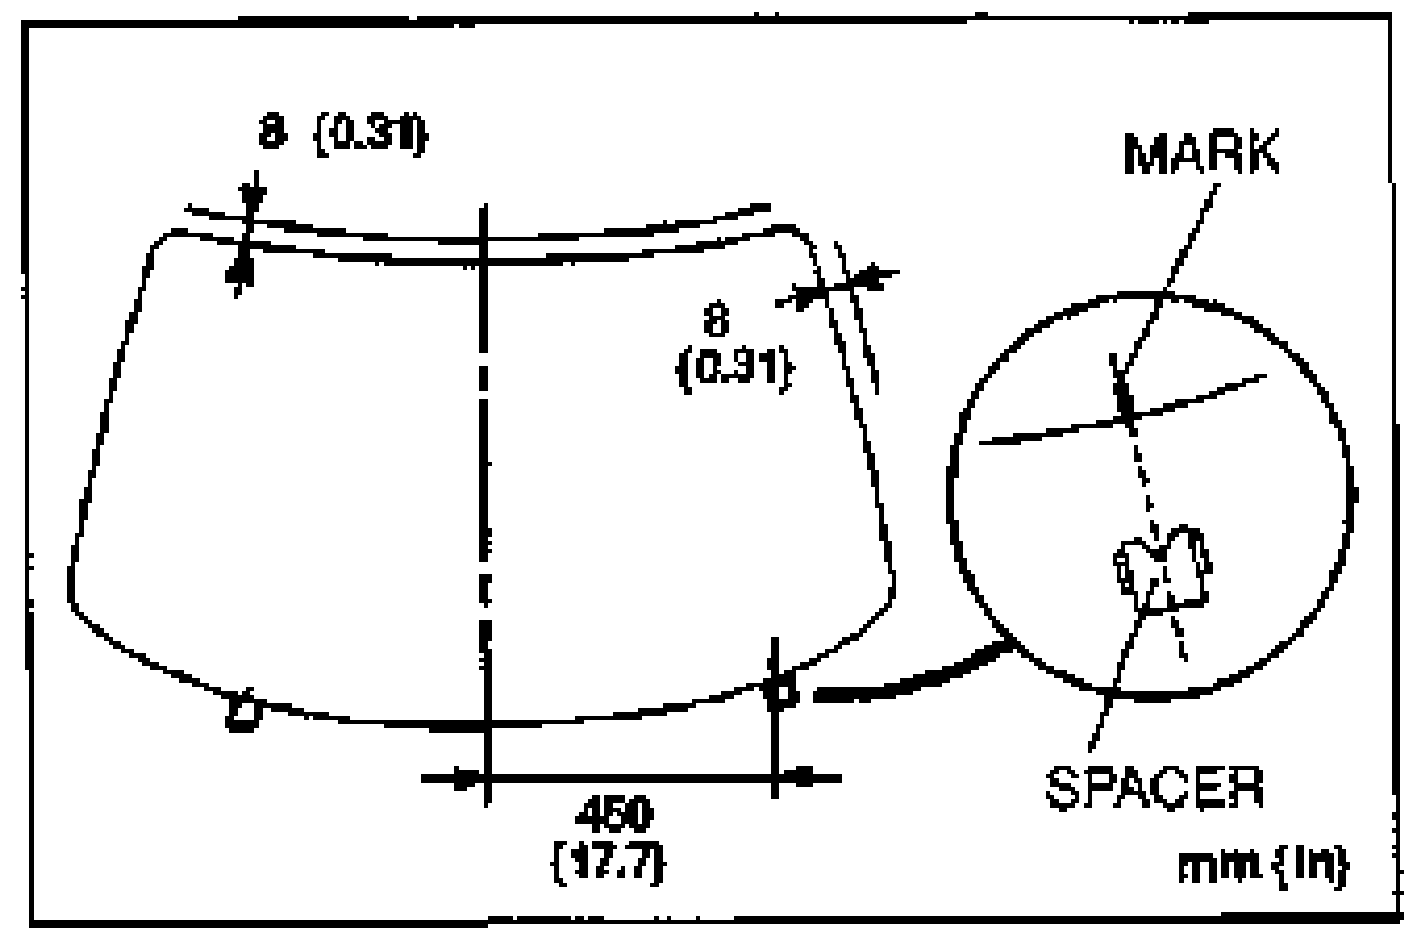
    Front view of the windshield with glass-to-body clearance dimensions: 8 (0.31) at top, 450 (17.7) center span, and a magnified inset showing the V-notch SPACER and the alignment MARK on the glass. Unit note 'mm (in)'.
  3. 5
    Temporarily install the glass onto the body and adjust the glass-to-body clearance.
  4. 6
    Make a mark on the glass directly above the V-notch of the spacers.
  5. 7
    Remove the glass.
  6. 8
    Apply primer onto the bonding area of the glass, body, and molding by using a brush. Use only glass primer on the glass and body primer on the body and molding. Keep the area free of dirt and grease, and do not touch the surface. Allow it to dry for approximately 30 minutes.
    Hand applying primer with a brush to the molding/body bonding area. Cross-section details of the MOLDING (UPPER) and MOLDING (SIDE) profiles are shown at right, with BODY PRIMER application area labeled.
  7. 9
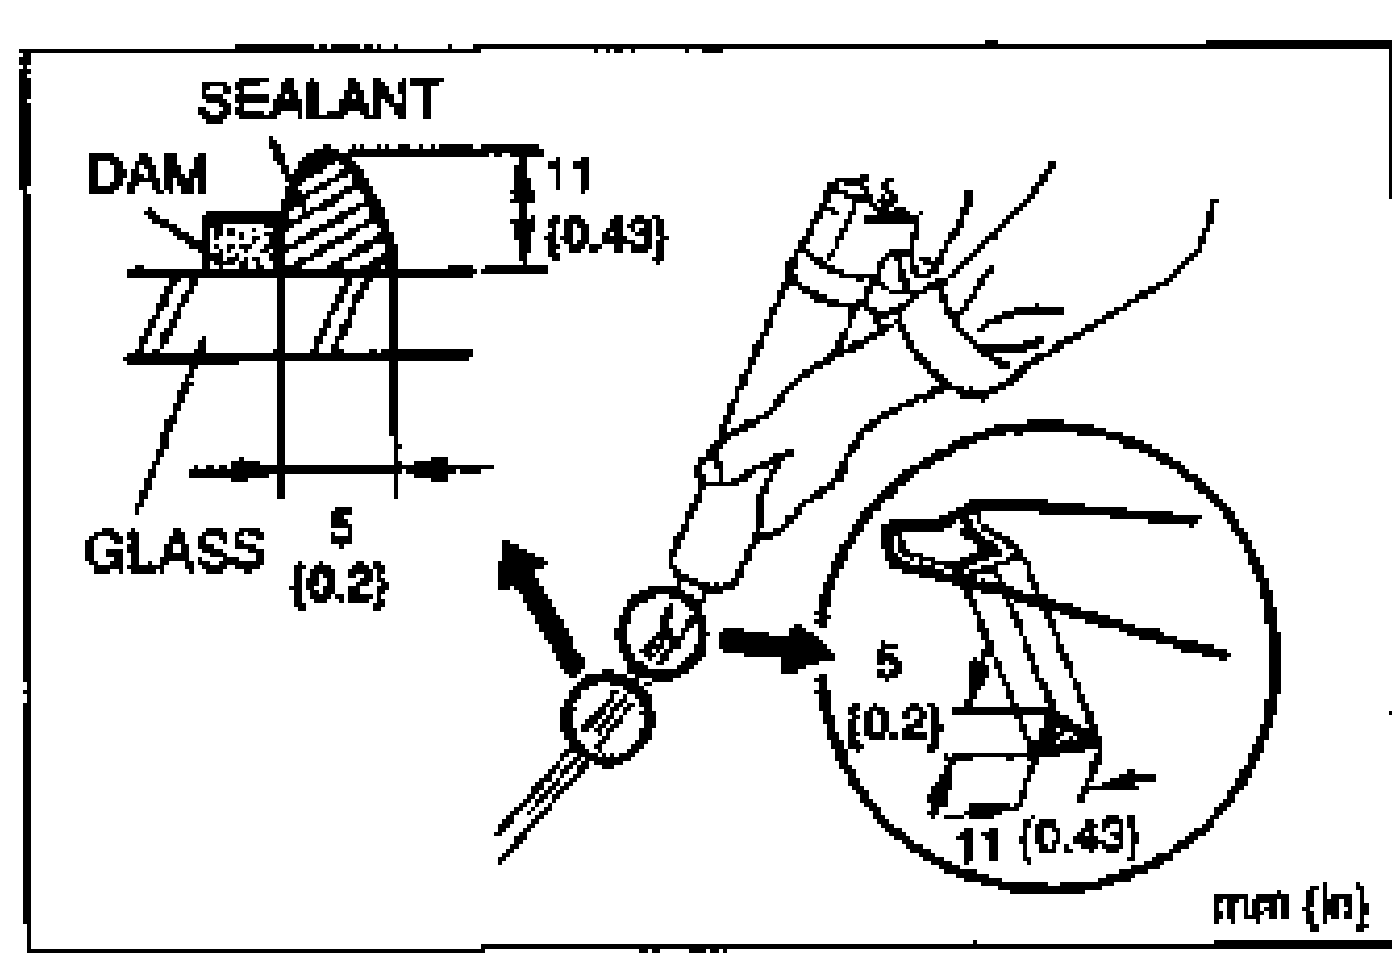
    After the primer has dried, apply an 11 mm {0.43 in} high bead of repair sealant around the circumference of the glass as shown. Keep the bead of sealant smooth and even, reshaping it with a spatula where necessary. If the windshield is being reused, apply new repair sealant over the original.
    Cross-section of the repair sealant bead application on glass with dam. Dimensions: 11 (0.43) bead height, 5 (0.2) widths. A hand with a sealant gun and a magnified inset of the nozzle tip are shown. Labeled SEALANT, DAM, GLASS; unit note 'mm (in)'.
  8. 10
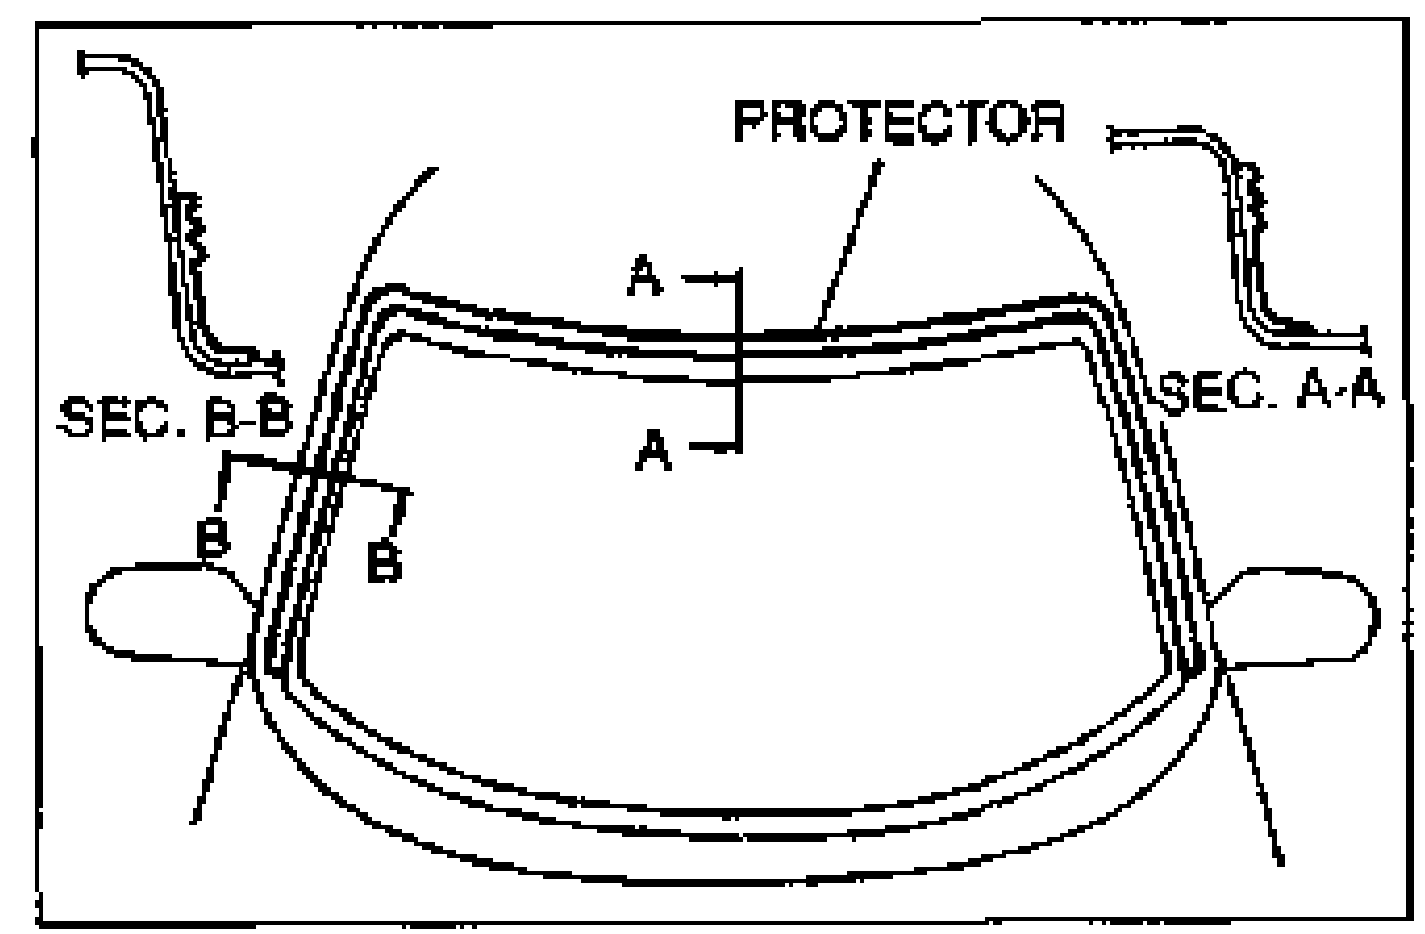
    If the protector was removed, bond a new one onto the body as shown.

    Front view of the windshield opening showing the PROTECTOR routing along the body, with section markers A-A and B-B and their cross-section details (SEC. A-A, SEC. B-B) at the sides.

Search Manual

Search pages, specs, and procedures