Mazda MX-3 silhouetteMX-3

REAR WIPER AND WASHER

S-39parts diagram

COMPONENTS

Removal / Installation

  1. 1
    Disconnect the negative battery cable.
  2. 2
    Remove in the order shown in the figure. To remove the rear washer pipe, remove the liftgate upper trim (page S-65) and the rear portion of the headliner (page S-70).
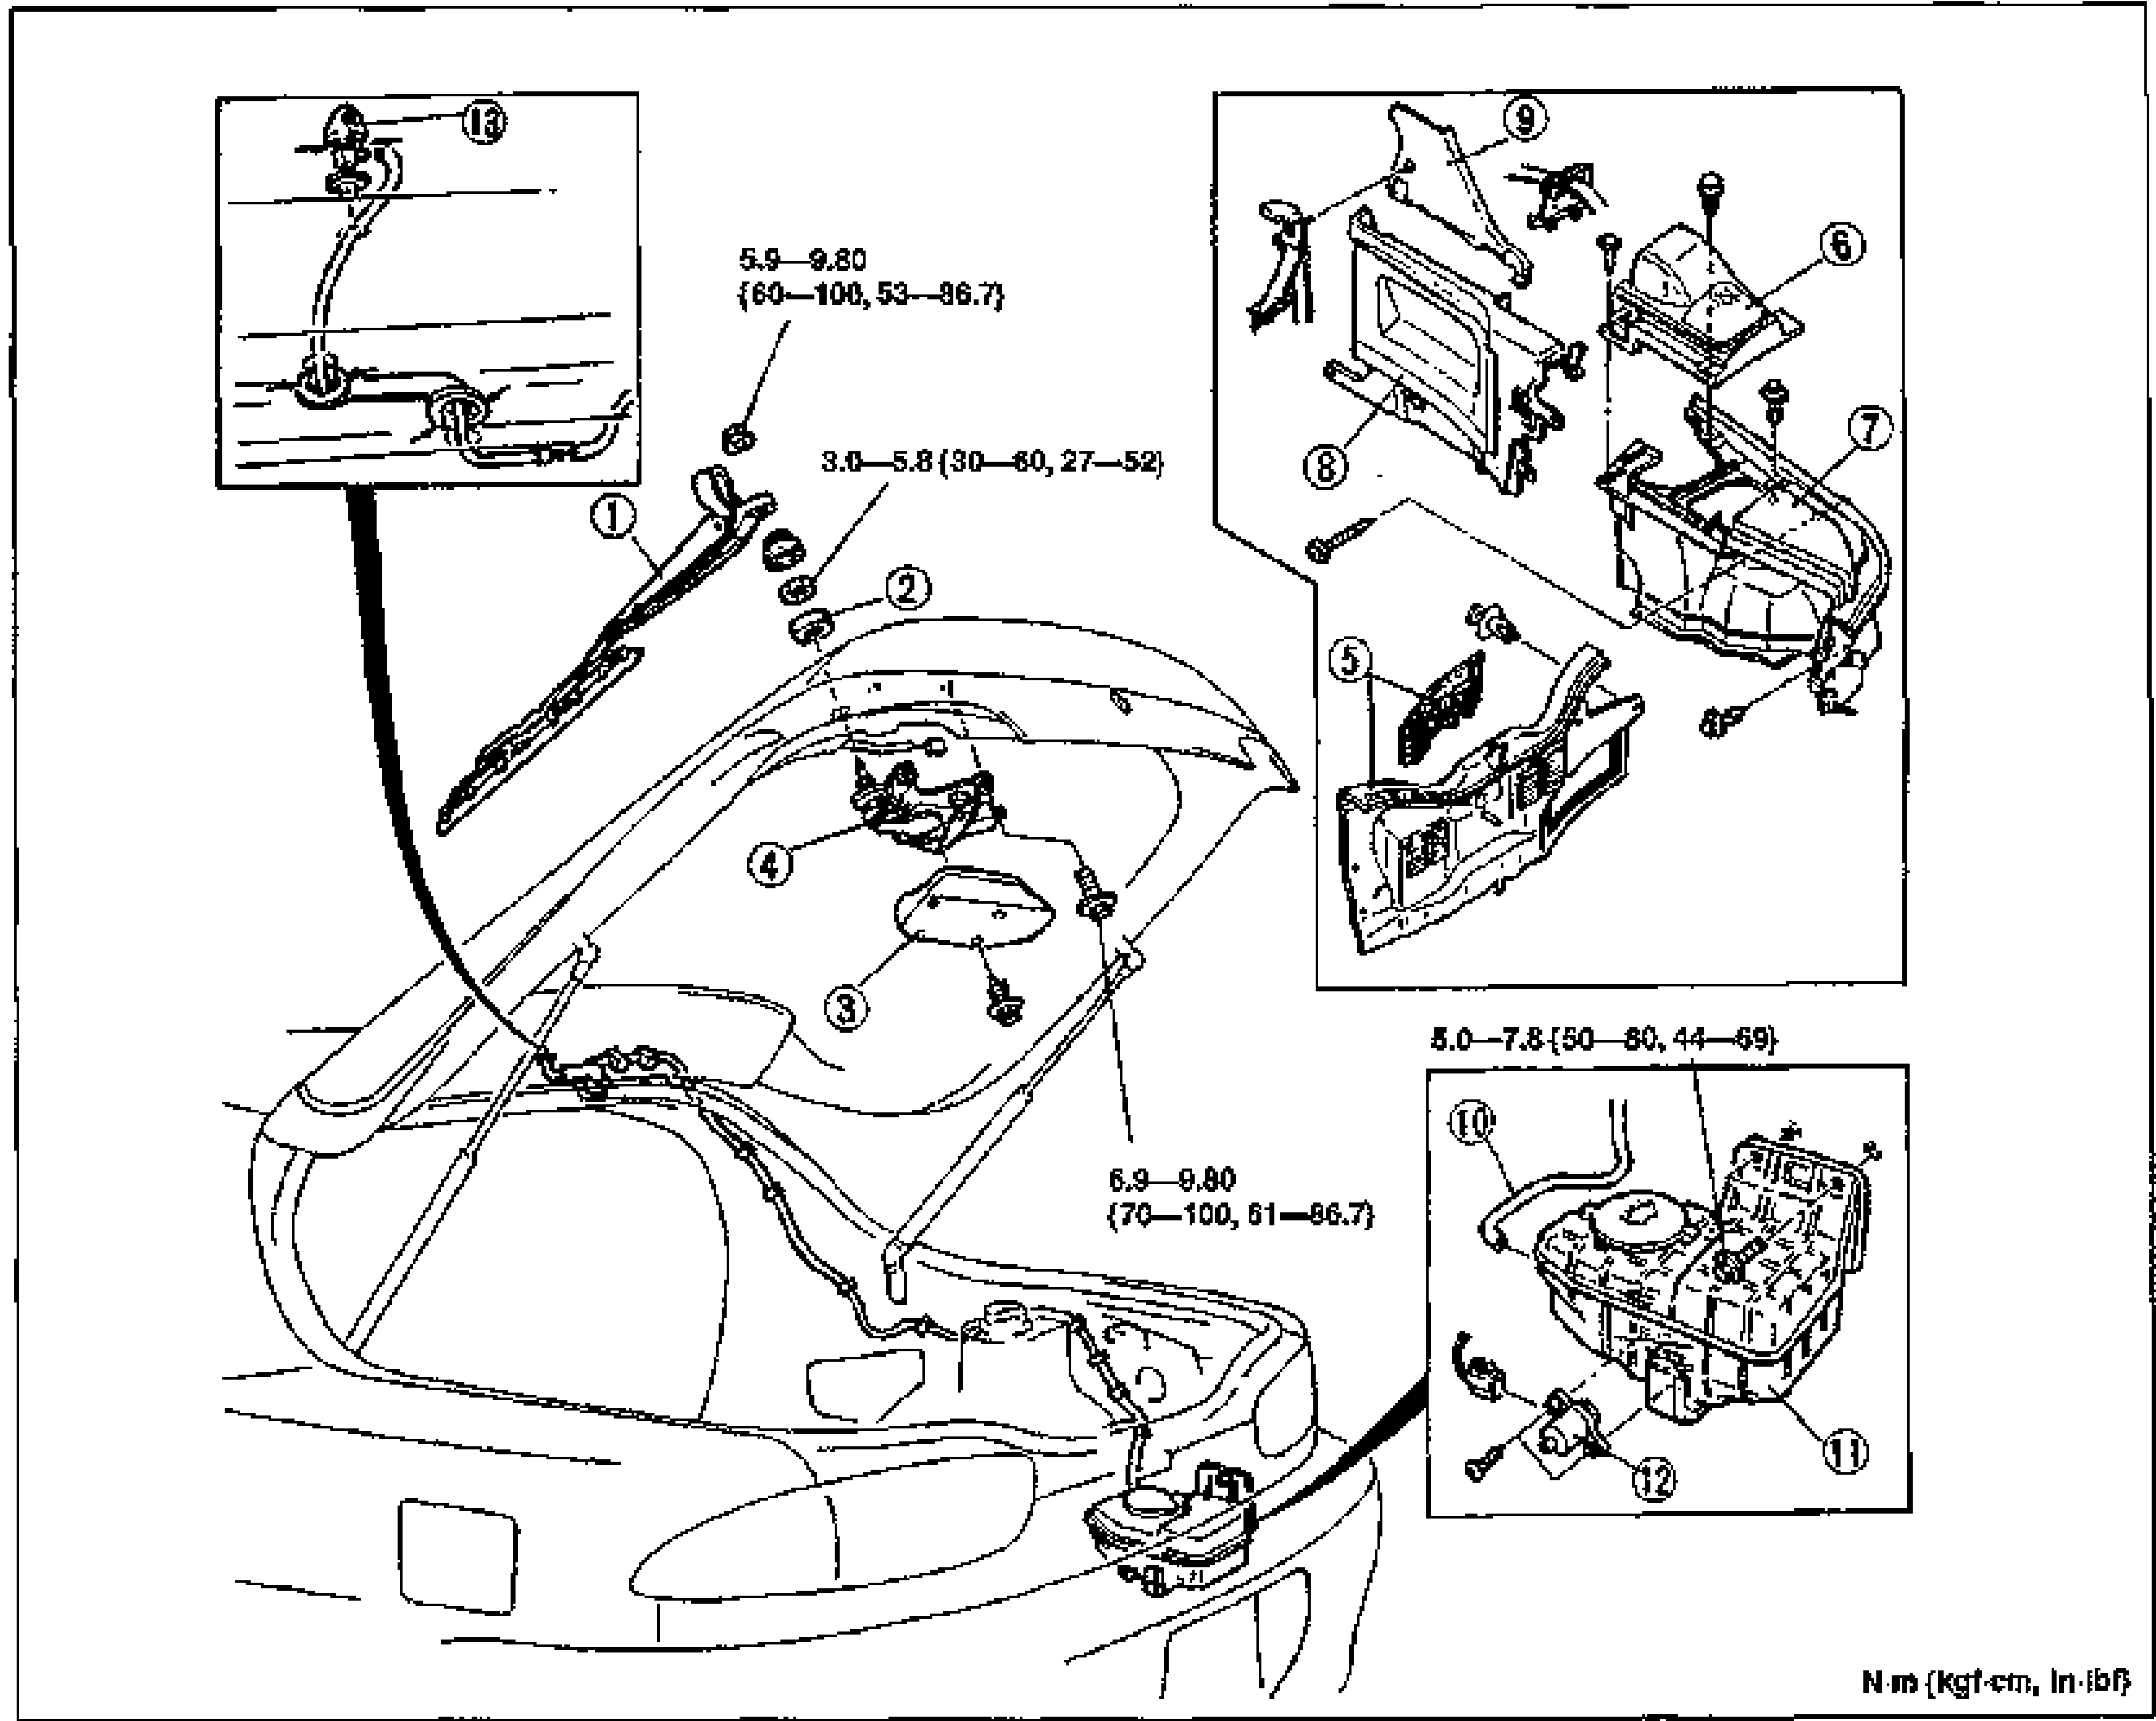
    Composite exploded view of the rear wiper and washer system on the liftgate/hatch. Main view (left/center) shows the rear of the car with rear wiper arm and blade (1), outer bushing (2), rear wiper cover (3) and rear wiper motor (4). Top-right inset shows trunk/rear interior trim panels: trunk end trim (5), rear speaker cover (6), trunk side trim (7), quarter trim (8), B-pillar trim (9). Bottom-right inset shows the rear washer pipe (10), rear washer tank (11) and rear washer motor (12). A top-left inset shows the rear washer nozzle (13). Torque values: 5.9—9.80 N·m (60—100 kgf·cm, 53—86.7 in-lbf); 3.0—5.8 N·m (30—60 kgf·cm, 27—52 in-lbf); 6.9—9.80 N·m (70—100 kgf·cm, 61—86.7 in-lbf); 5.0—7.8 N·m (50—80 kgf·cm, 44—69 in-lbf).
  3. 3
    Install in the reverse order of removal, referring to Installation note.
49 - 76N·m

Rear wiper

Parts DiagramFig. fig1
#Part NameNotes
1Rear wiper arm and bladeInstallation note ... page S-40; Adjustment ... page S-40
2Outer bushing
3Rear wiper cover
4Rear wiper motor

Rear washer

Parts DiagramFig. fig1
#Part NameNotes
5Trunk end trimRemoval / Installation ... page S-65
6Rear speaker coverRemoval / Installation ... page S-65
7Trunk side trimRemoval / Installation ... page S-65
8Quarter trimRemoval / Installation ... page S-65
9B-pillar trimRemoval / Installation ... page S-65
10Rear washer pipe
11Rear washer tank
12Rear washer motor
13Rear washer nozzleAdjustment ... page S-40

Search Manual

Search pages, specs, and procedures