Mazda MX-3 silhouetteMX-3

REAR SUSPENSION (STRUT) — Disassembly / Inspection / Assembly

R-30parts diagram

Disassembly / Inspection / Assembly

  1. 1
    Disassemble in the order shown in the figure, referring to Disassembly Note.
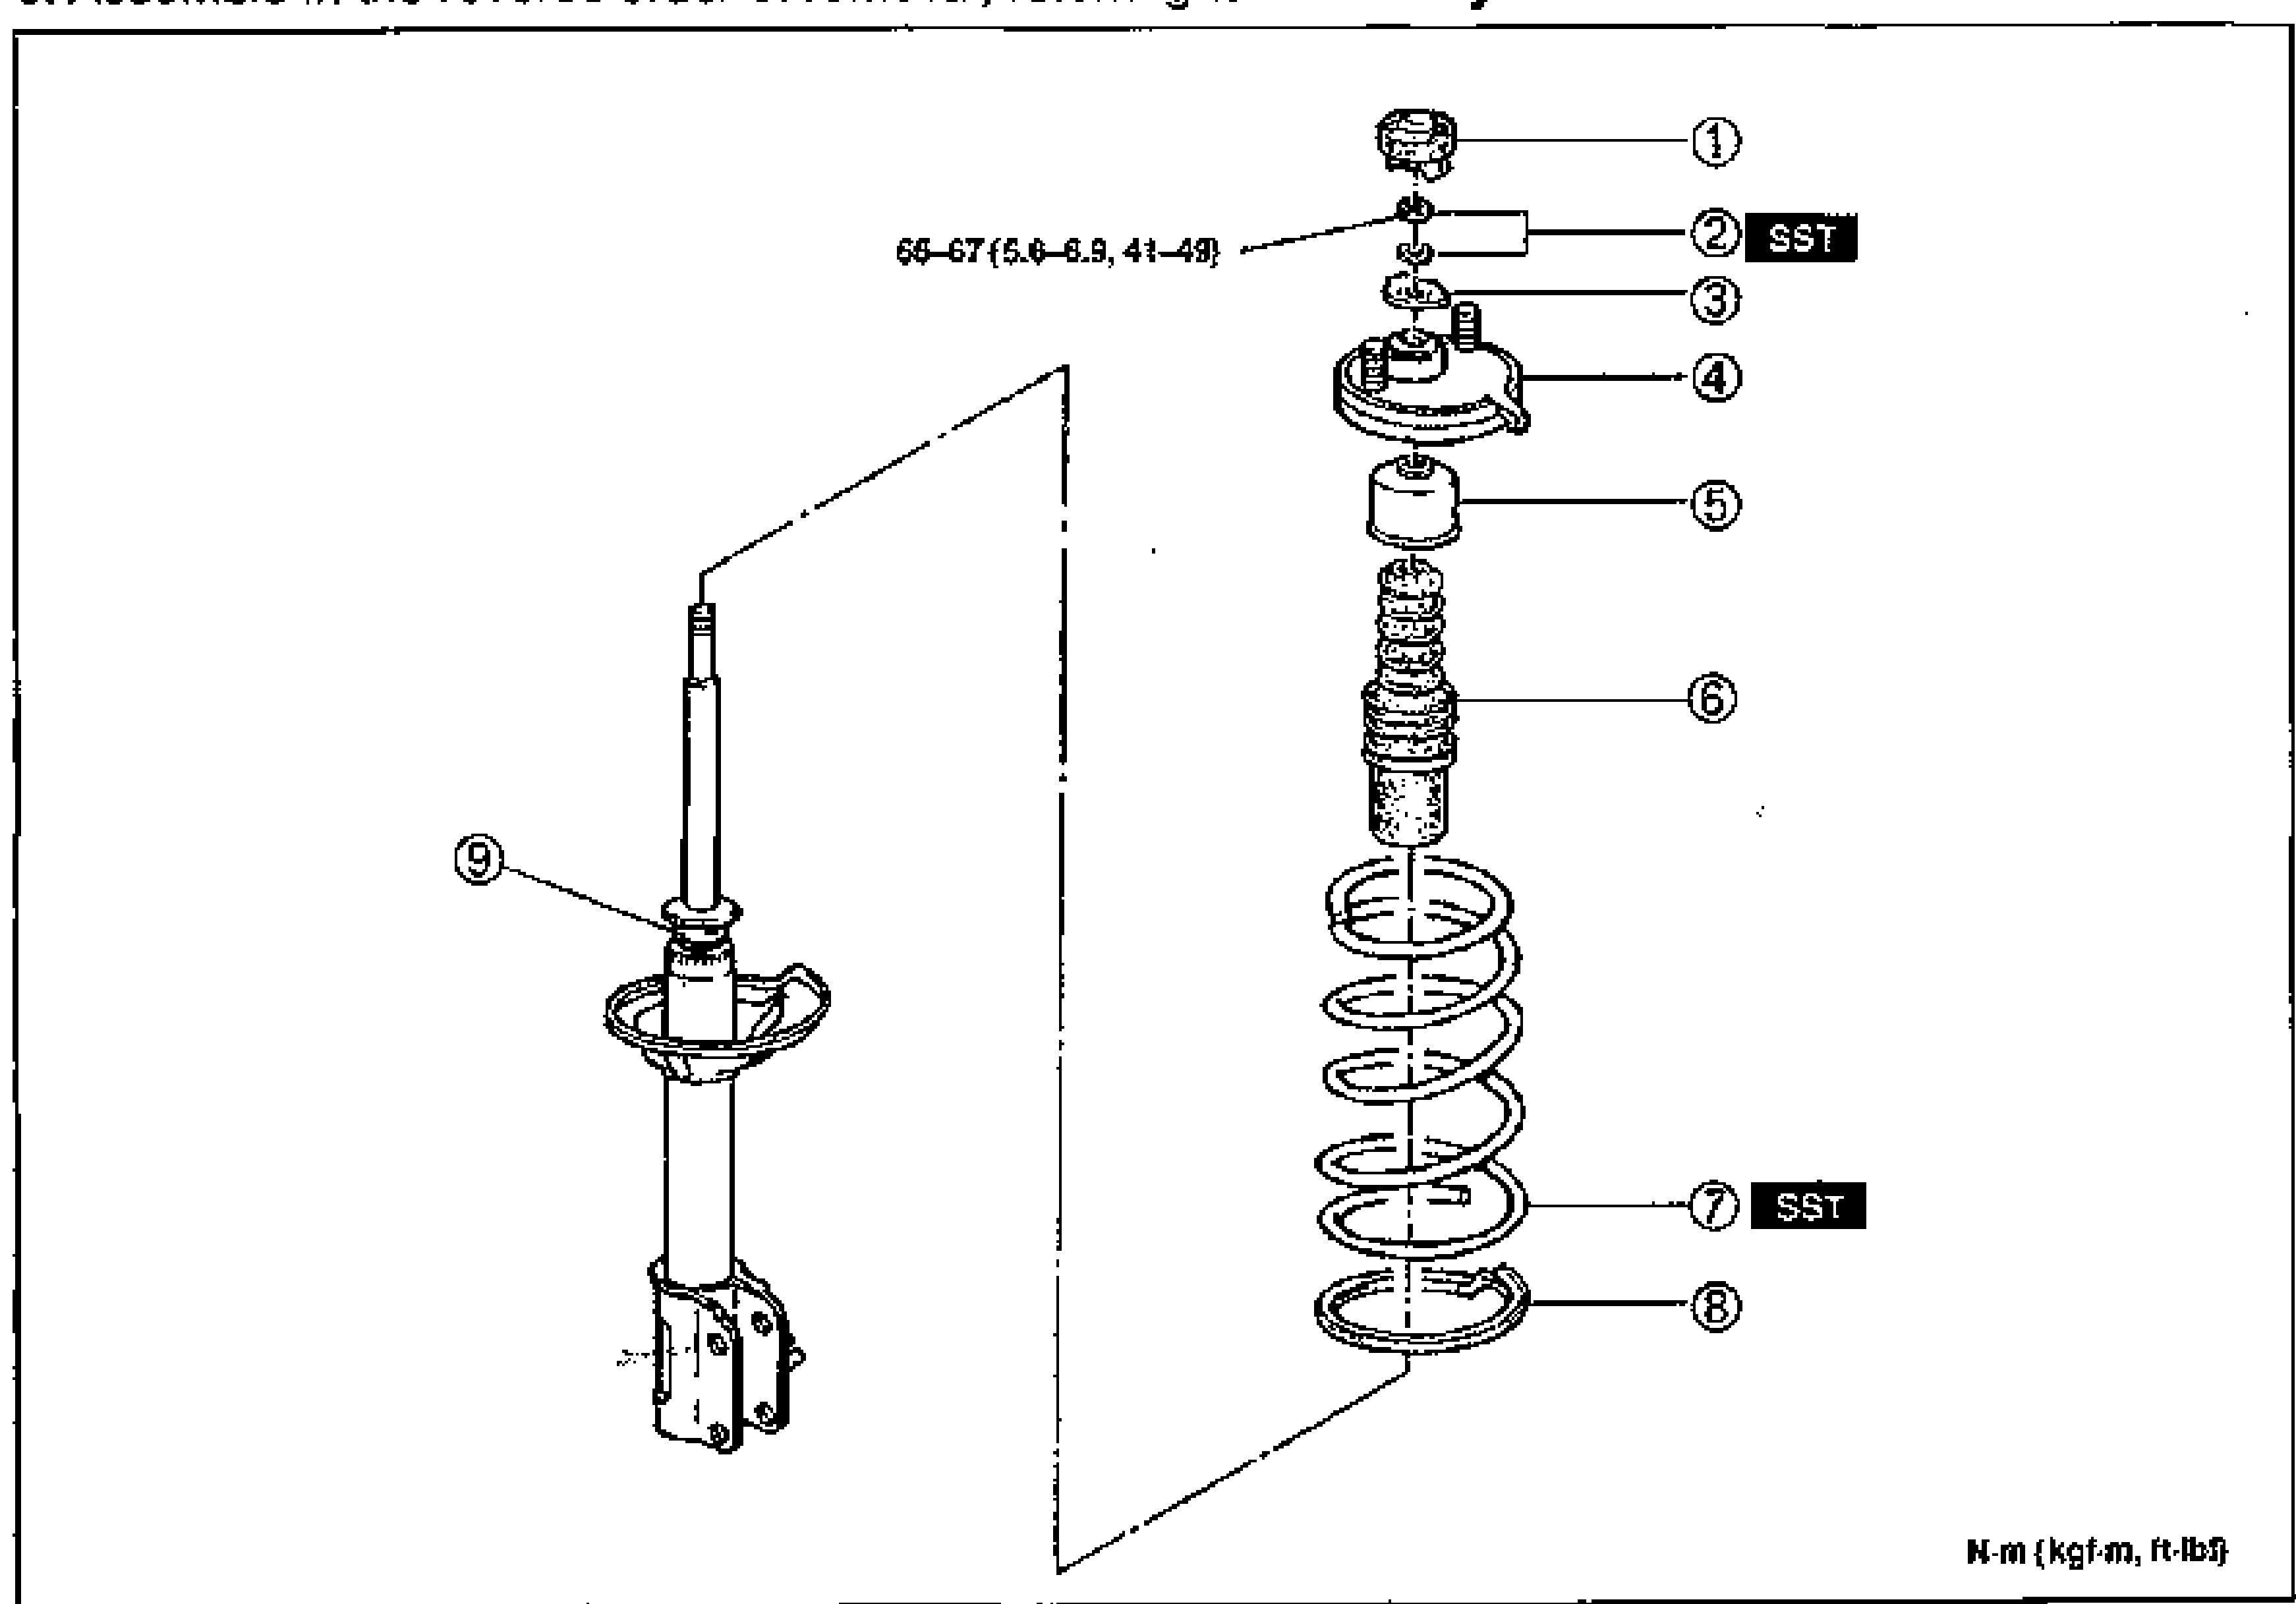
    Exploded view of the rear shock absorber (strut) assembly. Left: assembled shock absorber/strut (callout 9). Right: stacked components from top — cap (1), nut and washer (2, marked SST), retainer (3), mounting block (4), stopper seat (5), bound stopper (6), coil spring (7, marked SST), lower spring seat (8). Tightening torque on nut (2): 66-67 N·m {5.6-6.9 kgf·m, 41-49 ft·lbf}. Torque legend N·m {kgf·m, ft·lbf} at bottom-right.
  2. 2
    Visually inspect each part and replace as necessary.
  3. 3
    Assemble in the reverse order of removal, referring to Assembly Note.
Parts DiagramFig. fig1
#Part NameNotes
1Cap
2Nut and washerDisassembly Note ... below. Tightening torque 66-67 N·m {5.6-6.9 kgf·m, 41-49 ft·lbf}. SST
3Retainer
4Mounting blockInspect for damage weakness
5Stopper seat
6Bound stopperInspect for damage and cracks
7Coil springAssembly Note ... page R-31. Inspect for damage and weakness. SST
8Lower spring seatInspect for damage and cracks
9Shock absorberInspection ... page R-14. Disposal of shock absorber ... page R-14

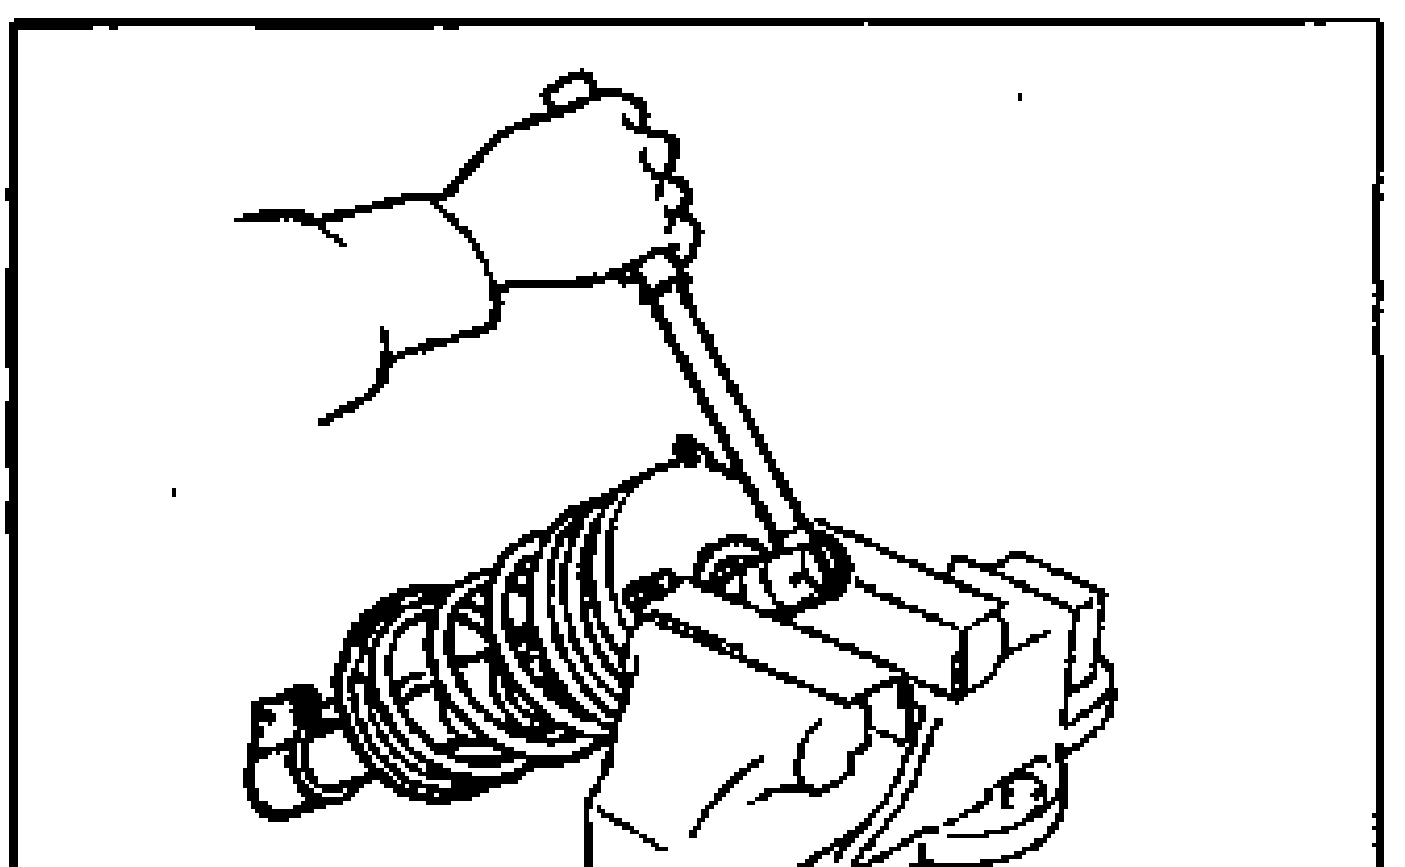
Disassembly Note — Nut and washer

Disassembly Note — Nut and washer

  1. 1
    Secure the mounting block in a vise.
    Disassembly Note illustration: a hand using a wrench to loosen the nut on a shock absorber/coil spring assembly secured (mounting block) in a bench vise.
  2. 2
    Loosen the nut several turns, but do not remove it.

Search Manual

Search pages, specs, and procedures