
CLUTCH MASTER CYLINDER
H-9prose procedureRemoval Note
Clutch pipe
Clutch pipe — Removal Note
- 1Disconnect the clutch pipe by using the SST.
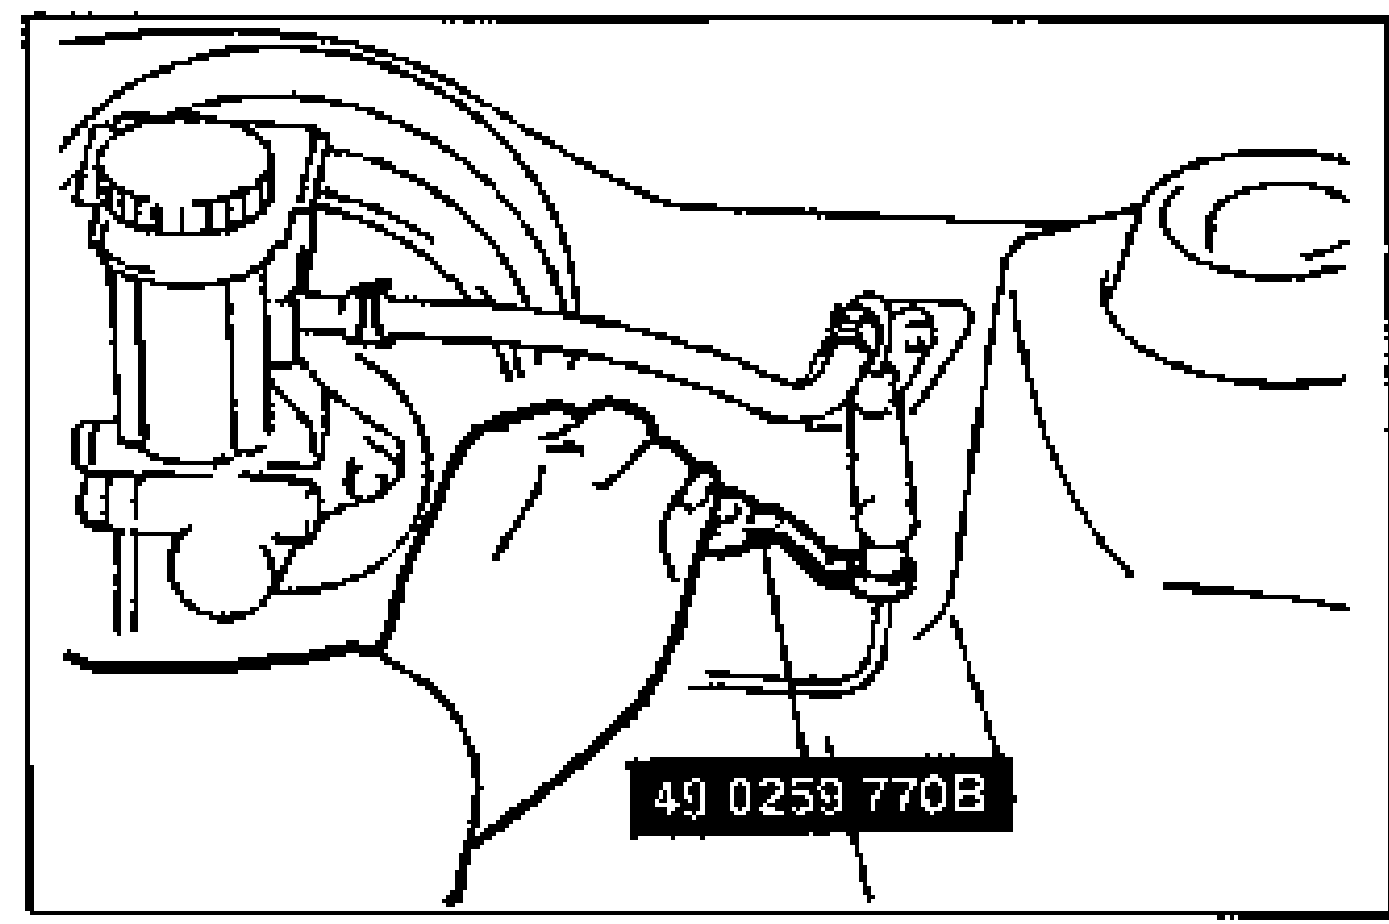
- 2Disconnect the clutch hose from the reservoir.
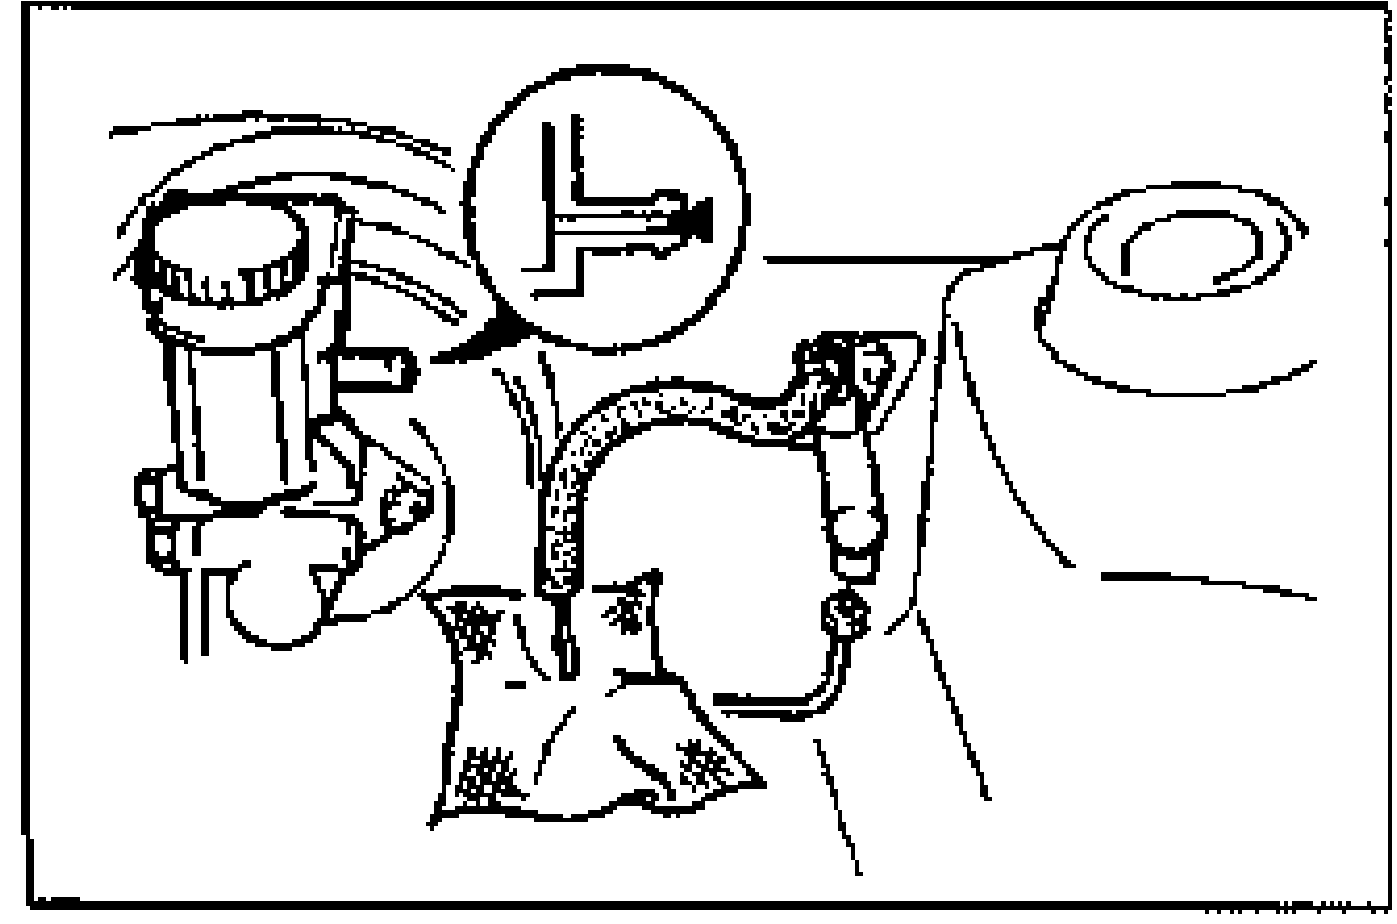
- 3Plug the outlet of the reservoir.
Installation Note
Clutch pipe
Clutch pipe — Installation Note
- 1Modify the clutch pipe tightening torque to allow for a torque wrench-SST combination. (Refer to section GI "Torque Formulas".)
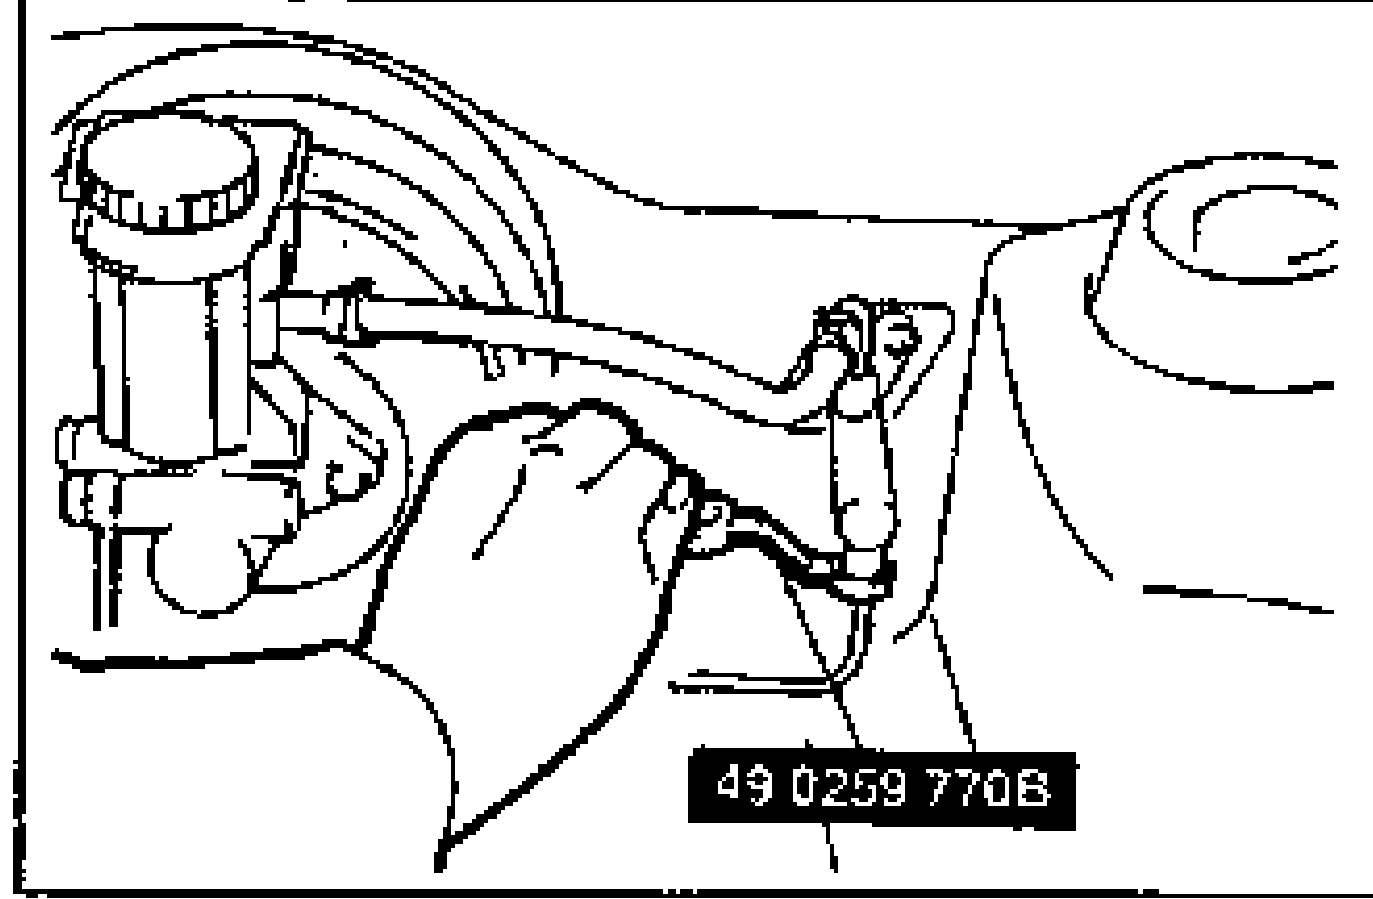
- 2Tighten the clutch pipe by using the SST.Tightening torque: 12.8—21.5 N·m {130—220 kgf·cm, 113—190 in·lbf}
| Specification | Value |
|---|---|
| Clutch pipe | ≈126 - 211N·m |
Clutch pipe
126 - 211N·m
AIR BLEEDING
The clutch hydraulic system must be bled to remove air introduced whenever a hydraulic line is disconnected.
CAUTION
Clutch fluid will damage painted surfaces. If clutch fluid does get on a painted surface, wipe it off immediately.
Air Bleeding
- 1Remove the bleeder cap from the clutch release cylinder and attach a vinyl hose to the bleeder plug.
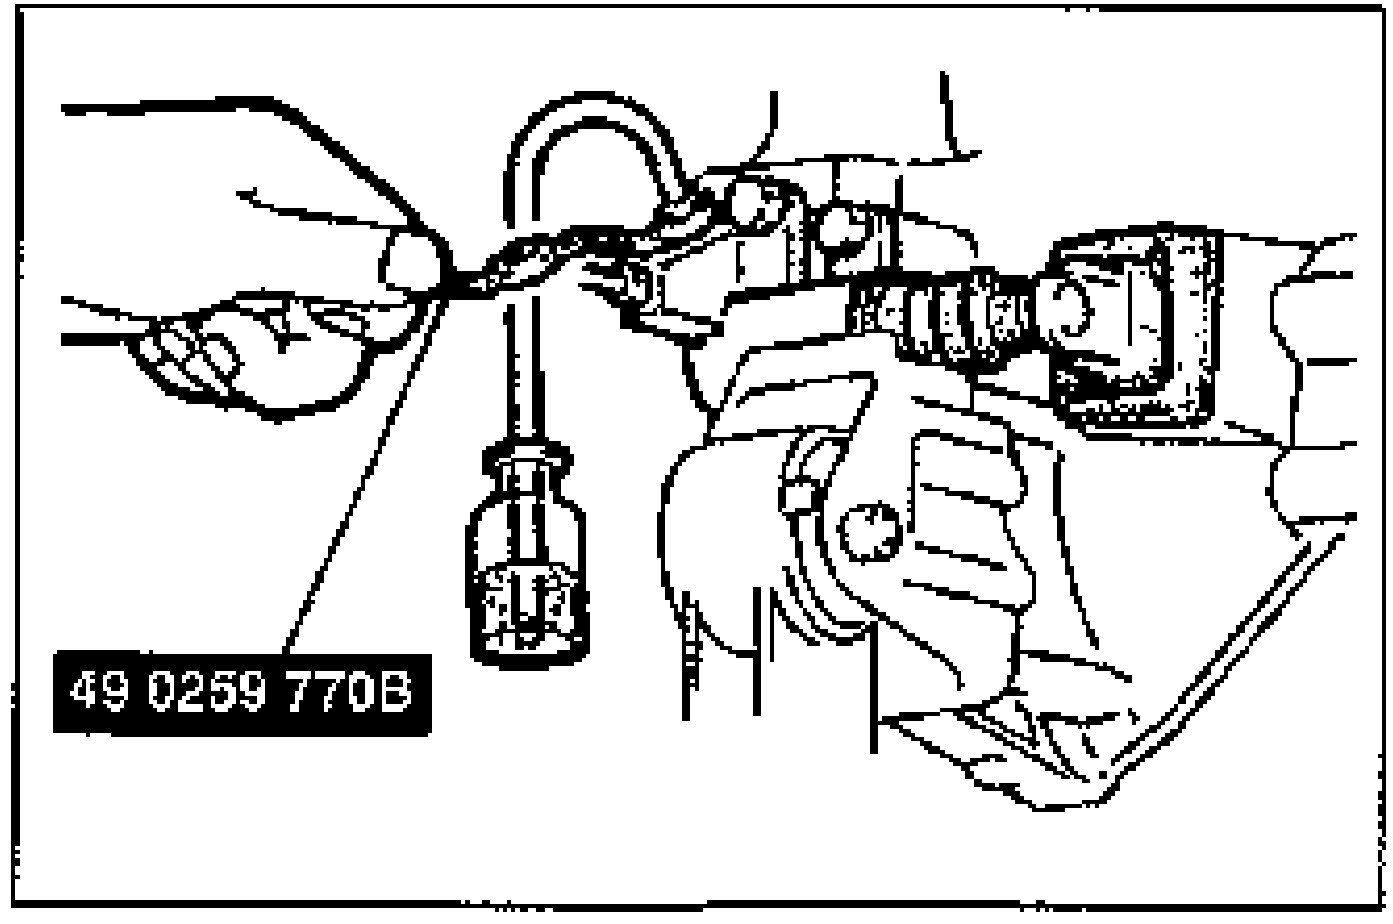
- 2Insert the other end of the vinyl hose into a clear container.
- 3Working with another person, have the person depress the clutch pedal several times, then hold it down.
- 4With the clutch pedal depressed, loosen the bleeder screw by using the SST to let fluid and air escape. Close the bleeder screw.
- 5Repeat steps 3 and 4 until no air bubbles are seen. Make sure the reservoir is always 3/4 full or more during this procedure.