Mazda MX-3 silhouetteMX-3

CLUTCH MASTER CYLINDER

H-8parts diagram

PREPARATION

SST

SST

49 0259 770B
NameWrench, flare nut
UsageFor disconnecting / connecting clutch pipe

REMOVAL / INSTALLATION

Removal / Installation

  1. 1
    Remove in the order shown in the figure, referring to Removal Note.
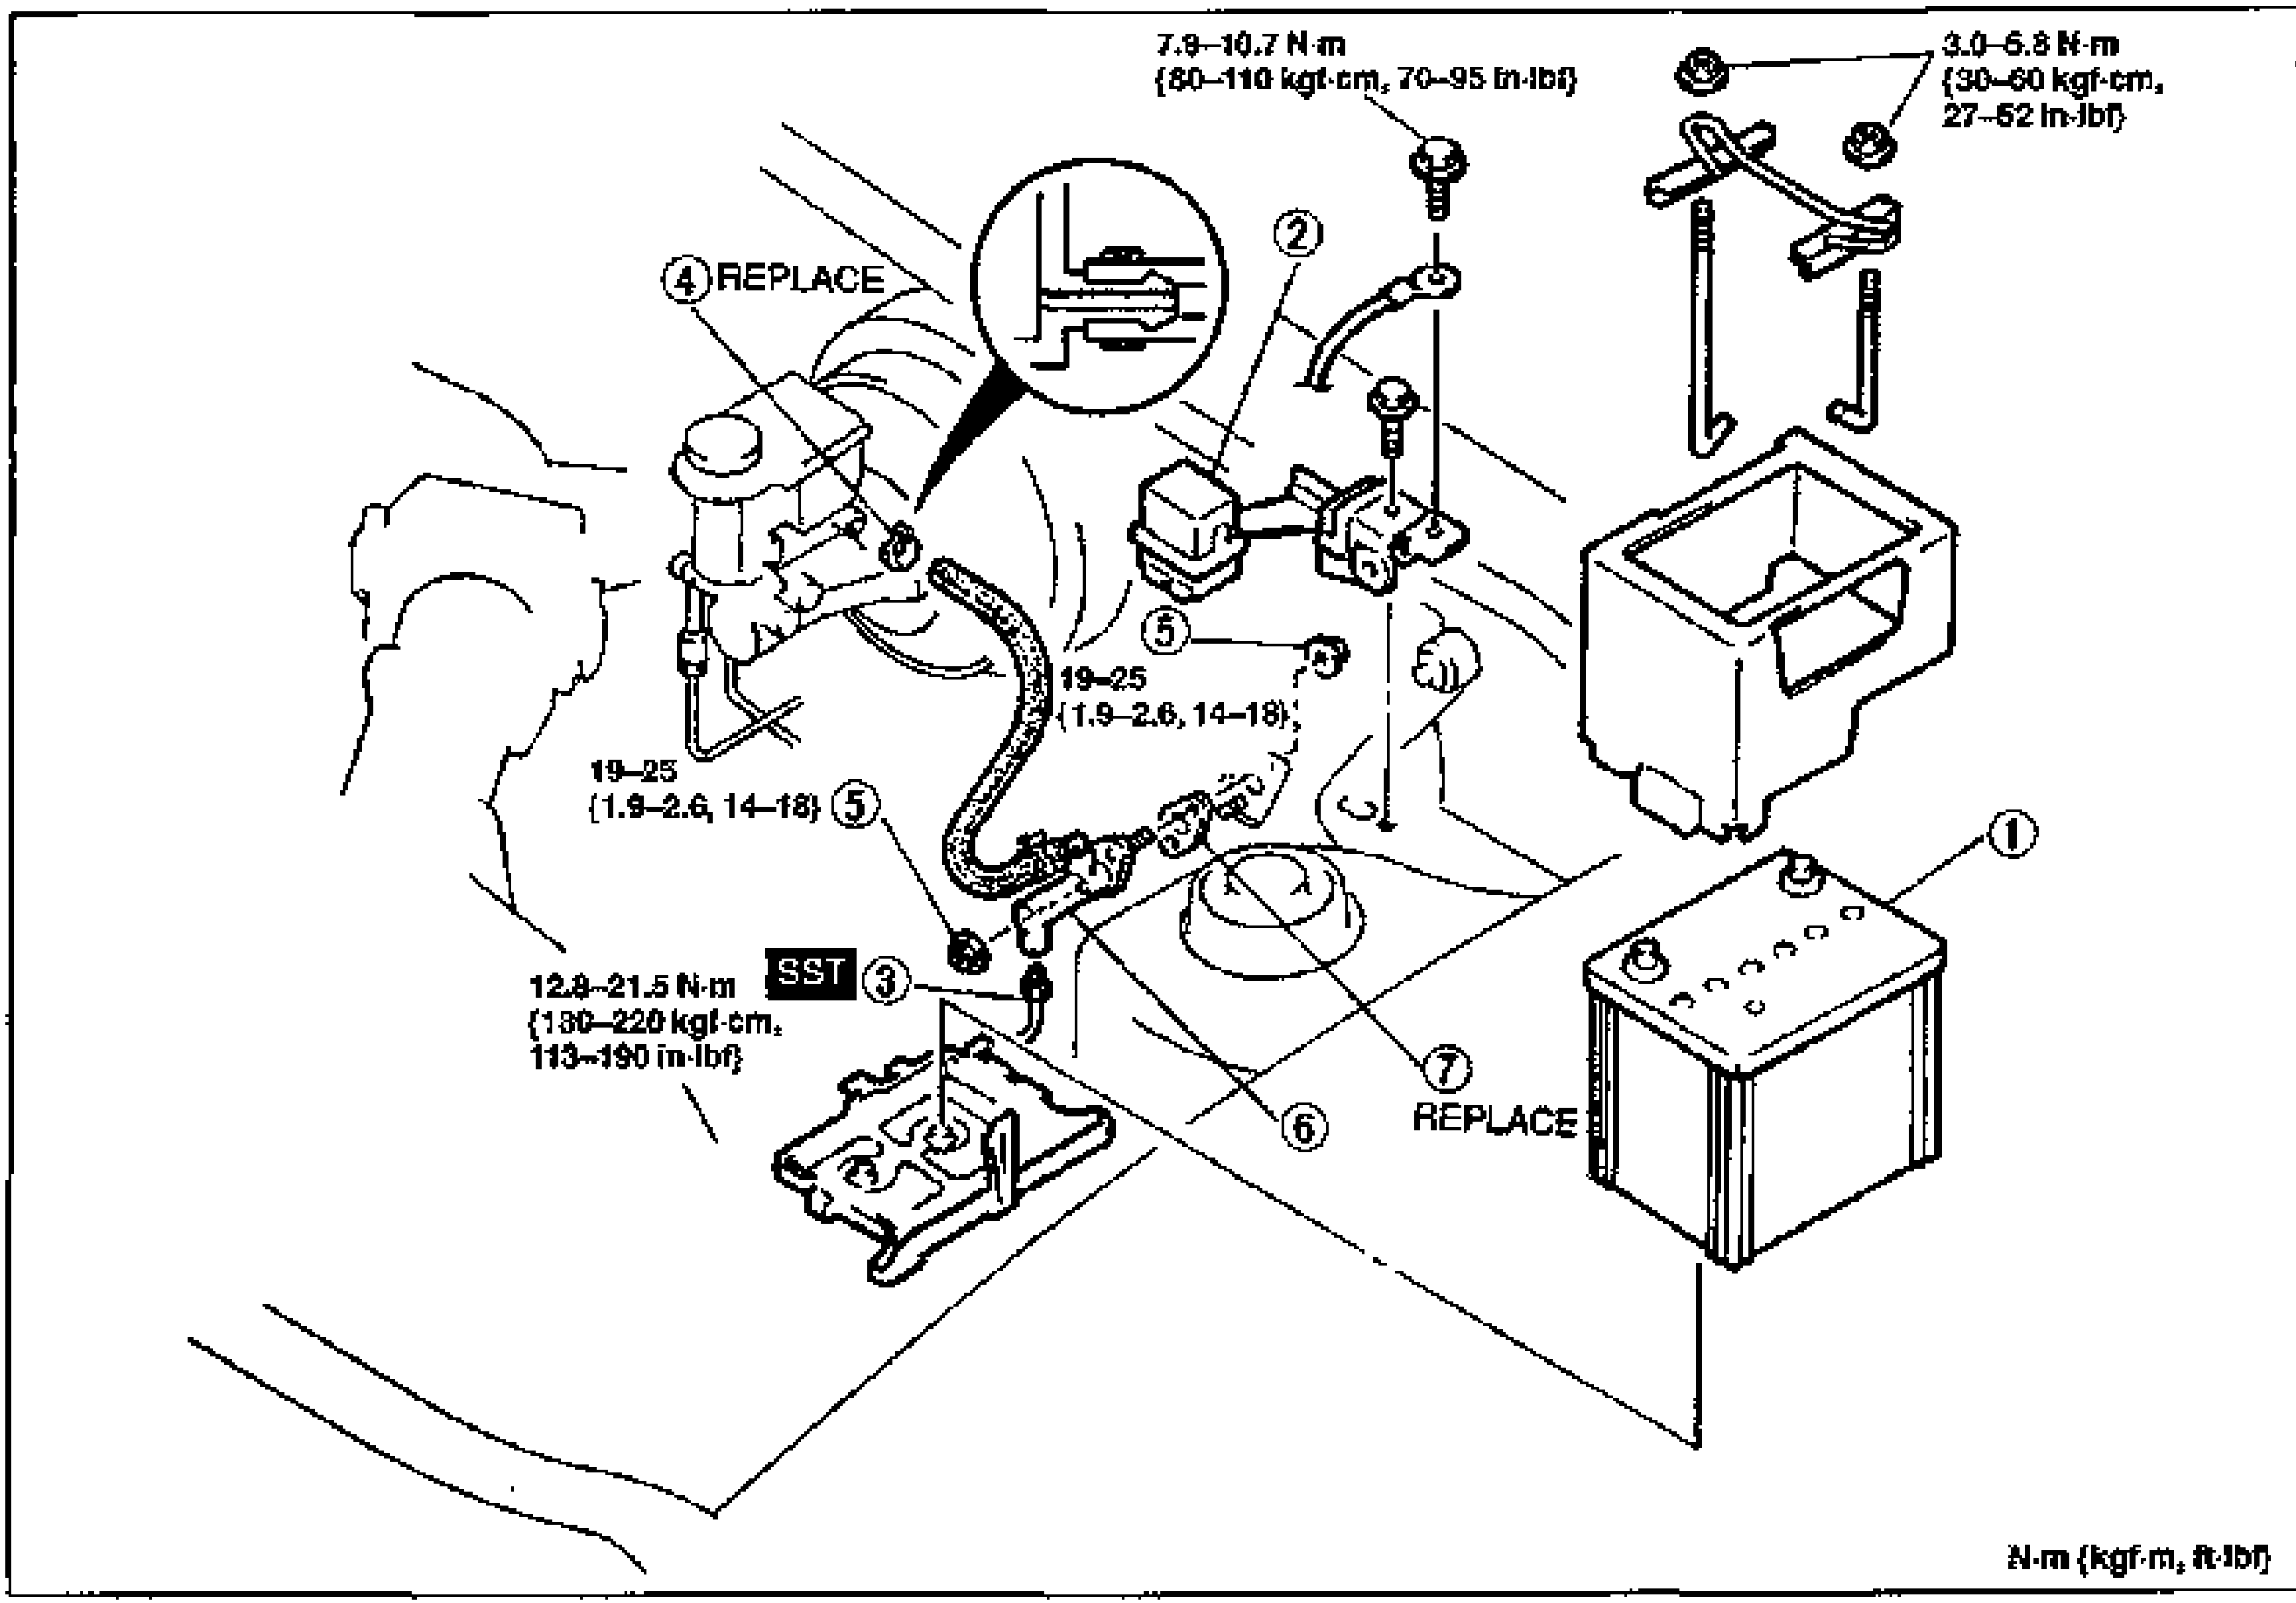
    Exploded view of the clutch master cylinder installation in the engine bay. Numbered balloons 1-7 identify the battery, data link connector, clutch pipe, clip, nut, clutch master cylinder and gasket. An inset shows the SST flare-nut wrench engaging the clutch pipe flare fitting. Torque callouts: nuts (5) 19—25 N·m {1.9—2.6 kgf·m, 14—18 ft·lbf}; nut (2) area 7.9—10.7 N·m {80—110 kgf·cm, 70—95 in·lbf}; battery bracket nuts 3.0—6.8 N·m {30—60 kgf·cm, 27—52 in·lbf}; clutch pipe flare fitting (3, SST) 12.8—21.5 N·m {130—220 kgf·cm, 113—190 in·lbf}. Clip (4) and gasket (7) marked REPLACE. Torque unit note: N·m {kgf·m, ft·lbf}.
  2. 2
    Install in the reverse order of removal, referring to Installation Note.
  3. 3
    After installation, bleed the clutch system. (Refer to page H-9.)
  4. 4
    Inspect and adjust the clutch pedal height and free play. (Refer to page H-6.)
Parts DiagramFig. fig2
#Part NameNotes
1Battery
2Data link connector
3Clutch pipeRemoval Note: page H-9; Installation Note: page H-9; flare fitting torque 12.8—21.5 N·m {130—220 kgf·cm, 113—190 in·lbf} using SST
4ClipReplace
5NutTightening torque 19—25 N·m {1.9—2.6 kgf·m, 14—18 ft·lbf}
6Clutch master cylinderCheck for fluid leakage from cylinder bore; Overhaul: page H-11; Air bleeding: page H-9
7GasketReplace

Search Manual

Search pages, specs, and procedures