
RADIATOR
E2-7prose procedureOil cooler hoses (item 5) apply to ATX (automatic transaxle) only.
Removal / Installation
- 1Disconnect the negative battery cable.
- 2Drain the engine coolant. (Refer to page E2-5.)
- 3Remove in the order shown in the figure.
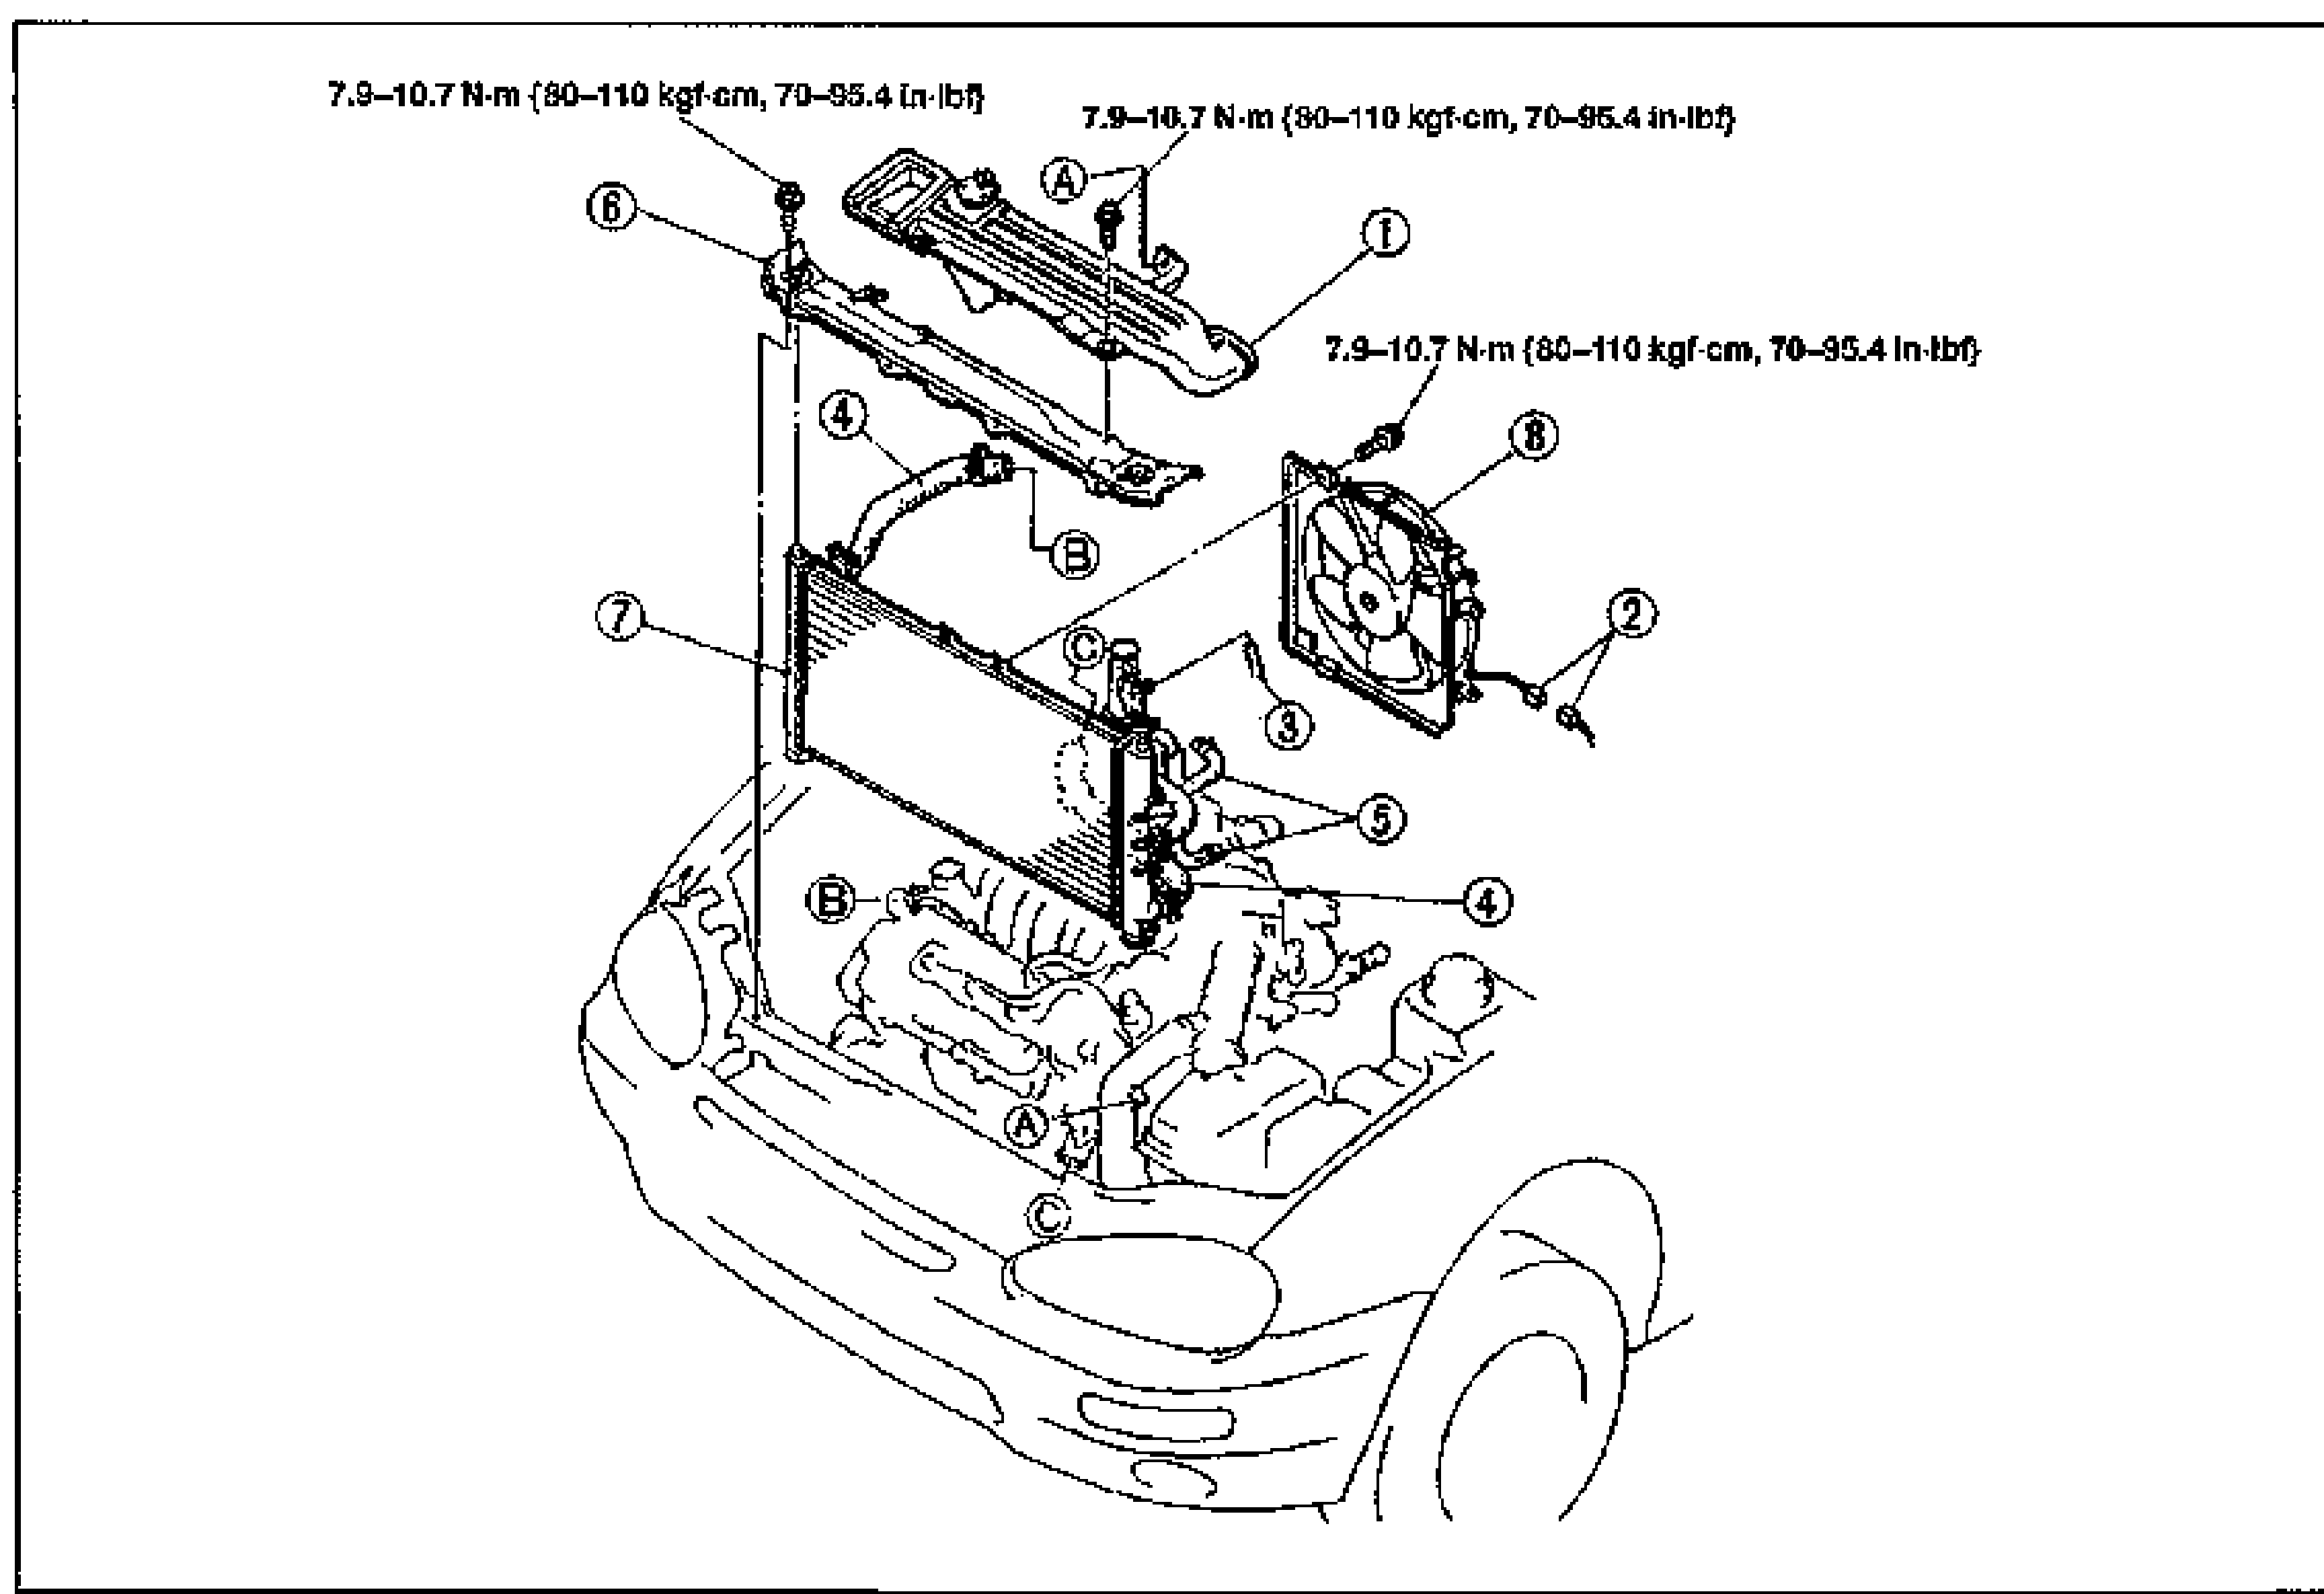
- 4Install in the reverse order of removal.
Parts DiagramFig. fig1
NOTE
Tightening torque (shroud upper panel / coolant fan and radiator cowling bolts): 7.9-10.7 N·m {80-110 kgf·cm, 70-95.4 in-lbf}
INSPECTION
Check for the following and repair or replace if necessary.
Inspection
- 1Cracks, damage, and water leakage.
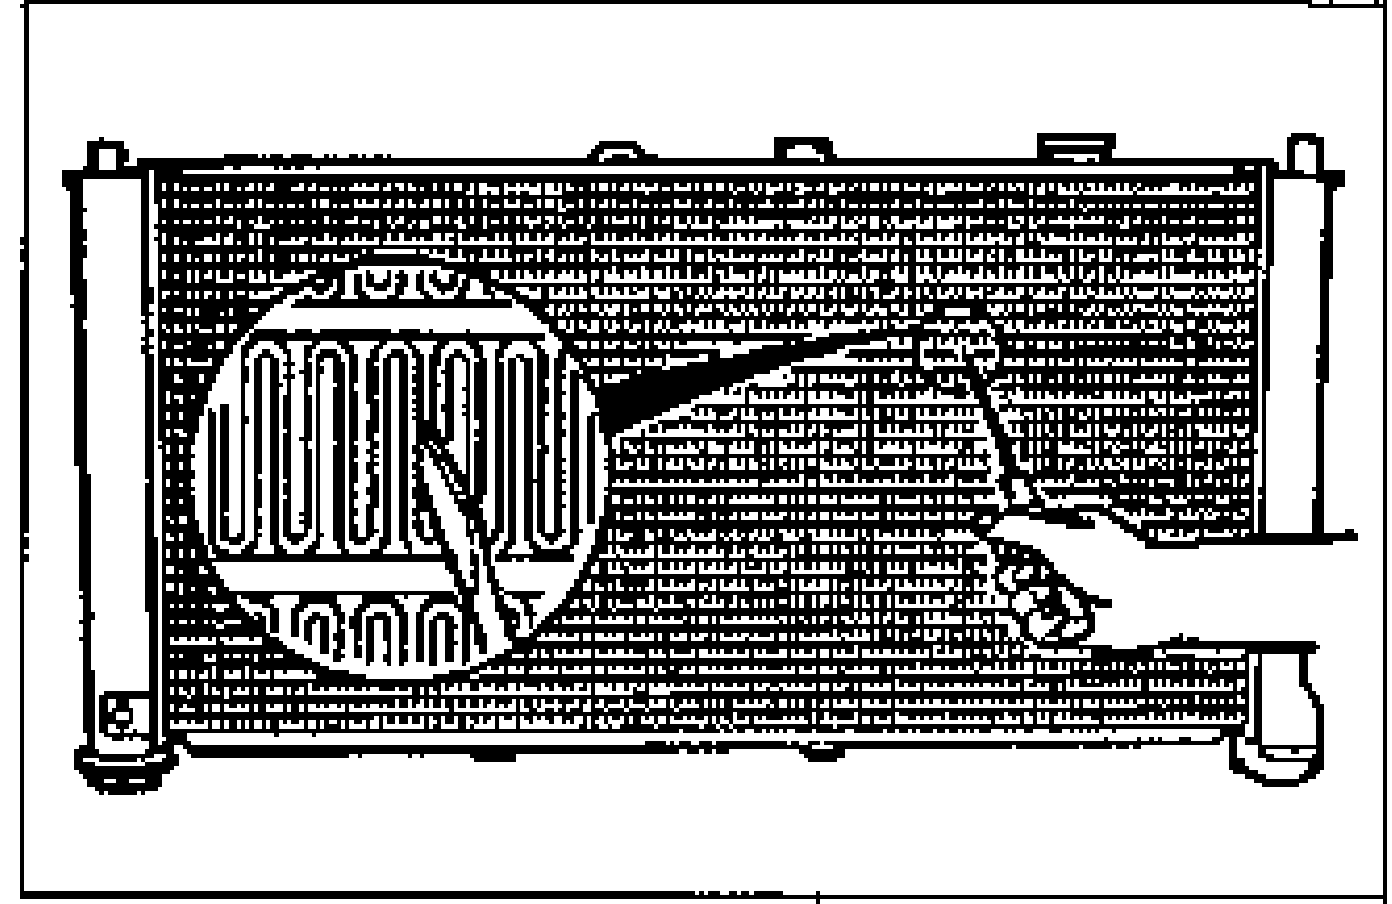
- 2Bent fins (Repair with a screwdriver).
- 3Distorted or bent radiator inlet.
Steps After Installation
- 1Fill the radiator with the specified amount and type of engine coolant. (Refer to page E2-6.)
- 2Connect the negative battery cable.
- 3Start the engine and check for leaks.