Mazda MX-3 silhouetteMX-3

WATER PUMP

E2-10parts diagram

REMOVAL / INSTALLATION

Removal / Installation

  1. 1
    Disconnect the negative battery cable.
  2. 2
    Drain the engine coolant. (Refer to page E2-5.)
  3. 3
    Remove in the order shown in the figure.
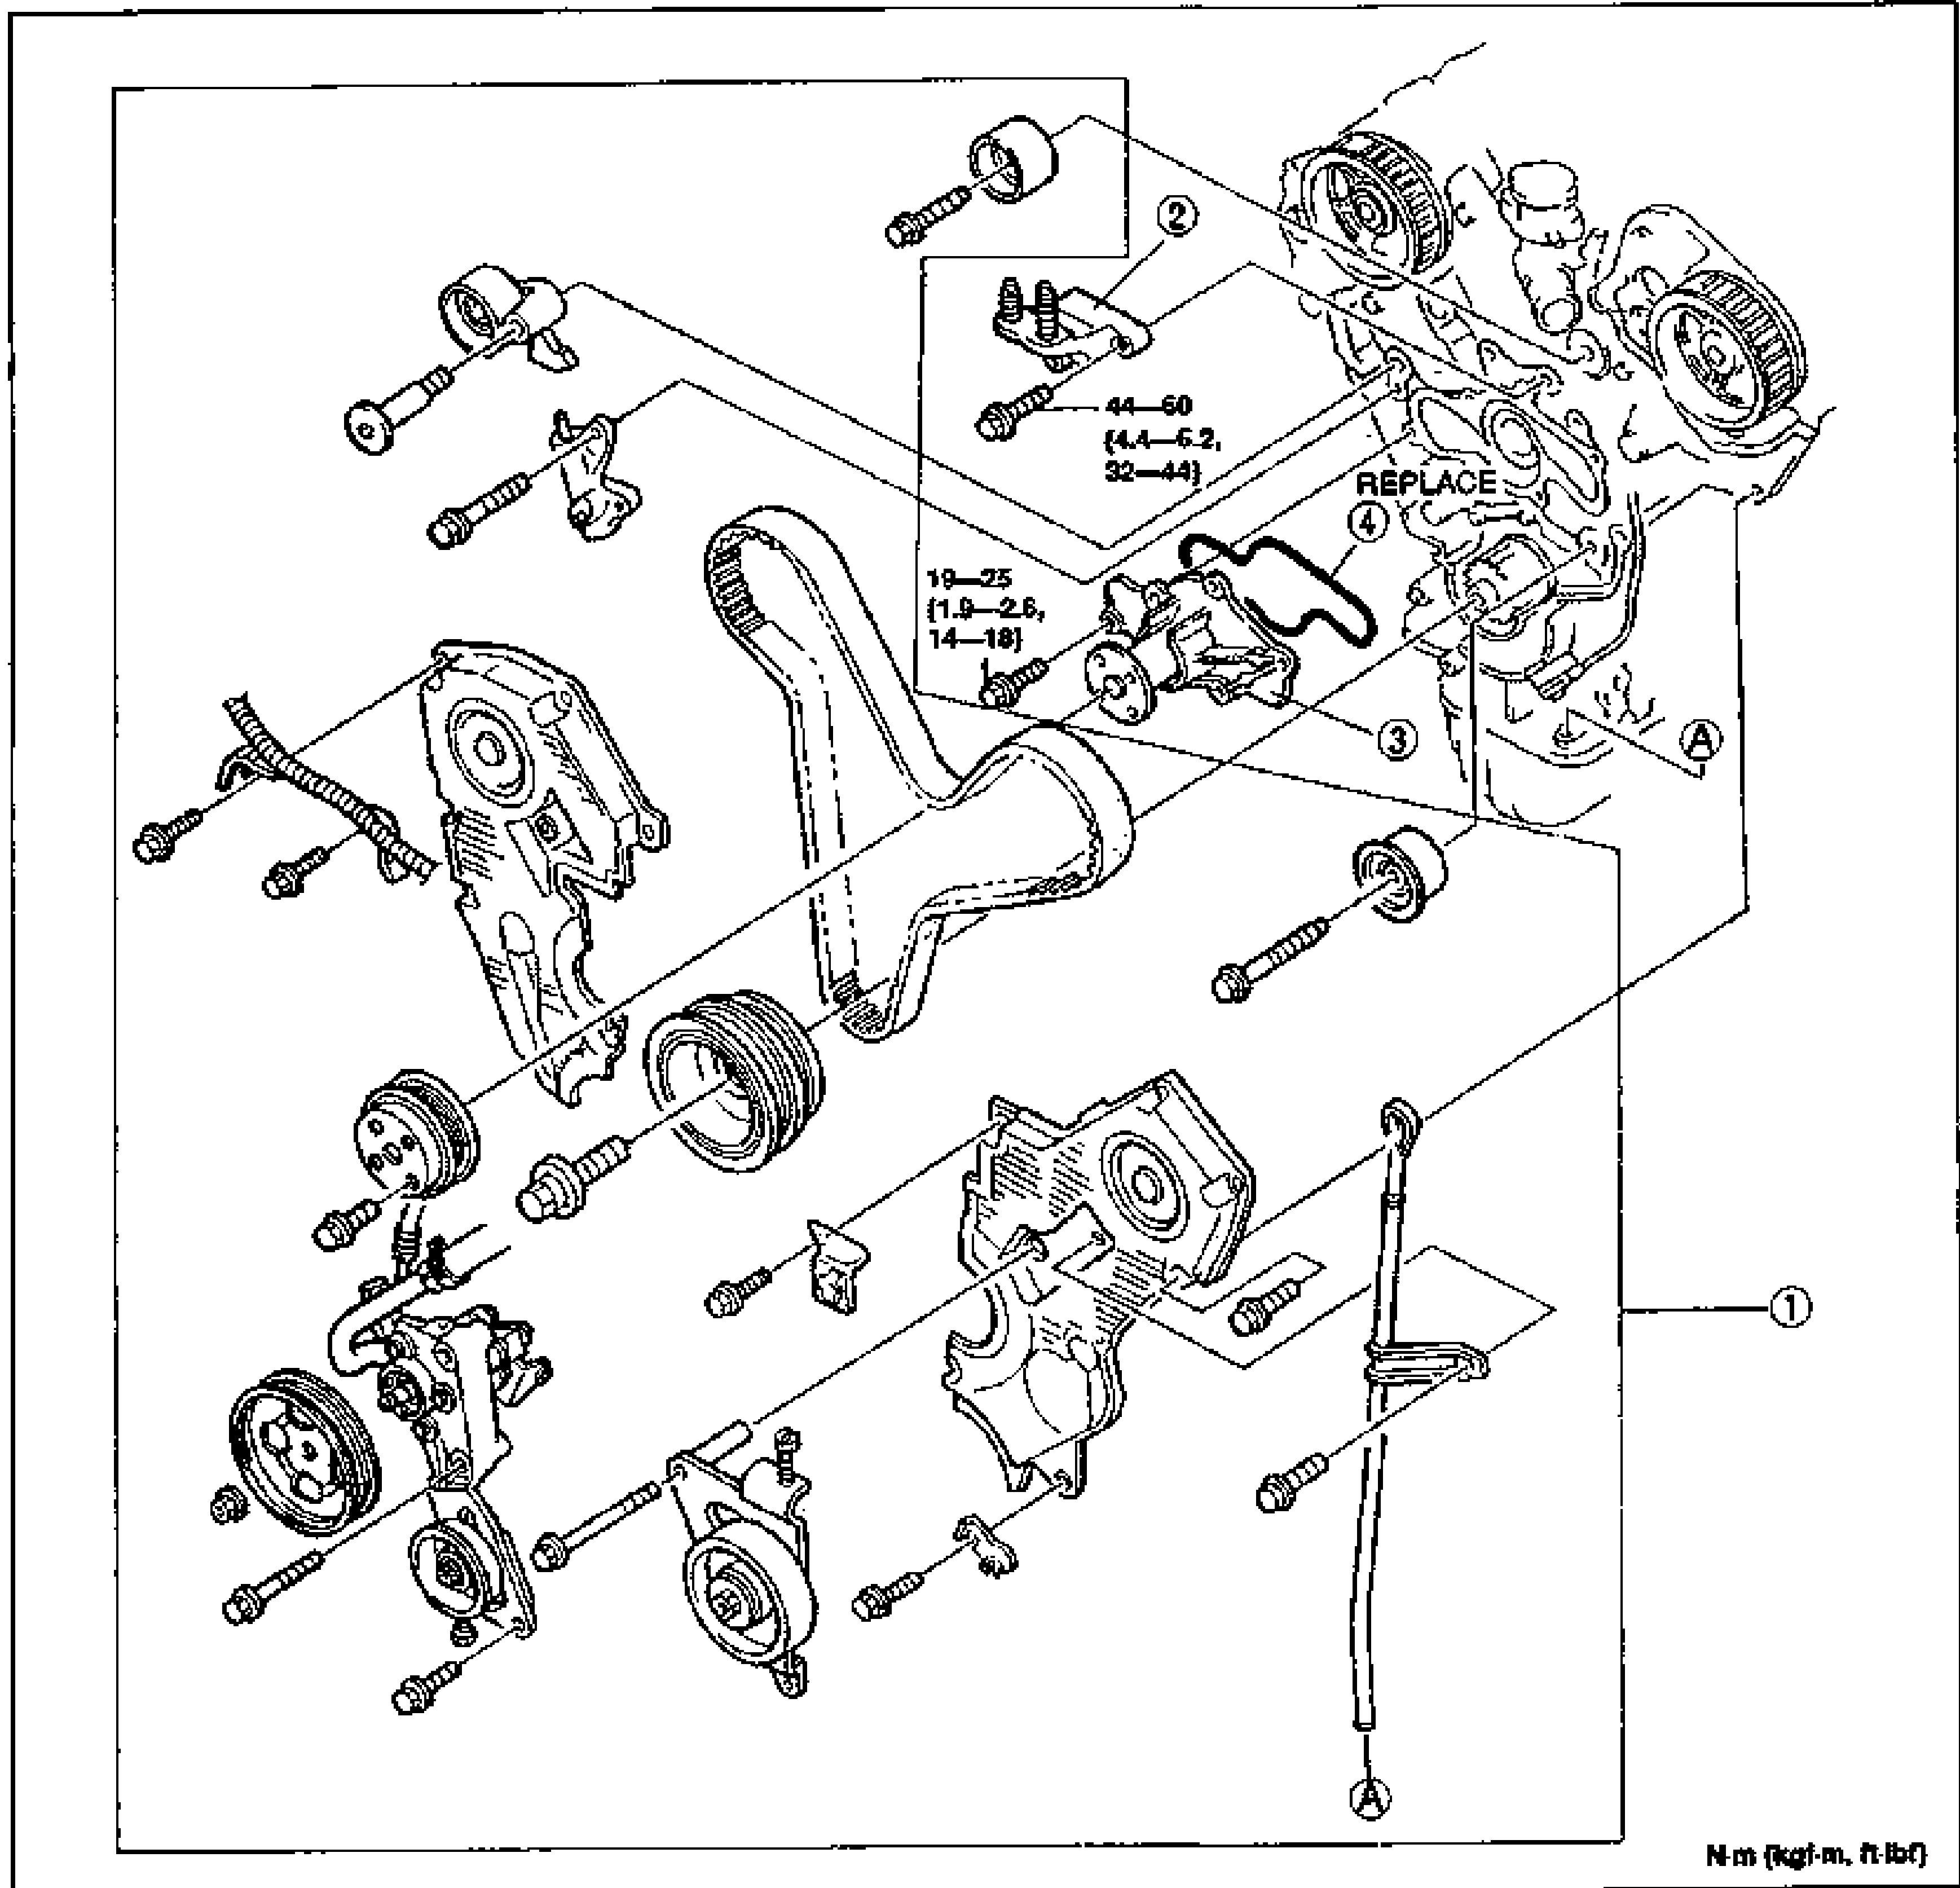
    Large exploded view of the water pump and surrounding timing-belt/cover components at the front of the engine. Numbered balloon callouts 1-4 identify the timing belt, No.3 engine mount bracket, water pump assembly, and water pump rubber seal. A 'REPLACE' label points to the water pump seal/gasket. Bolt torque leader lines read 44-60 N·m {4.4-6.2 kgf·m, 32-44 ft-lbf} and 19-25 N·m {1.9-2.6 kgf·m, 14-18 ft-lbf}. Lettered references A mark mating/orientation points.
  4. 4
    Install in the reverse order of removal.
Parts DiagramFig. fig1
#Part NameNotes
1Timing beltRemoval/Installation ... section B2
2No.3 engine mount bracket
3Water pump assemblyInspect for cracks, damaged mounting surface, bearing condition, and leakage. If the water pump is damaged, replace it. Do not repair it.
4Water pump rubber sealReplace

Search Manual

Search pages, specs, and procedures