
OIL COOLER
D2-7parts diagramPREPARATION
SST
SST
49 G014 001
NameOil filter wrench
UsageFor removal and installation of oil filter
REMOVAL / INSTALLATION
Oil cooler removal / installation
- 1Disconnect the negative battery cable.
- 2Drain the engine coolant. (Refer to section E2.)
- 3Remove in the order shown in the figure.
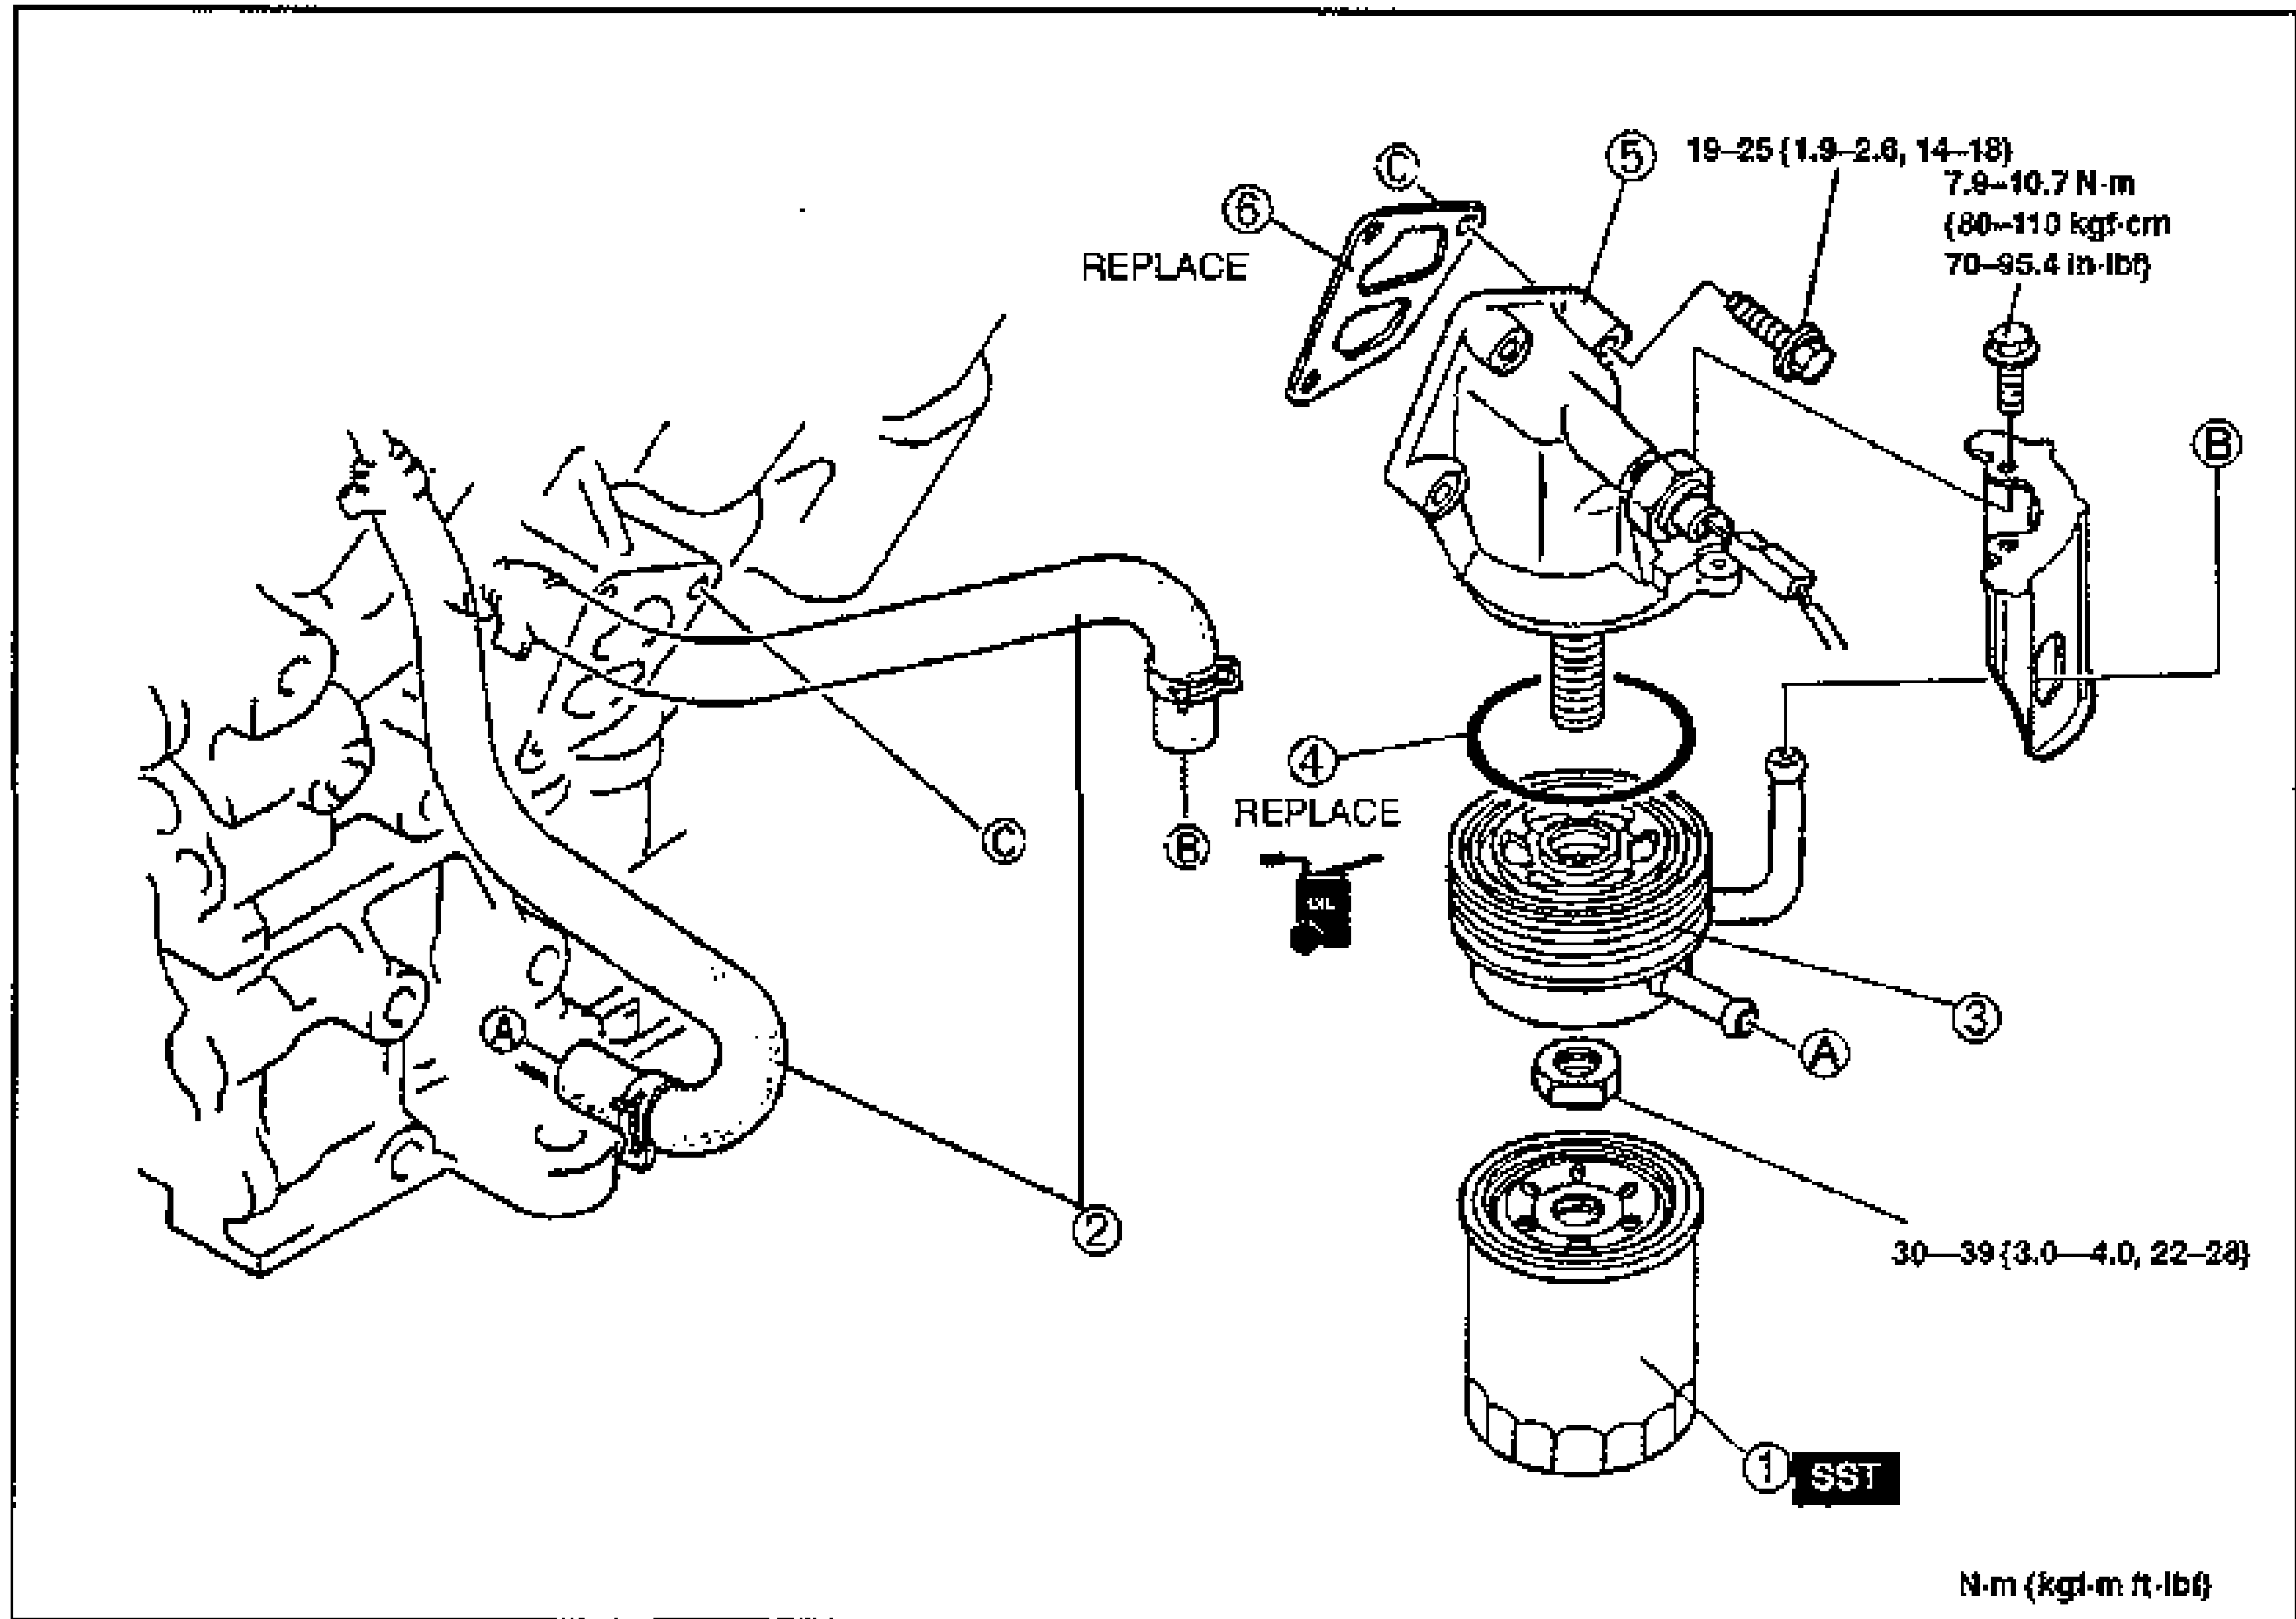
- 4Install in the reverse order of removal.
Parts DiagramFig. fig2
| Specification | Value |
|---|---|
| Bolt/nut | 19–25N·m {1.9–2.6 kgf·m, 14–18 ft·lbf} |
| Bolt | 7.9–10.7N·m {80–110 kgf·cm, 70–95.4 in·lbf} |
| Nut (oil cooler/filter body to block) | 30–39N·m {3.0–4.0 kgf·m, 22–28 ft·lbf} |
Bolt/nut
19–25N·m {1.9–2.6 kgf·m, 14–18 ft·lbf}
Bolt
7.9–10.7N·m {80–110 kgf·cm, 70–95.4 in·lbf}
Nut (oil cooler/filter body to block)
30–39N·m {3.0–4.0 kgf·m, 22–28 ft·lbf}
Steps After Installation
- 1Fill with the specified amount and type of engine coolant. (Refer to section E2.)
- 2Start the engine and check for leaks.